RhinoArtisan Modeling
Lesson 5 of 13
Building the Shank
Sign in to access this lesson
This lesson is part of From RhinoArtisan to Keyshot: Jewelry Rendering Intermediate, which can come bundled with a RhinoArtisan Commercial license subject to current promotions. Log in with your customer account, or get in touch and we'll set you up.
Customers only
Solo para clientes
This lesson is part of From RhinoArtisan to Keyshot: Jewelry Rendering Intermediate, which can be included with a RhinoArtisan Commercial license subject to current promotions. If you've already purchased and don't see it in your account, get in touch.
Downloads
Objective: Learn how to construct a classic ring shank using the Classi Ring command and adjust its parameters for customization.
Building the Shank
To start, we will build a classic ring. Go to the Shanks (1) tab and use the Classic (2) command.

Click on edit
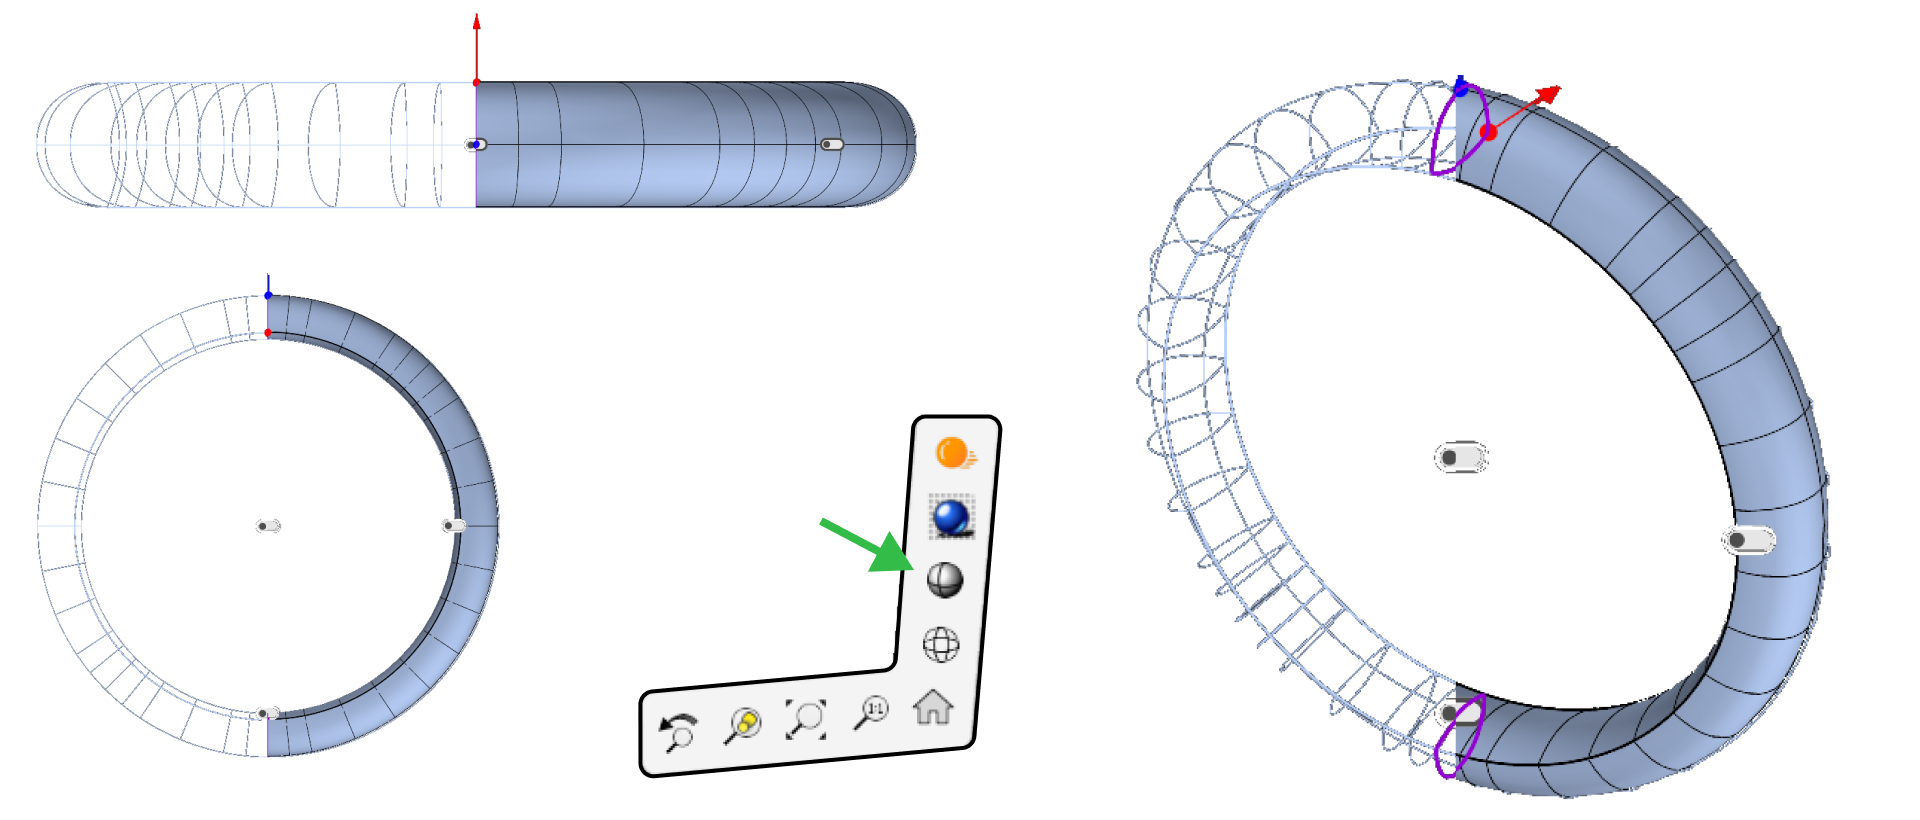
For better visualization of the model, go to the lower right corner, press Shift, and click on the Shaded icon. The display mode will automatically switch to shaded in all four viewports.
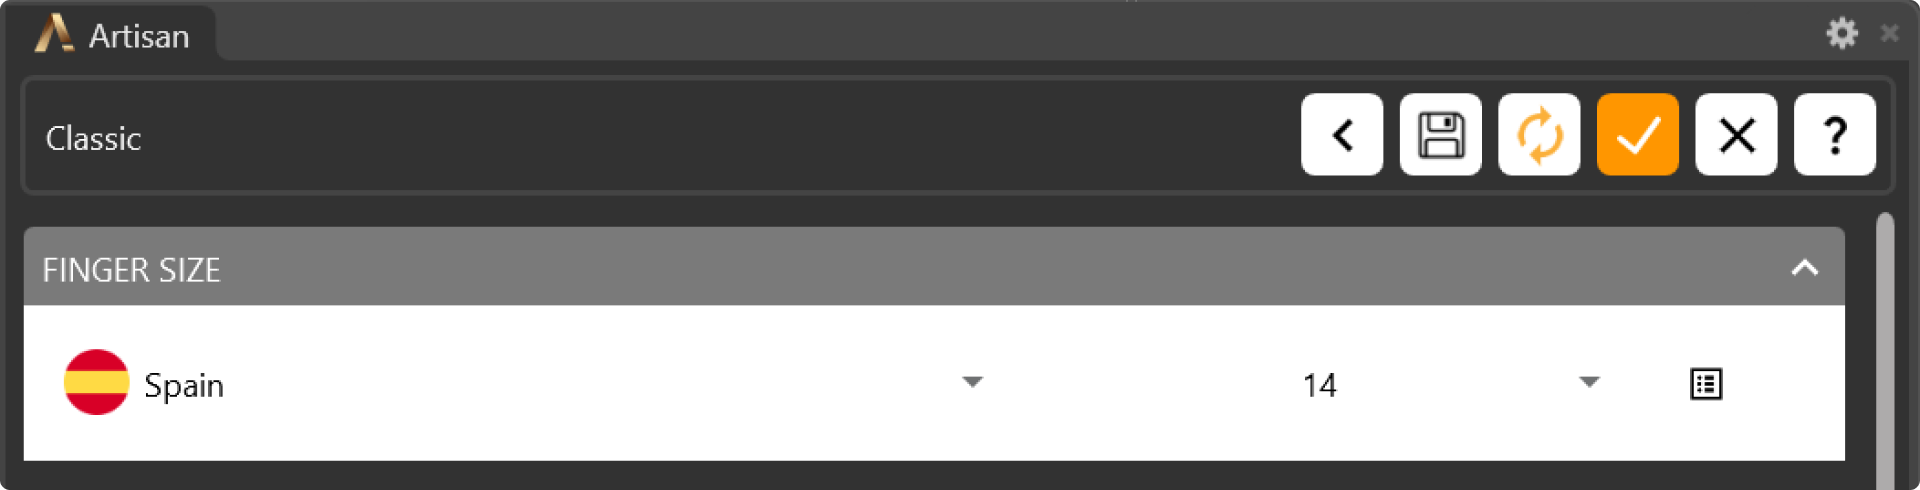
Setting the Size
The first step is to change the ring size to match the Spain region and select size 14.
Editing the Top Profile
Click on Edit Asset to modify the top profile.
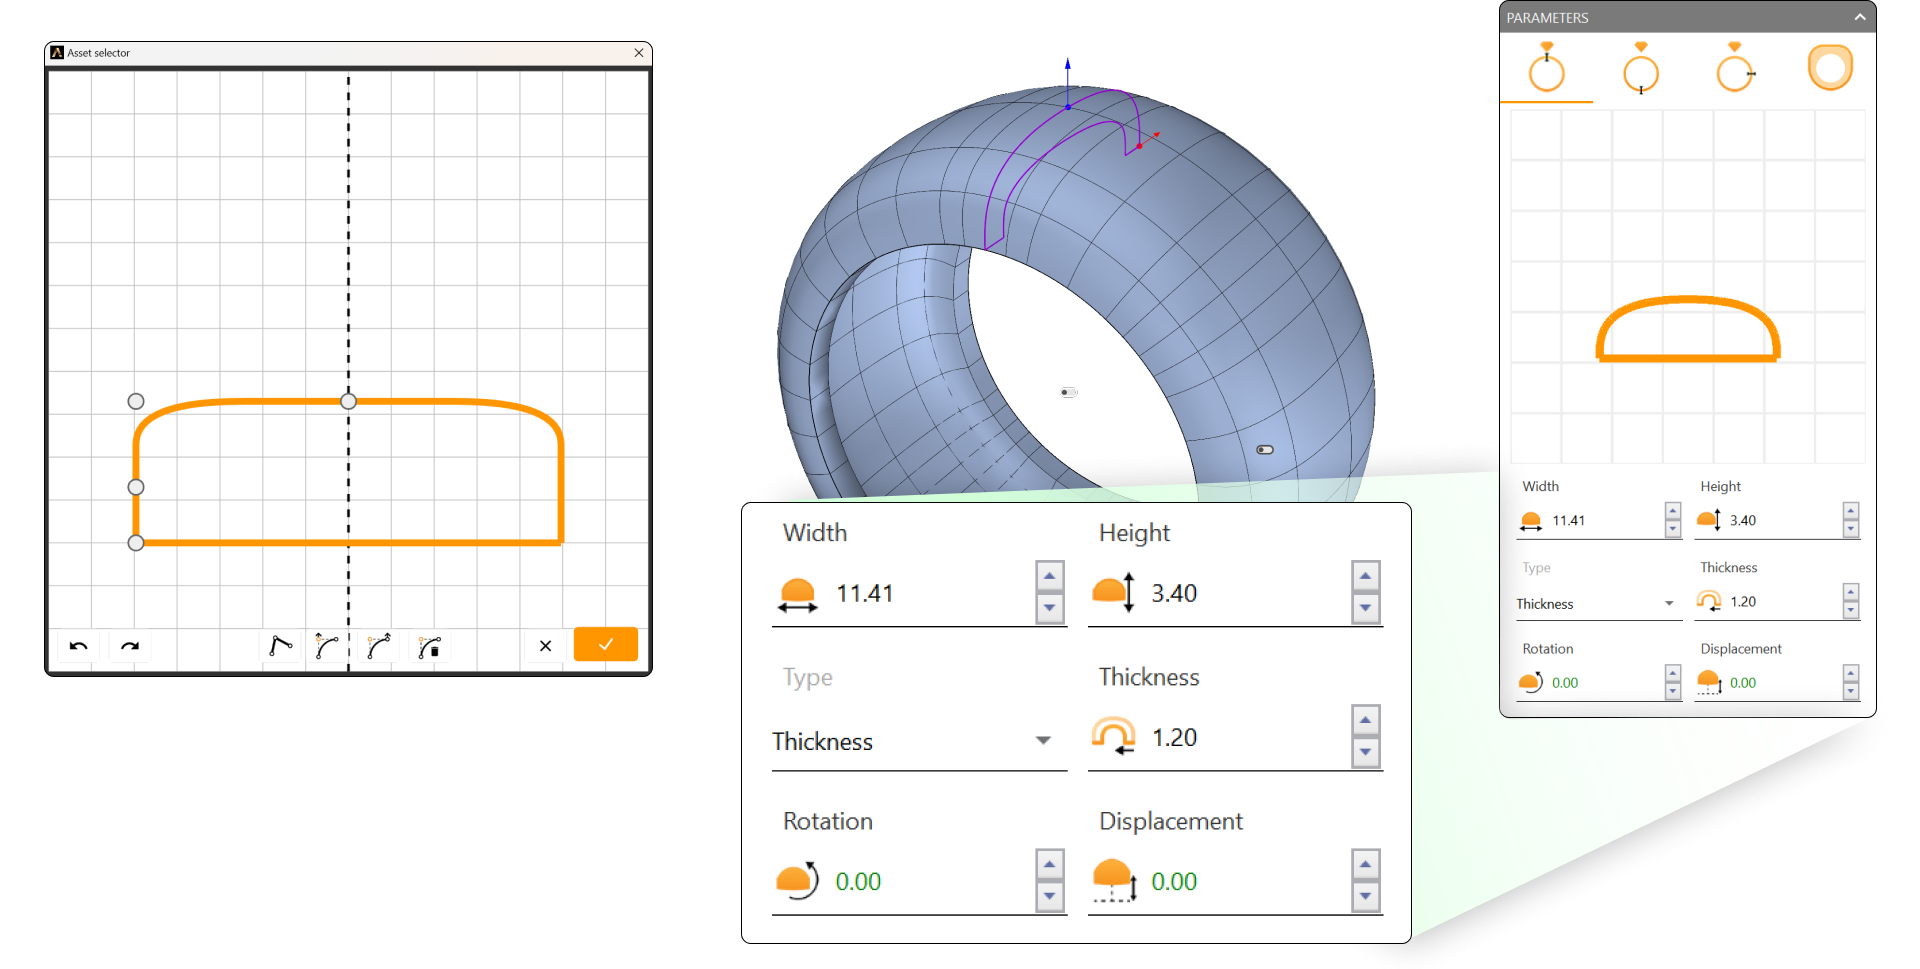
Adjust the following parameters:
- Width: 11.41 mm
- Height: 3.40 mm
- Change the Type to Thickness.
- Thickness: 1.20 mm
Editing the Bottom Profile
Now switch to the Parameters tab to adjust the bottom profile.
- Activate the bottom profile.
- Change the Height to 1.70 mm.
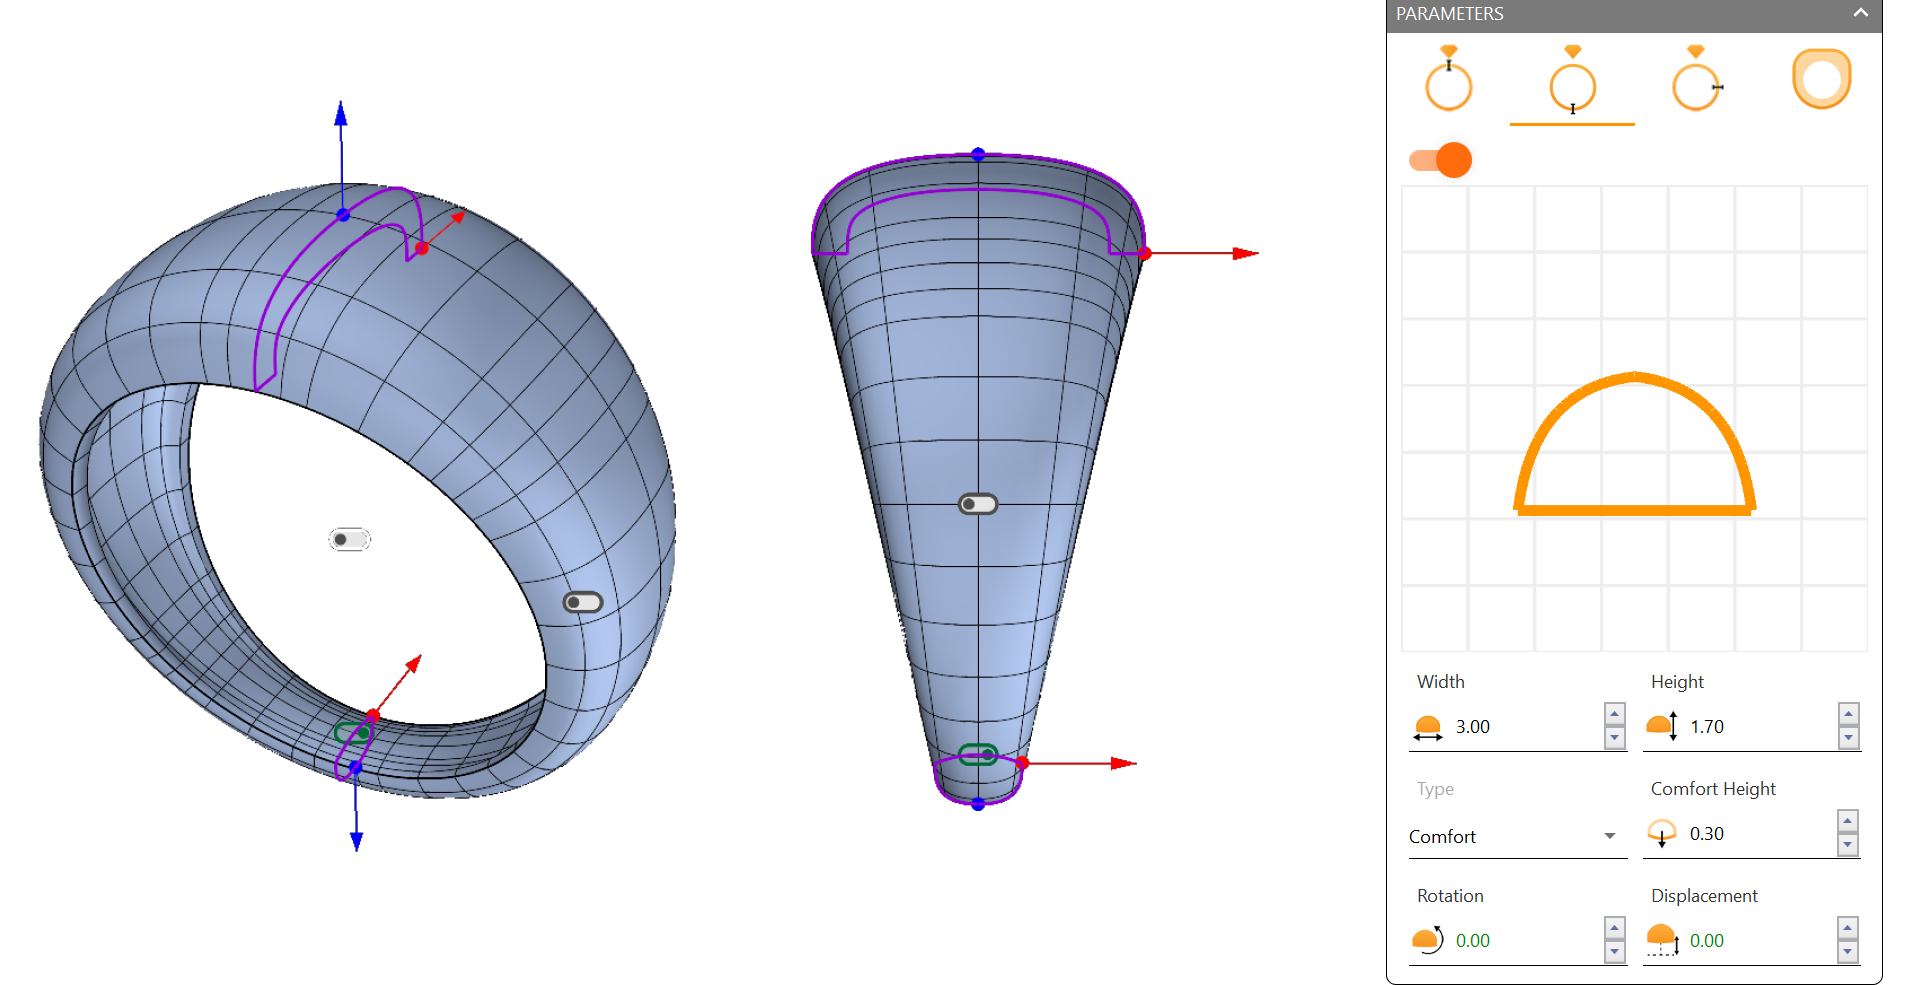
Once done, click Accept, and the base for your ring is ready.
Next Lesson: Adding Details and Refining the Ring