KeyShot Studio Interface
Lesson 5 of 17
Main Menu
Sign in to access this lesson
This lesson is part of From RhinoArtisan to Keyshot: Jewelry Rendering Essentials, which can come bundled with a RhinoArtisan Commercial license subject to current promotions. Log in with your customer account, or get in touch and we'll set you up.
Customers only
Solo para clientes
This lesson is part of From RhinoArtisan to Keyshot: Jewelry Rendering Essentials, which can be included with a RhinoArtisan Commercial license subject to current promotions. If you've already purchased and don't see it in your account, get in touch.
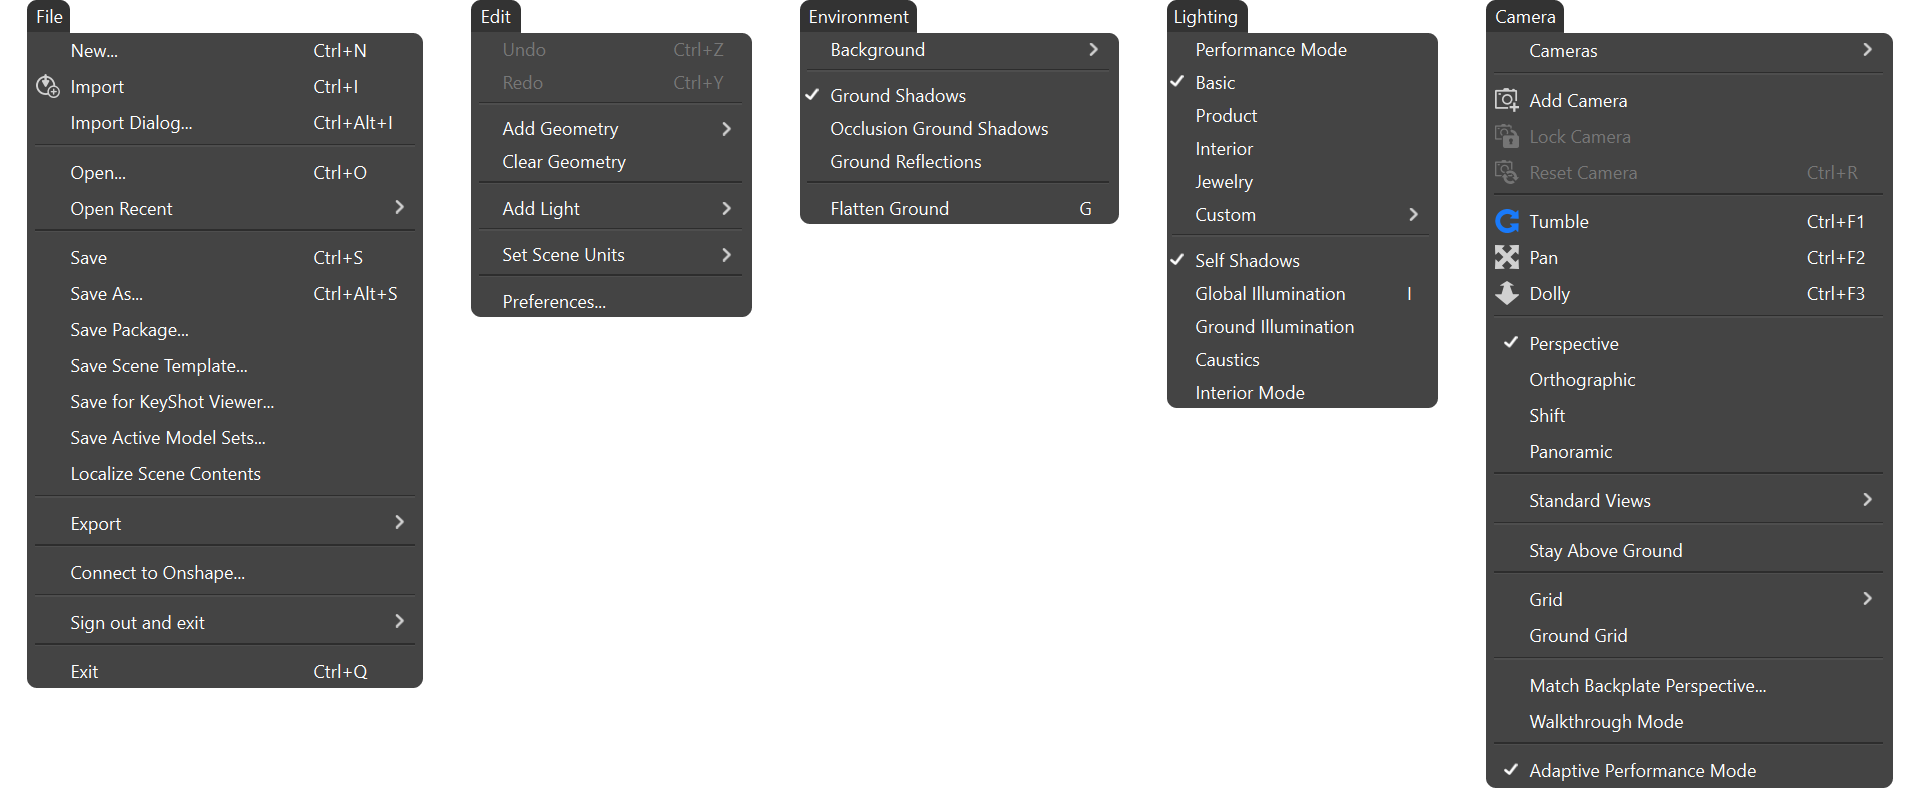
The Main Menu in KeyShot Studio is located at the top of the interface and includes several categories that streamline the workflow for jewelry rendering. Below is a brief description of the key menu sections:

- File: Options to create, open, import, and save projects, as well as export 3D models in compatible formats.
- Edit: Tools for undo/redo, geometry editing, scene unit definitions, and program preferences.
- Environment: Configure scene backgrounds, ground reflections, and shadows to create realistic jewelry presentations.
- Lighting: Adjust lighting modes, self-shadows, global illumination, and caustics to highlight jewelry details.
- Camera: Manage scene cameras by adding, locking, or selecting standard views and using grids for alignment.
- Image: Set resolution presets, adjust aspect ratios, and reduce noise for high-quality render outputs.
- Render: Pause real-time rendering, select render modes (CPU or GPU), apply motion blur, and manage rendering queues.
- View: Customize the interface by toggling panels, screen modes, and overlays.
- Tools: Access tools like moving objects, editing normals, closing meshes, and splitting object surfaces for precise adjustments.
- Window: Arrange and manage visibility of panels and windows for efficient workspace organization.
- Help: Access documentation, support, and software information.
