Ring Resizer
Lesson 12 of 18
Identifiers, Sprues & Verification
Sign in to access this lesson
This lesson is part of Jewelry Production & Manufacturing Essentials, which can come bundled with a RhinoArtisan Commercial license subject to current promotions. Log in with your customer account, or get in touch and we'll set you up.
Customers only
Solo para clientes
This lesson is part of Jewelry Production & Manufacturing Essentials, which can be included with a RhinoArtisan Commercial license subject to current promotions. If you've already purchased and don't see it in your account, get in touch.
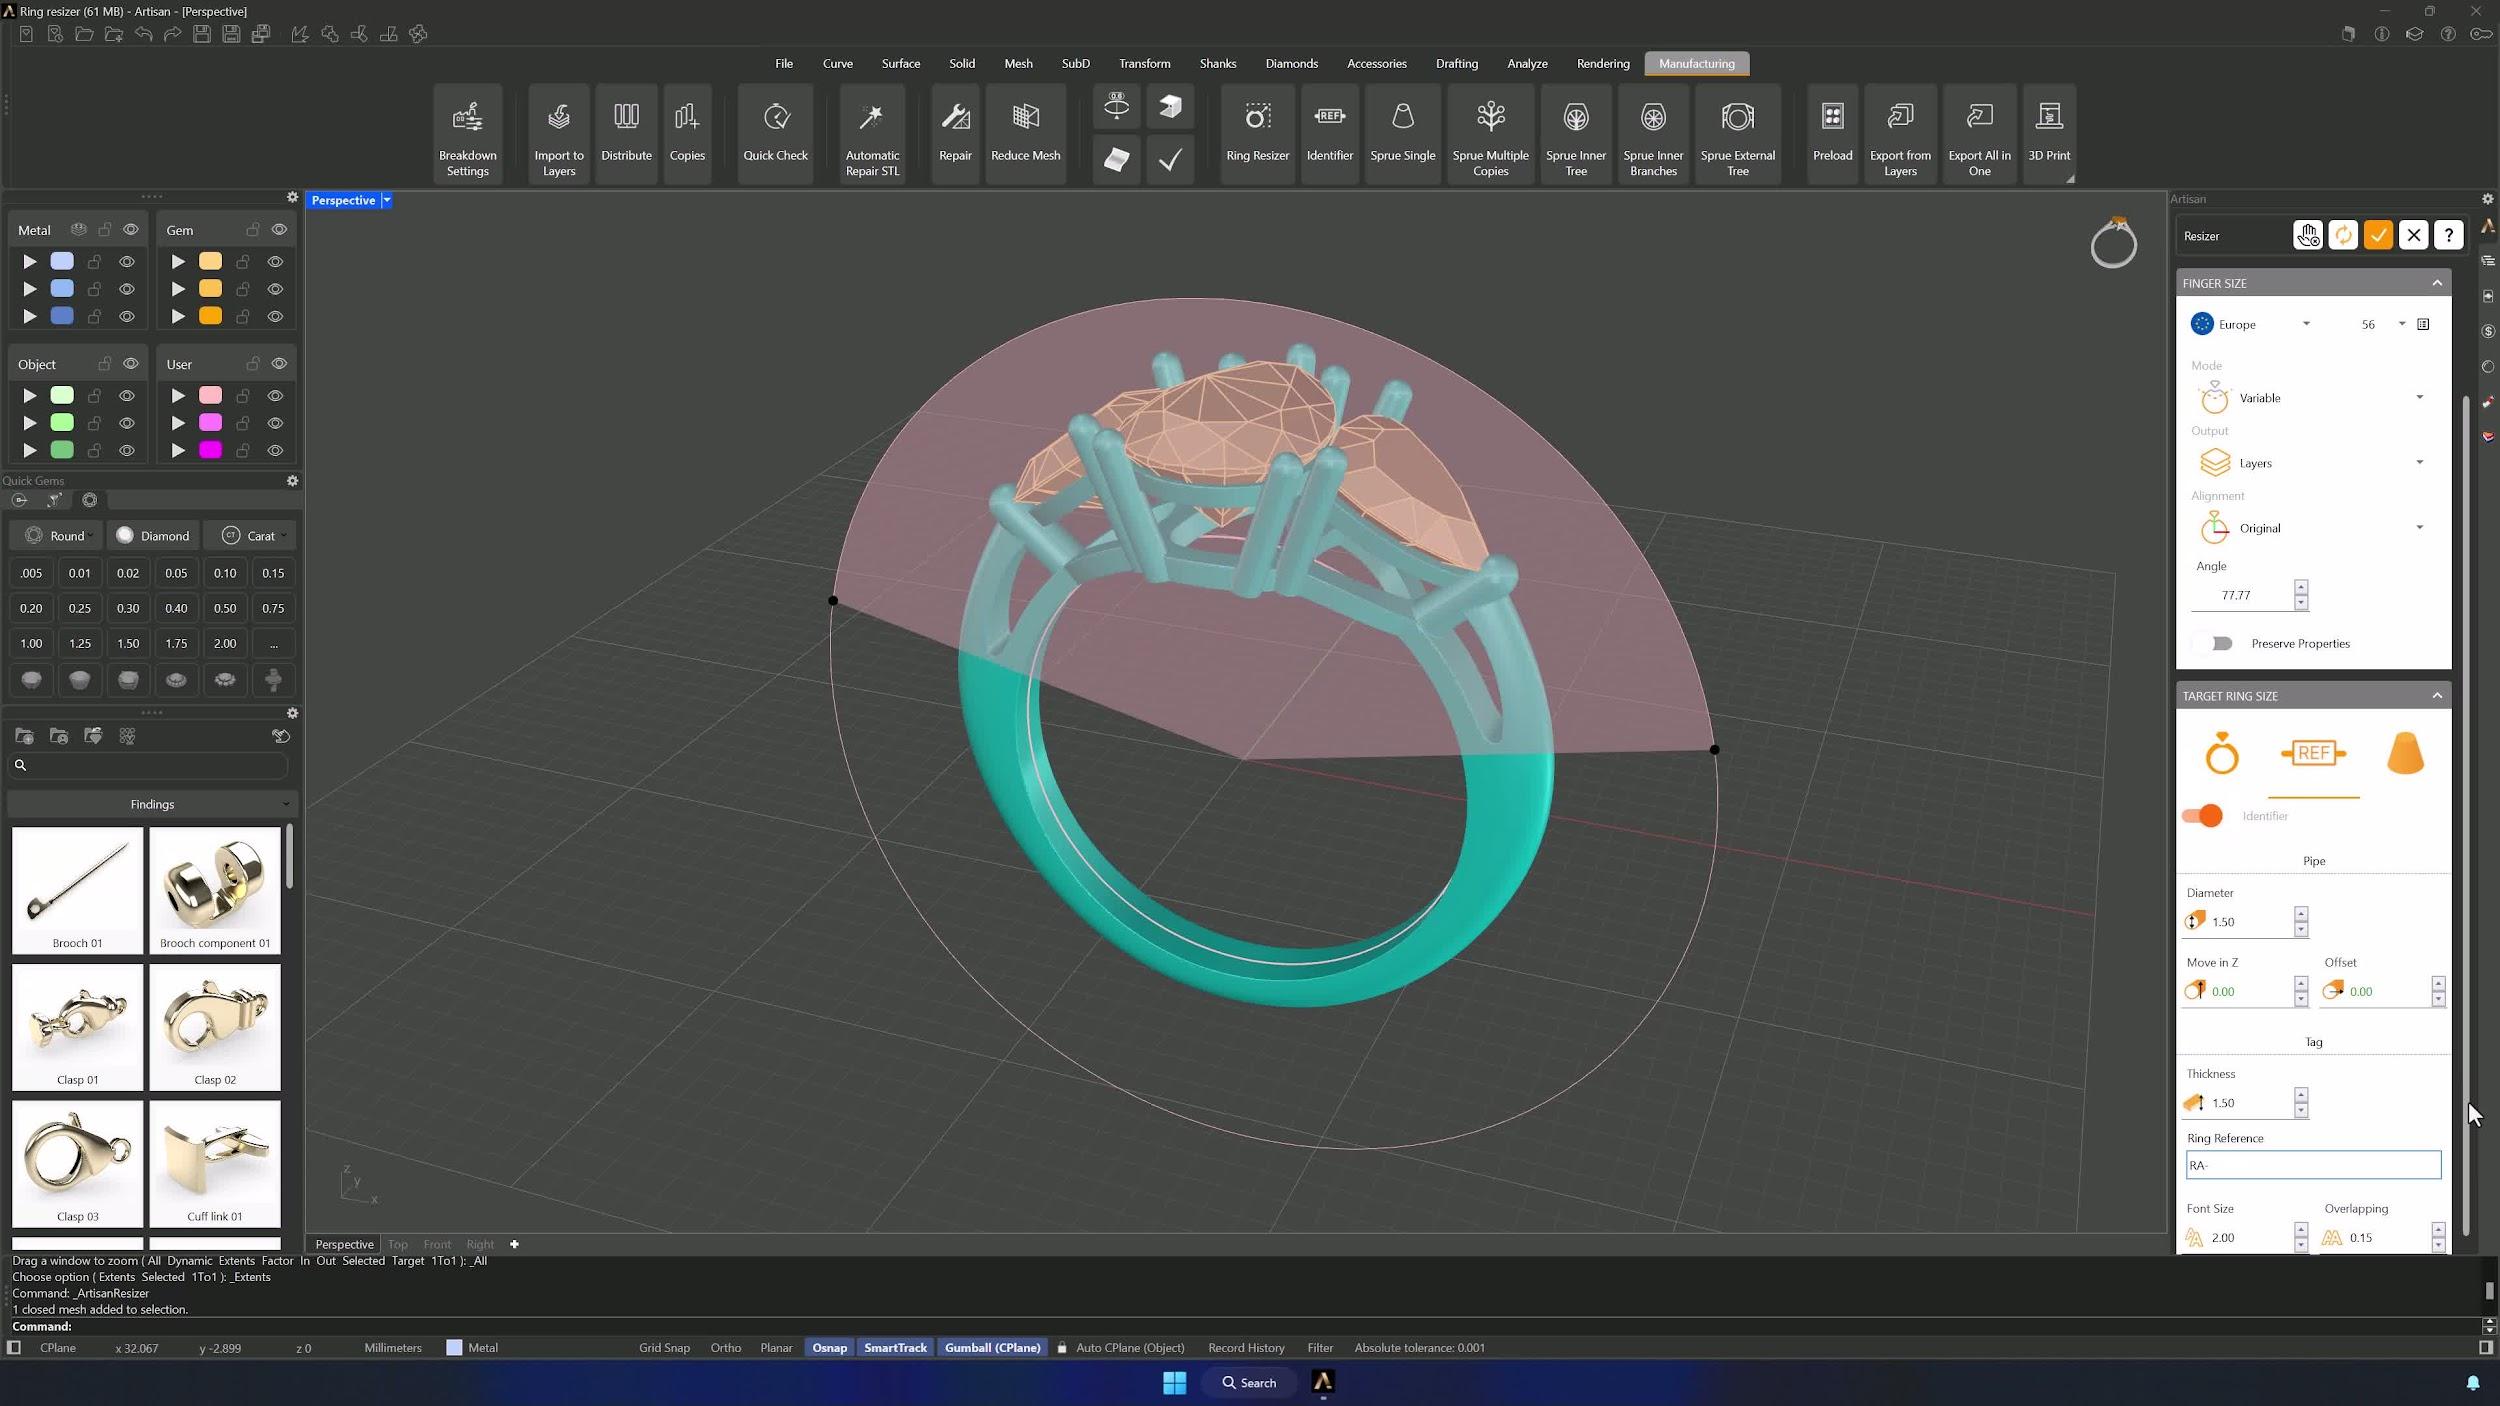
5. Enable the identifier and set the reference prefix
In the Identifier tab, activate the identifier and set the prefix — RA- in the example. Every generated copy comes out labeled and trackable.
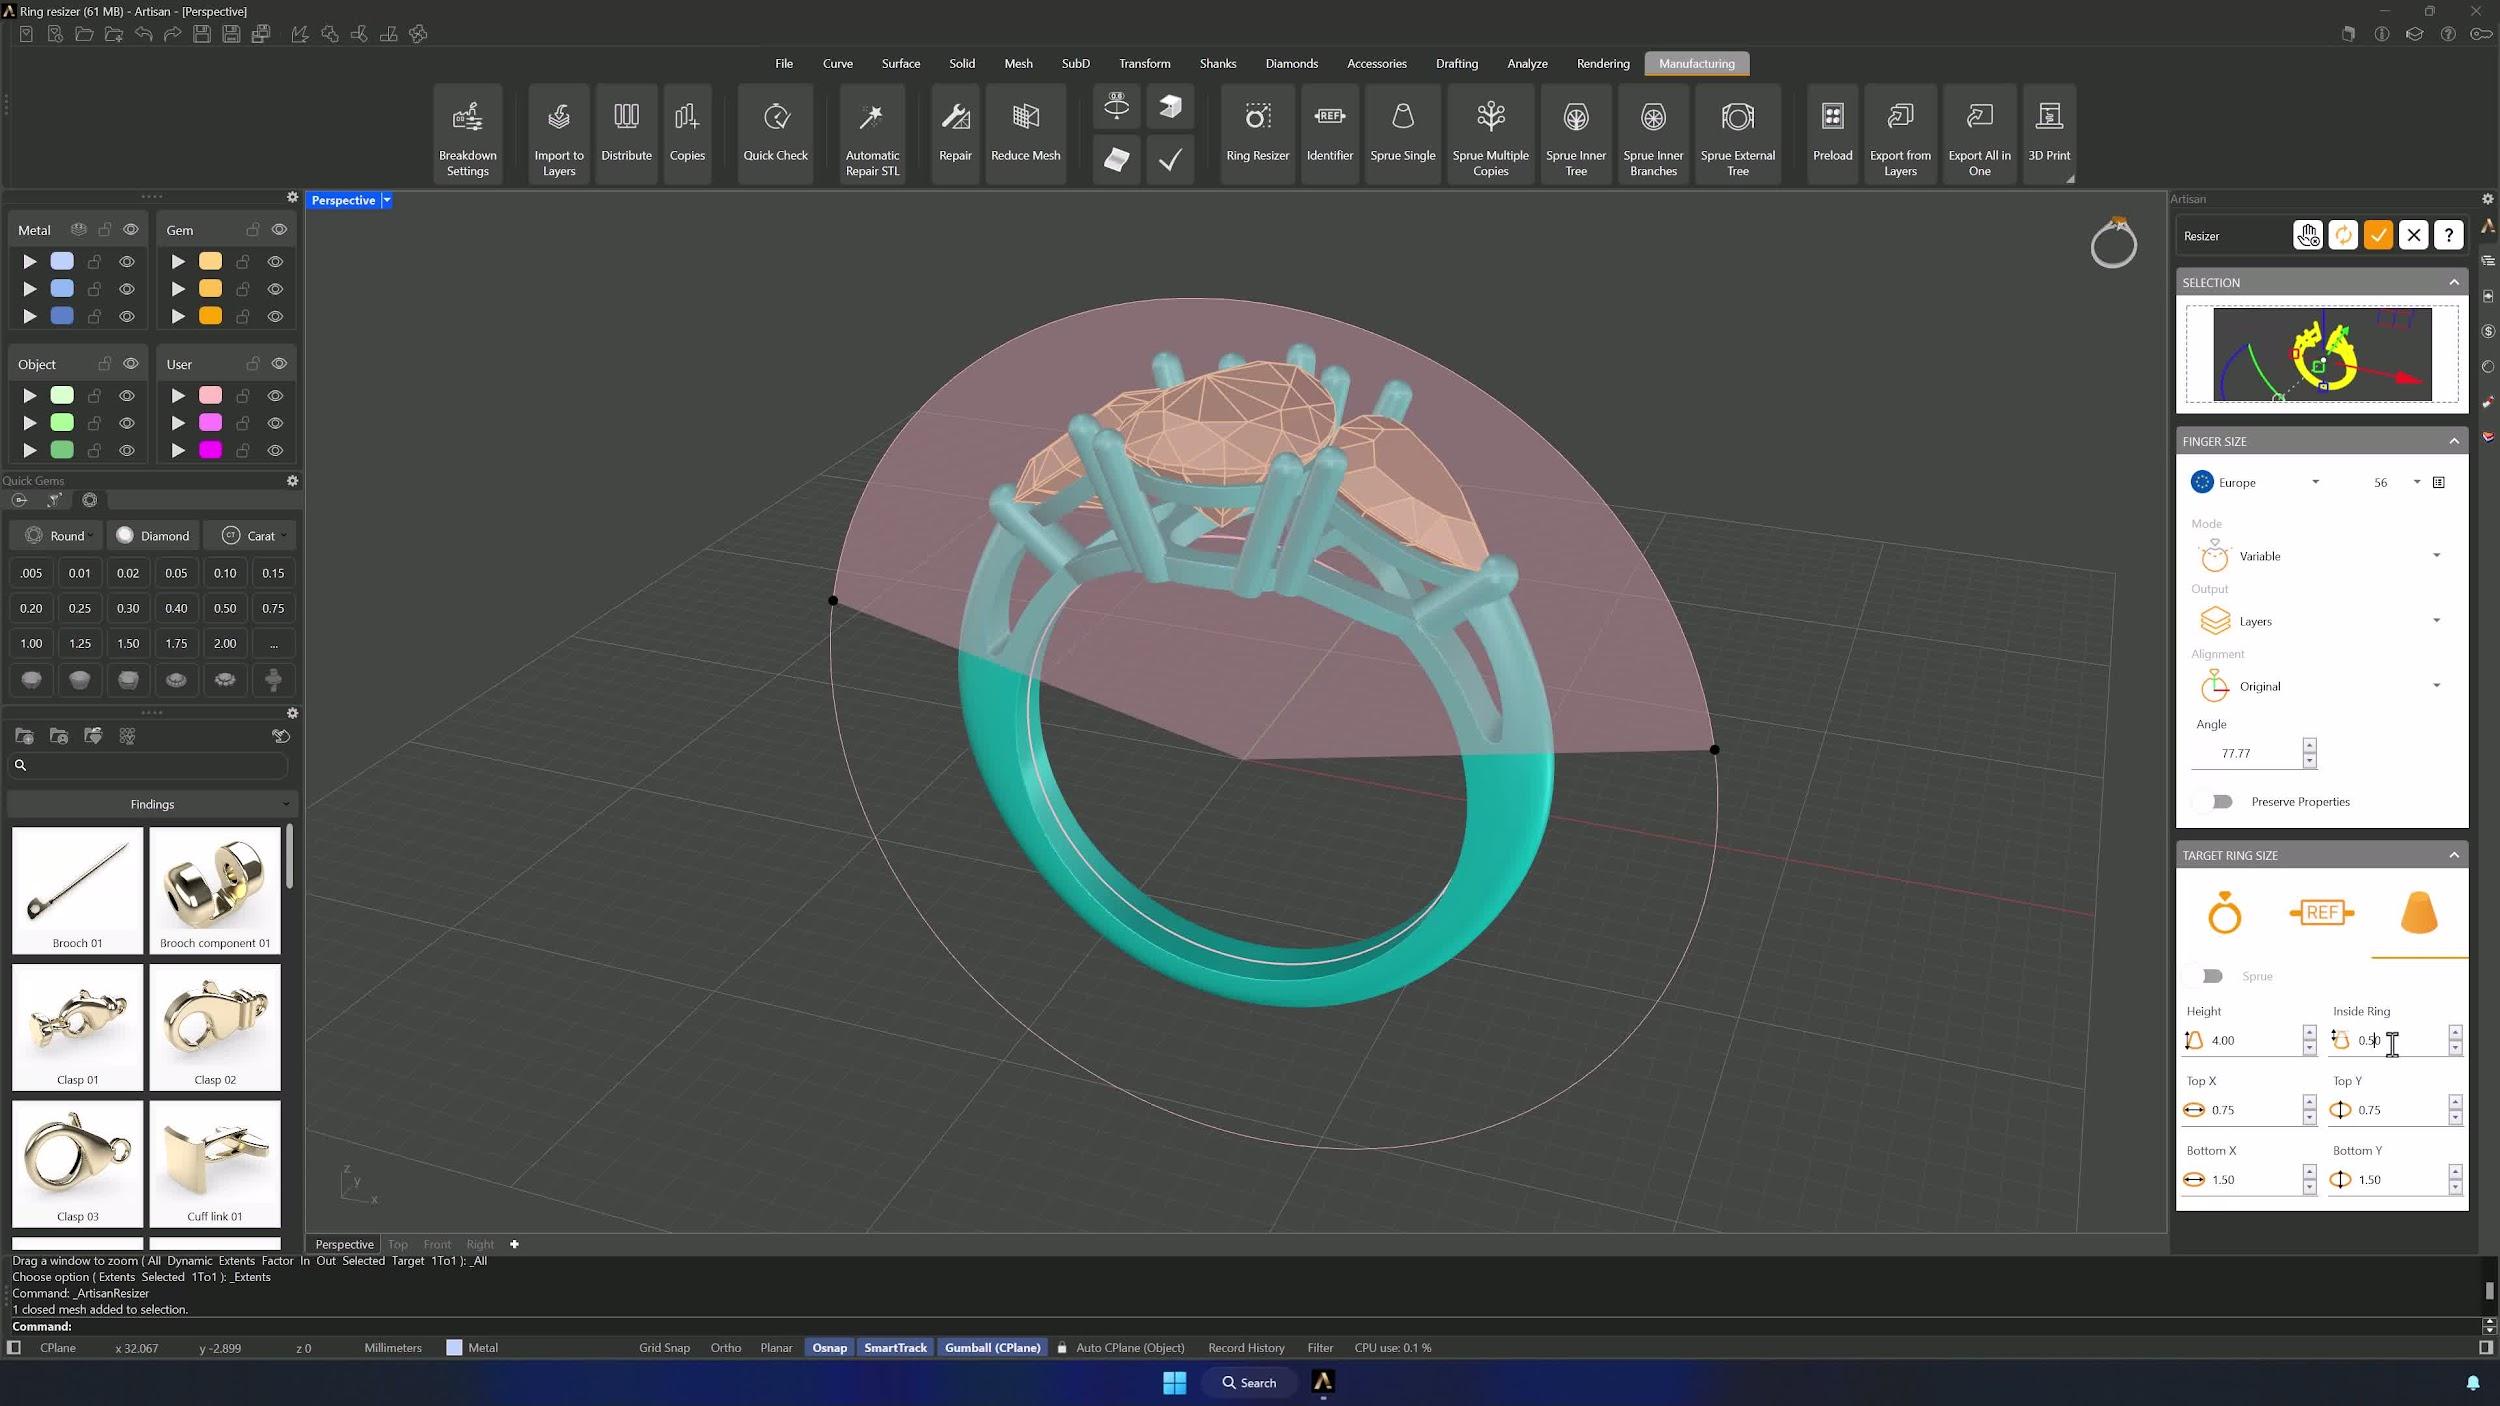
6. Configure sprue parameters
Set the sprue: height 4 mm, inside ring 0.5 mm, Top X 1.5 mm and Top Y 1.5 mm, and activate it. Each resized ring will come ready for casting.
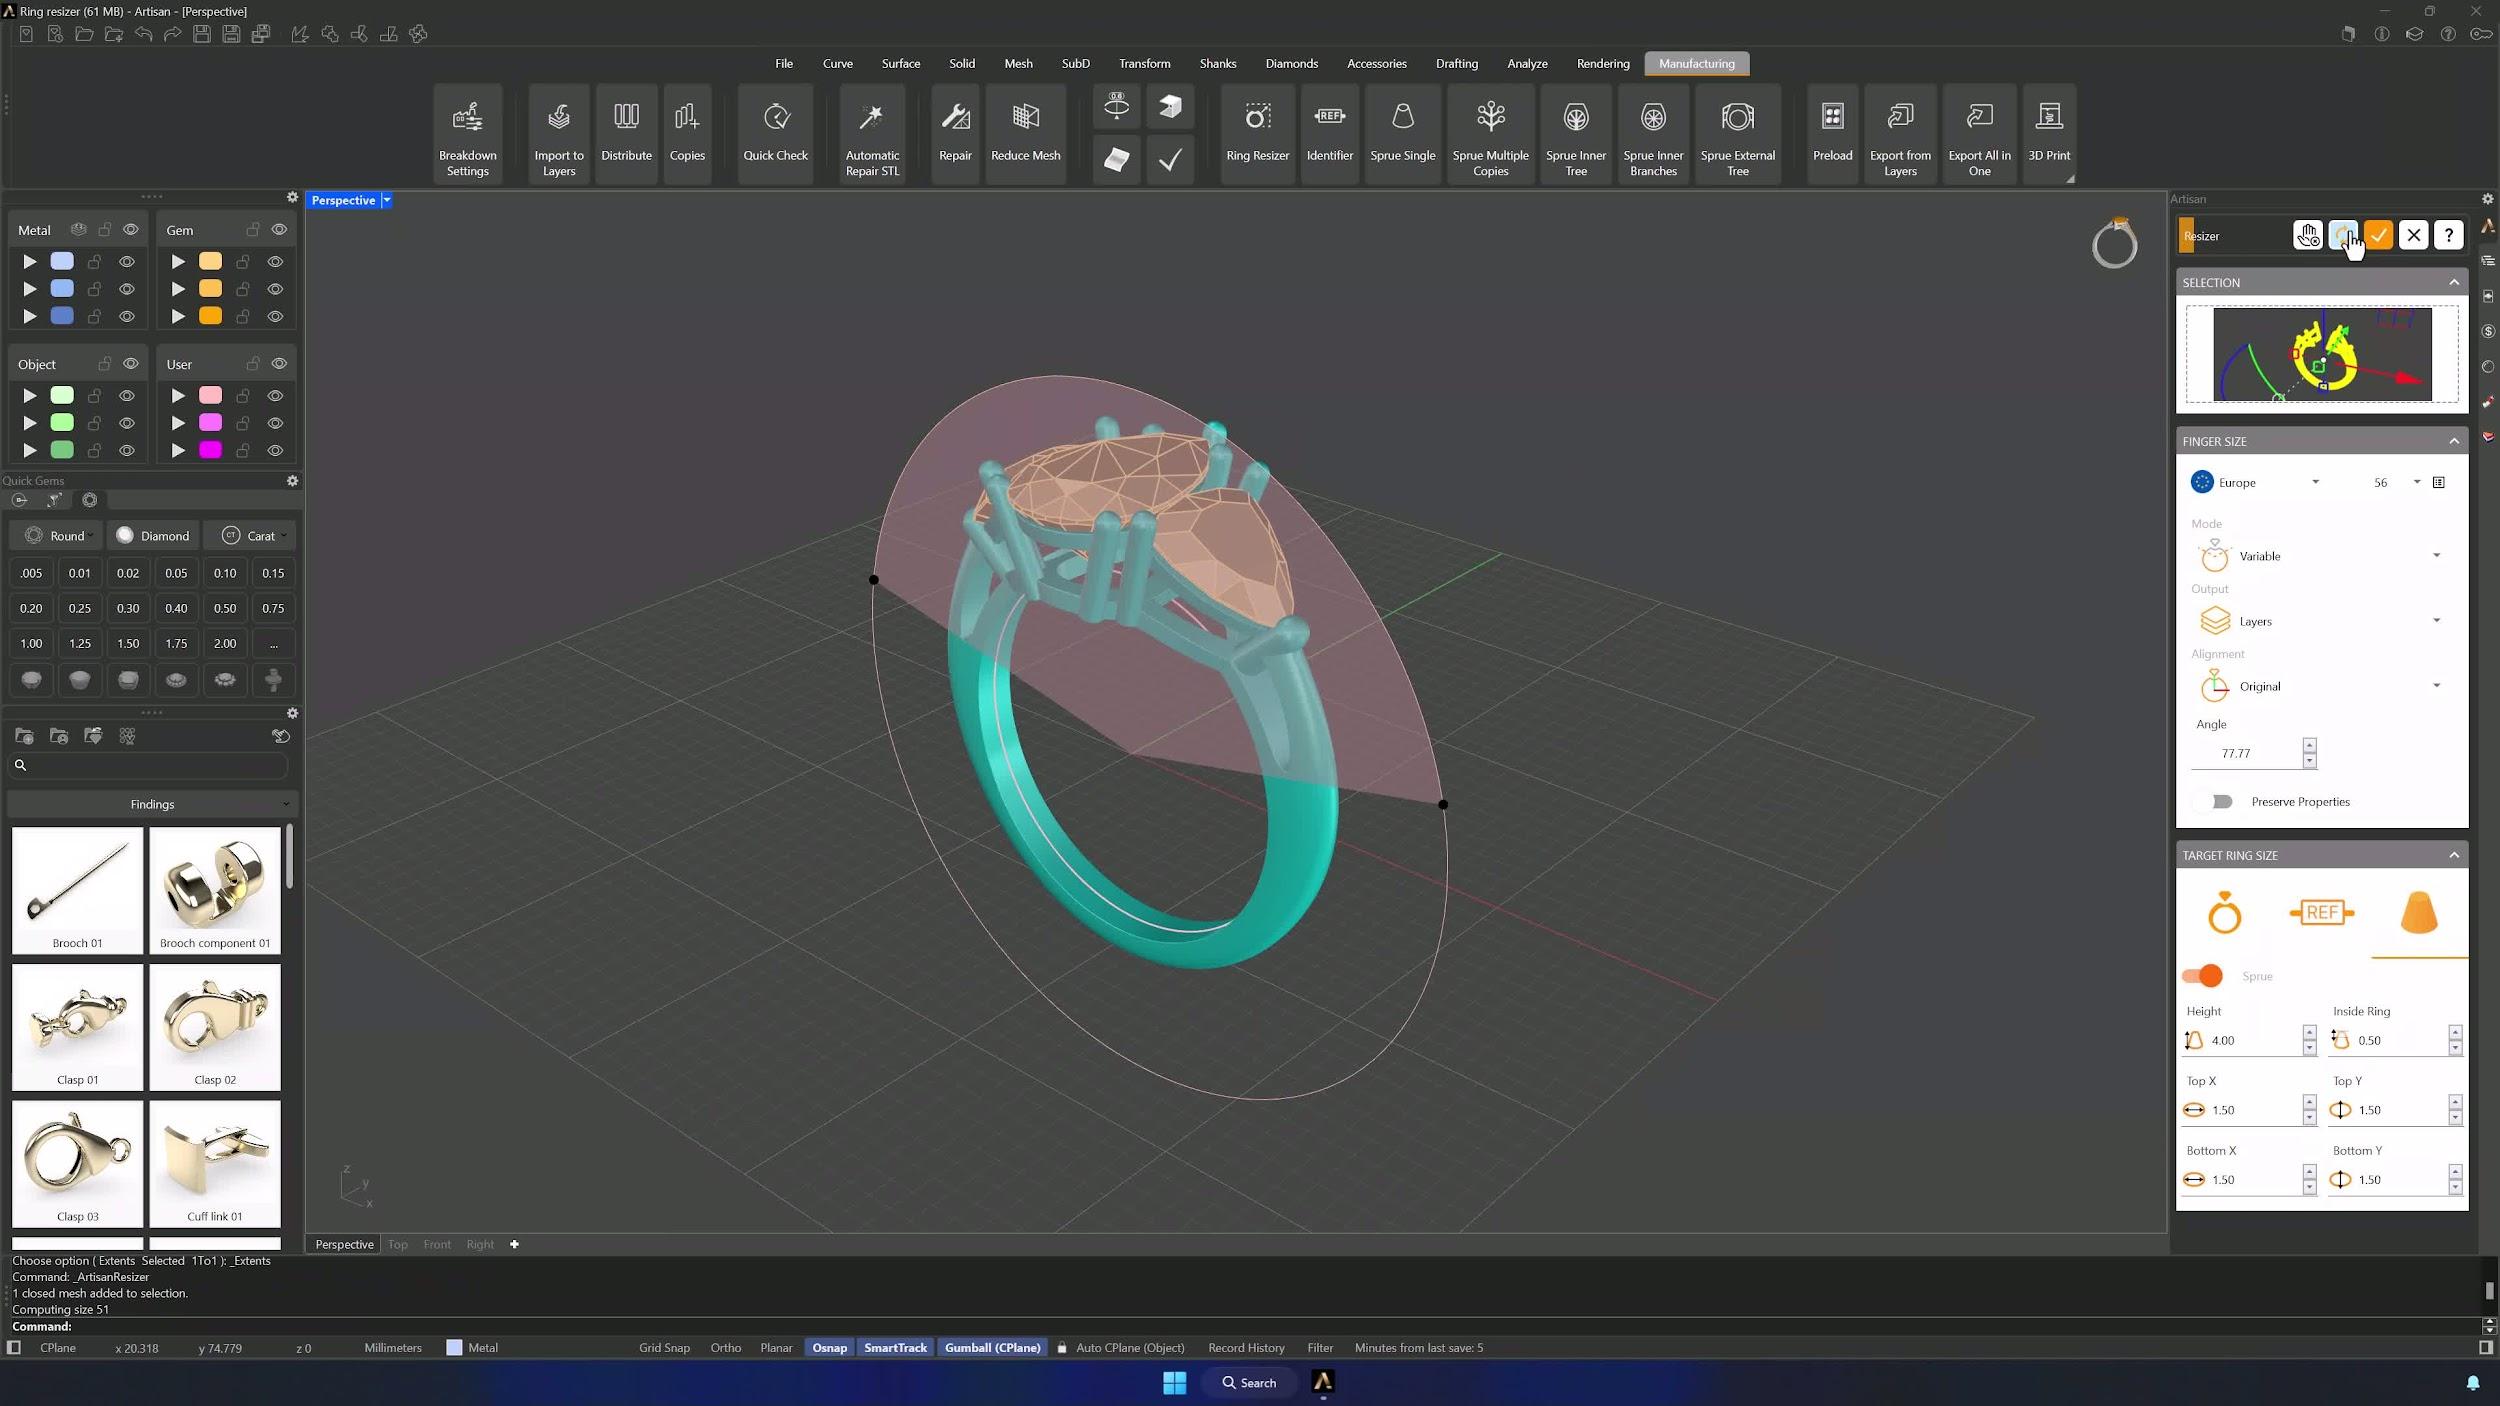
7. Refresh the command to generate the resized rings
Click Refresh and let the tool compute the scaling. Each copy should appear at its selected size, labeled with its identifier and carrying its sprue.
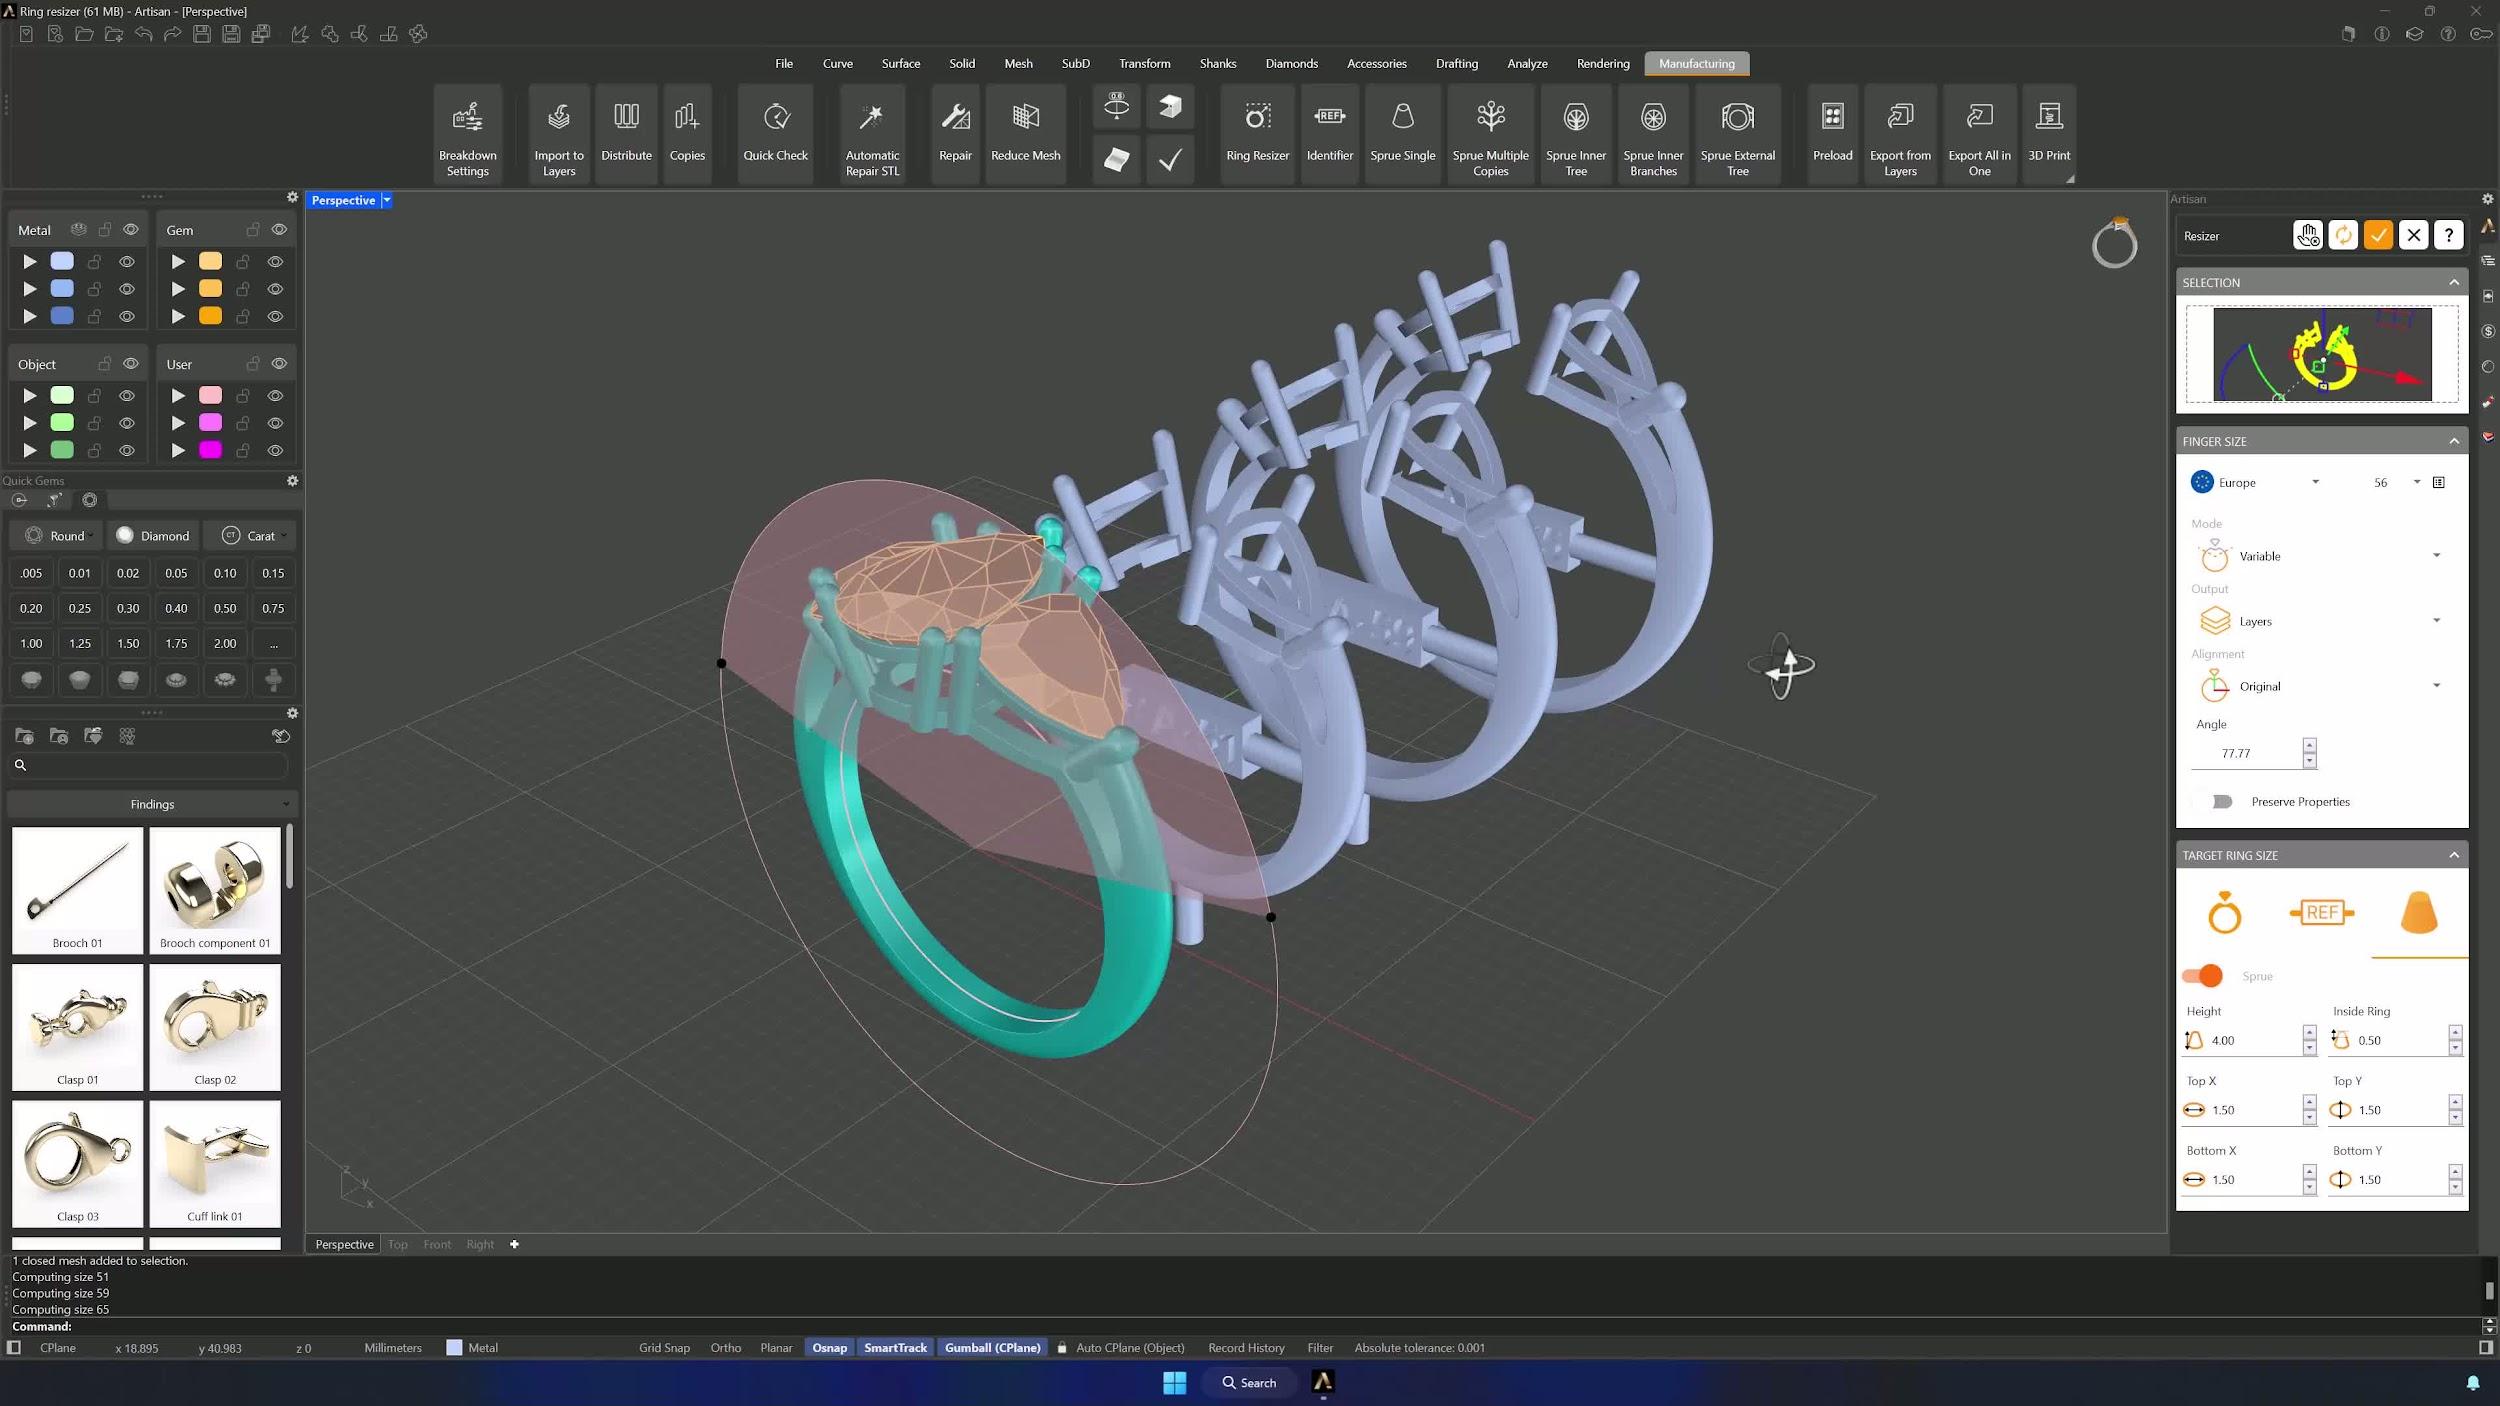
8. Accept the command to finalize the resized models
Review the generated set and, if everything looks right, Accept — the resized models are locked in for the next production step.
9. Verify the settings alignment on each resized ring
Select the gemstones and central basket and Alt-drag with the Gumball to copy them onto each resized ring, adjusting only the height of each copy. Never scale the settings — the stones must stay identical across sizes.
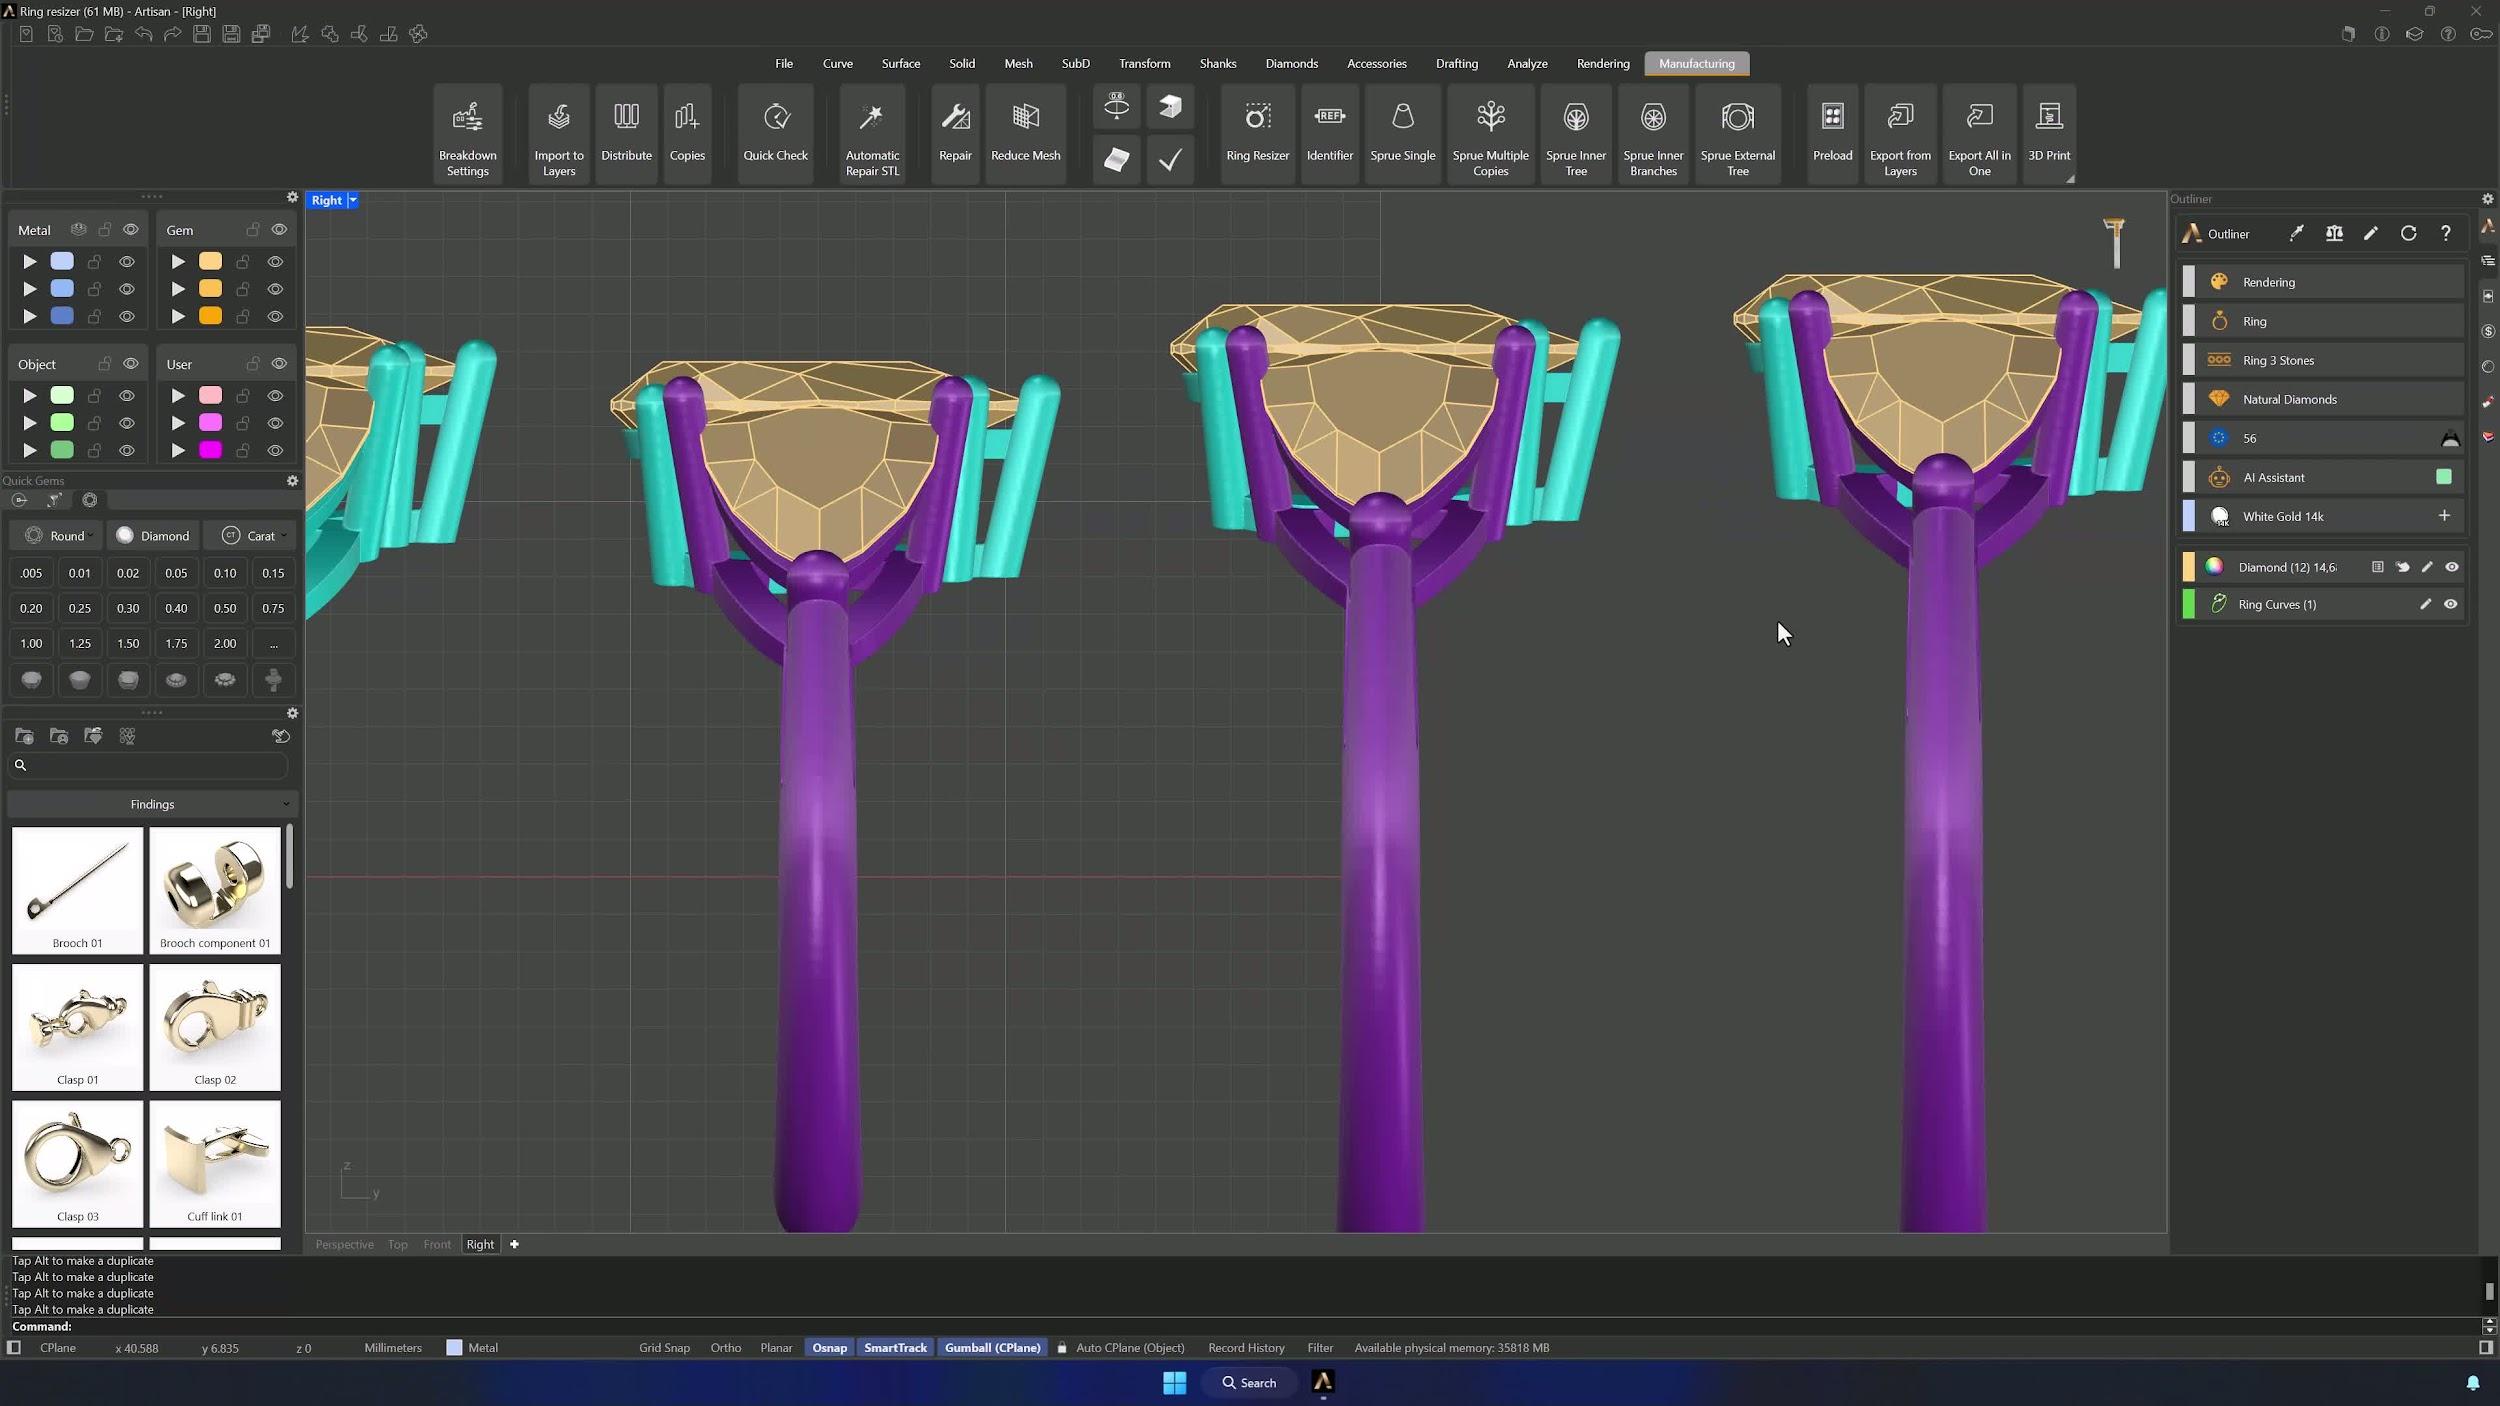
10. Confirm final fit and production readiness
Inspect each size: the settings fit, the proportional distances match the original, and the gem sits in its basket exactly as designed. With all checks passed, the set is approved for production.
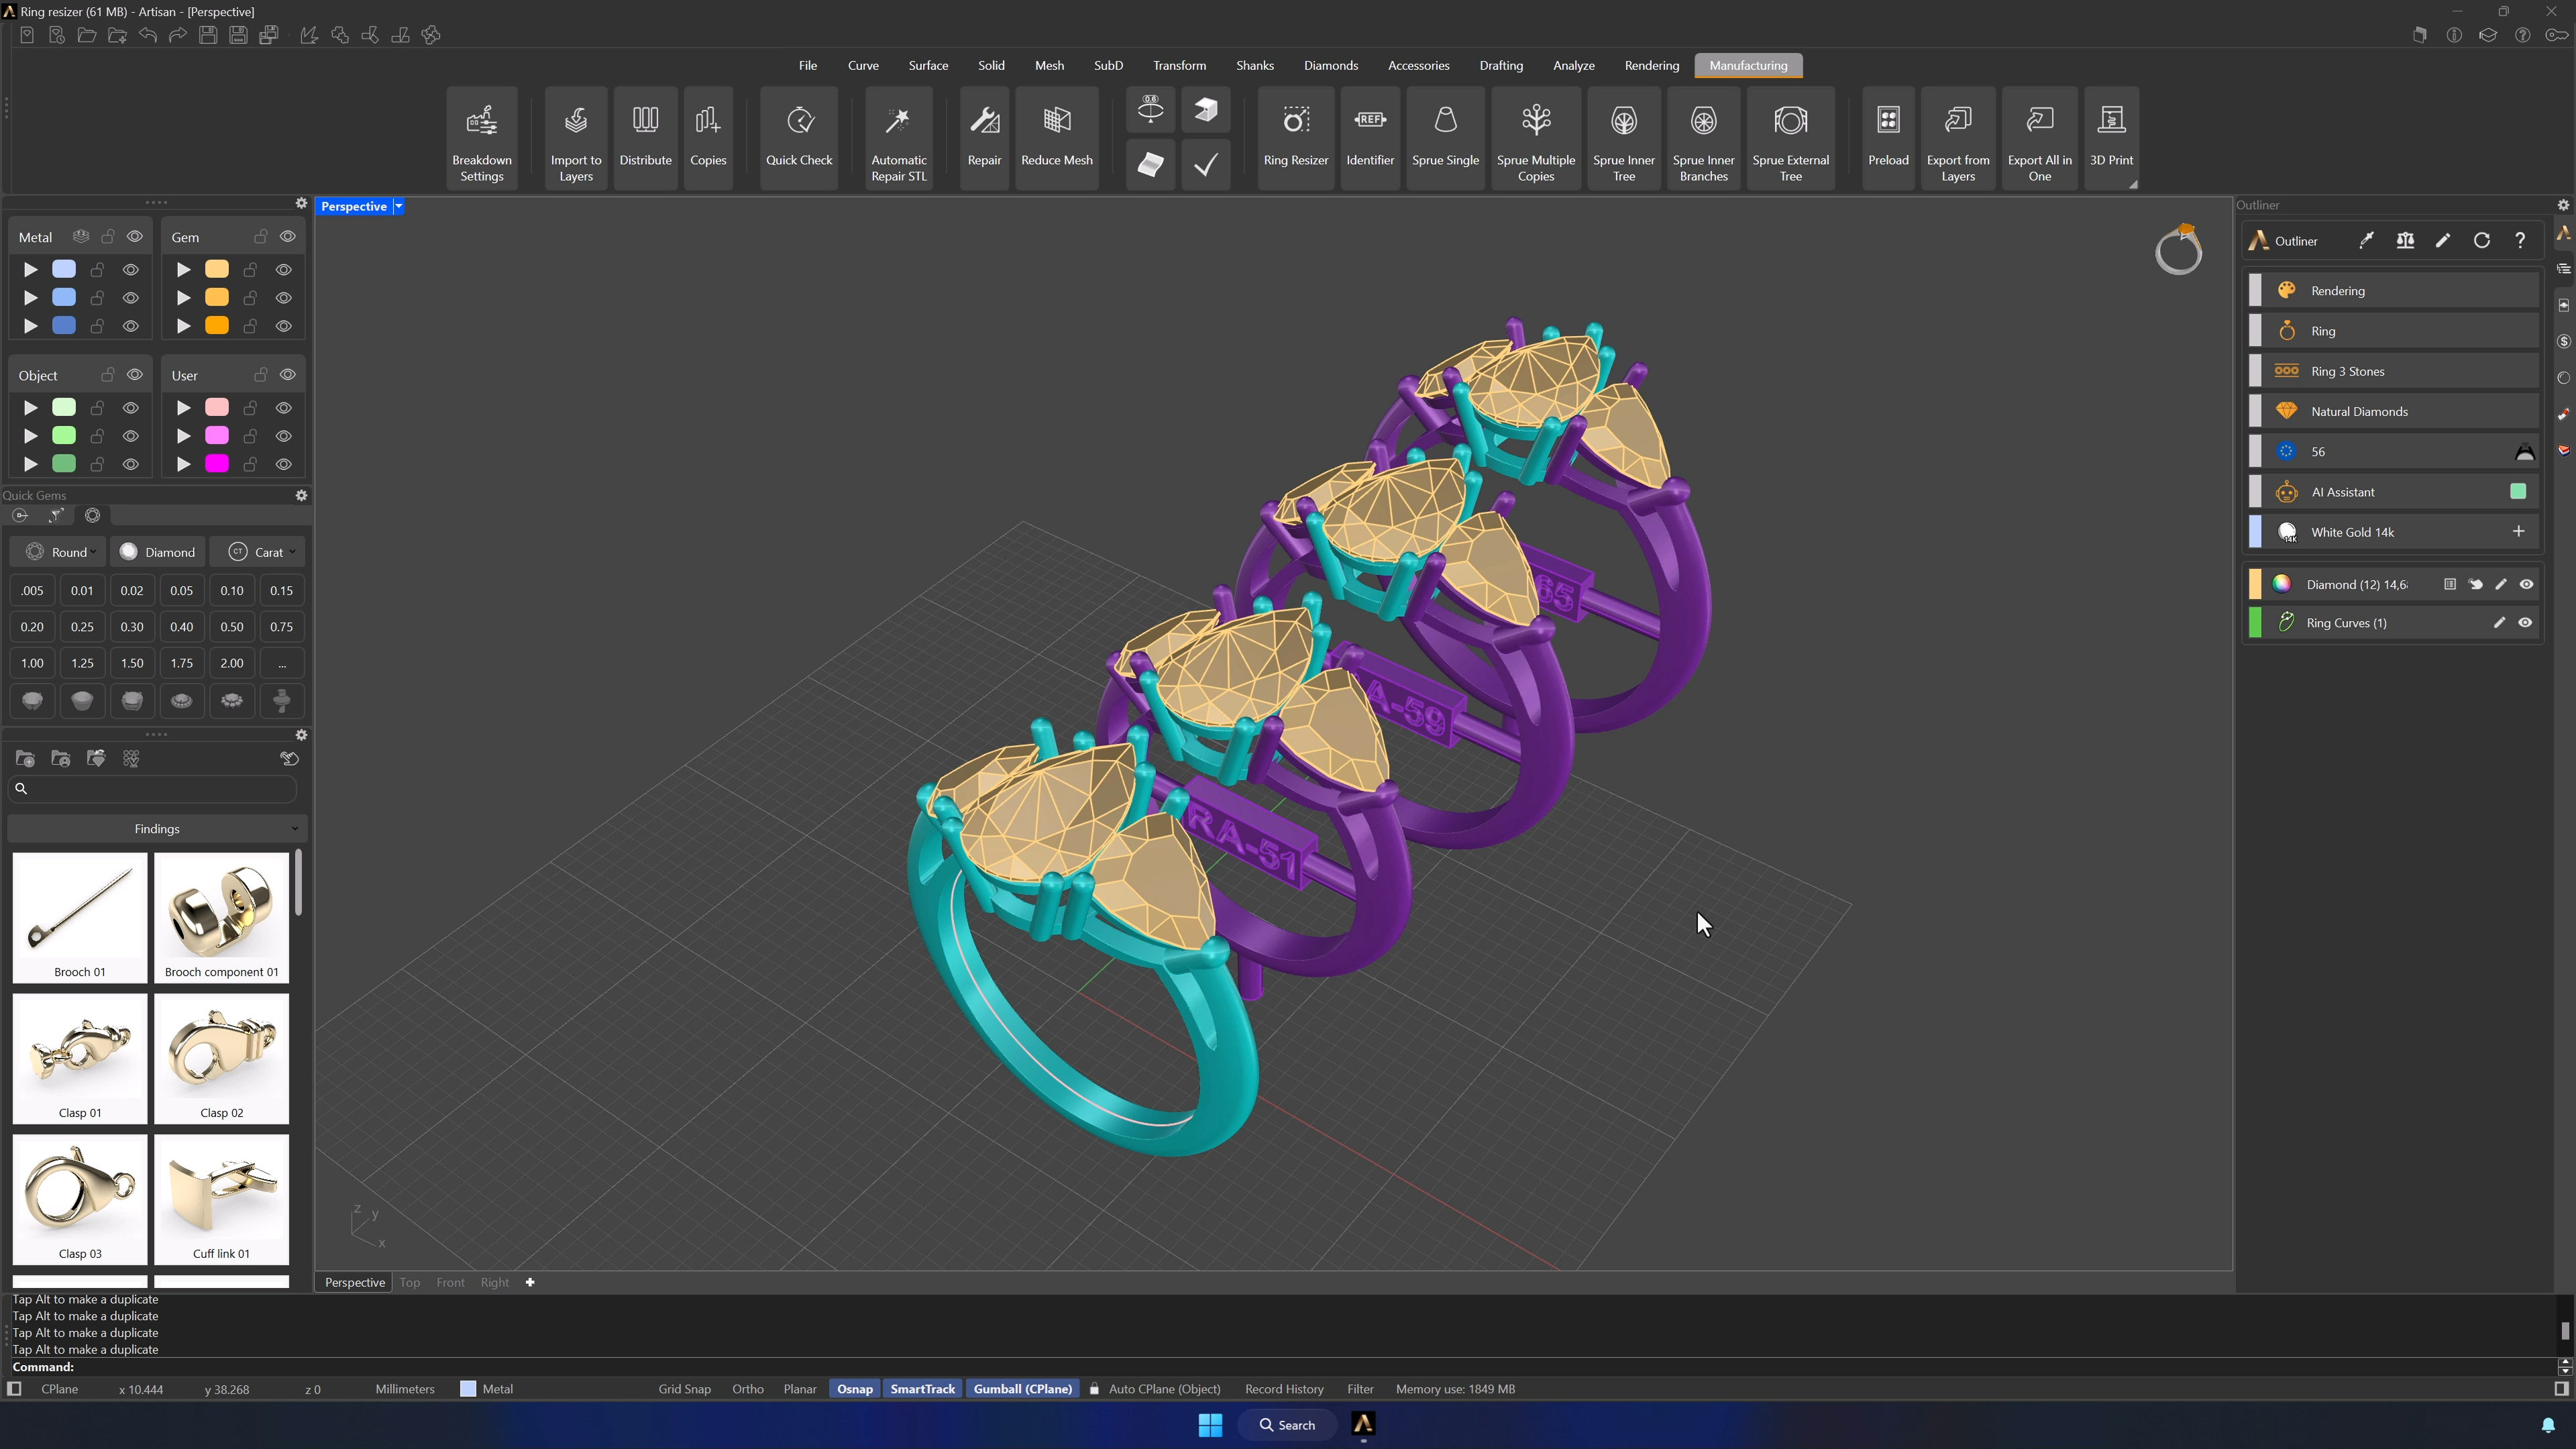
Tips for a clean result
- Set the protected section correctly before refreshing — the setting area should never resize unless the design demands it.
- Verify target sizes and identifier settings before accepting.
- When copying settings between sizes, adjust height only; scaling them breaks the design.
- Generate all the sizes in one pass, and keep a consistent prefix (RA-) for painless file tracking.
- Quick visual check after Refresh and again after Accept — issues are cheapest to catch there.
Almost there — you still have some lessons to complete. Jump to the next one →
Impersonating — progress and reviews are disabled.
Course completed
You've completed Jewelry Production & Manufacturing Essentials 🎉
Great work. Get your certificate of completion and, if you have a minute, let other jewelers know what you thought of the course.