Creating Report Templates
Lesson 8 of 18
Viewports, Preview & Saving
Sign in to access this lesson
This lesson is part of Jewelry Production & Manufacturing Essentials, which can come bundled with a RhinoArtisan Commercial license subject to current promotions. Log in with your customer account, or get in touch and we'll set you up.
Customers only
Solo para clientes
This lesson is part of Jewelry Production & Manufacturing Essentials, which can be included with a RhinoArtisan Commercial license subject to current promotions. If you've already purchased and don't see it in your account, get in touch.
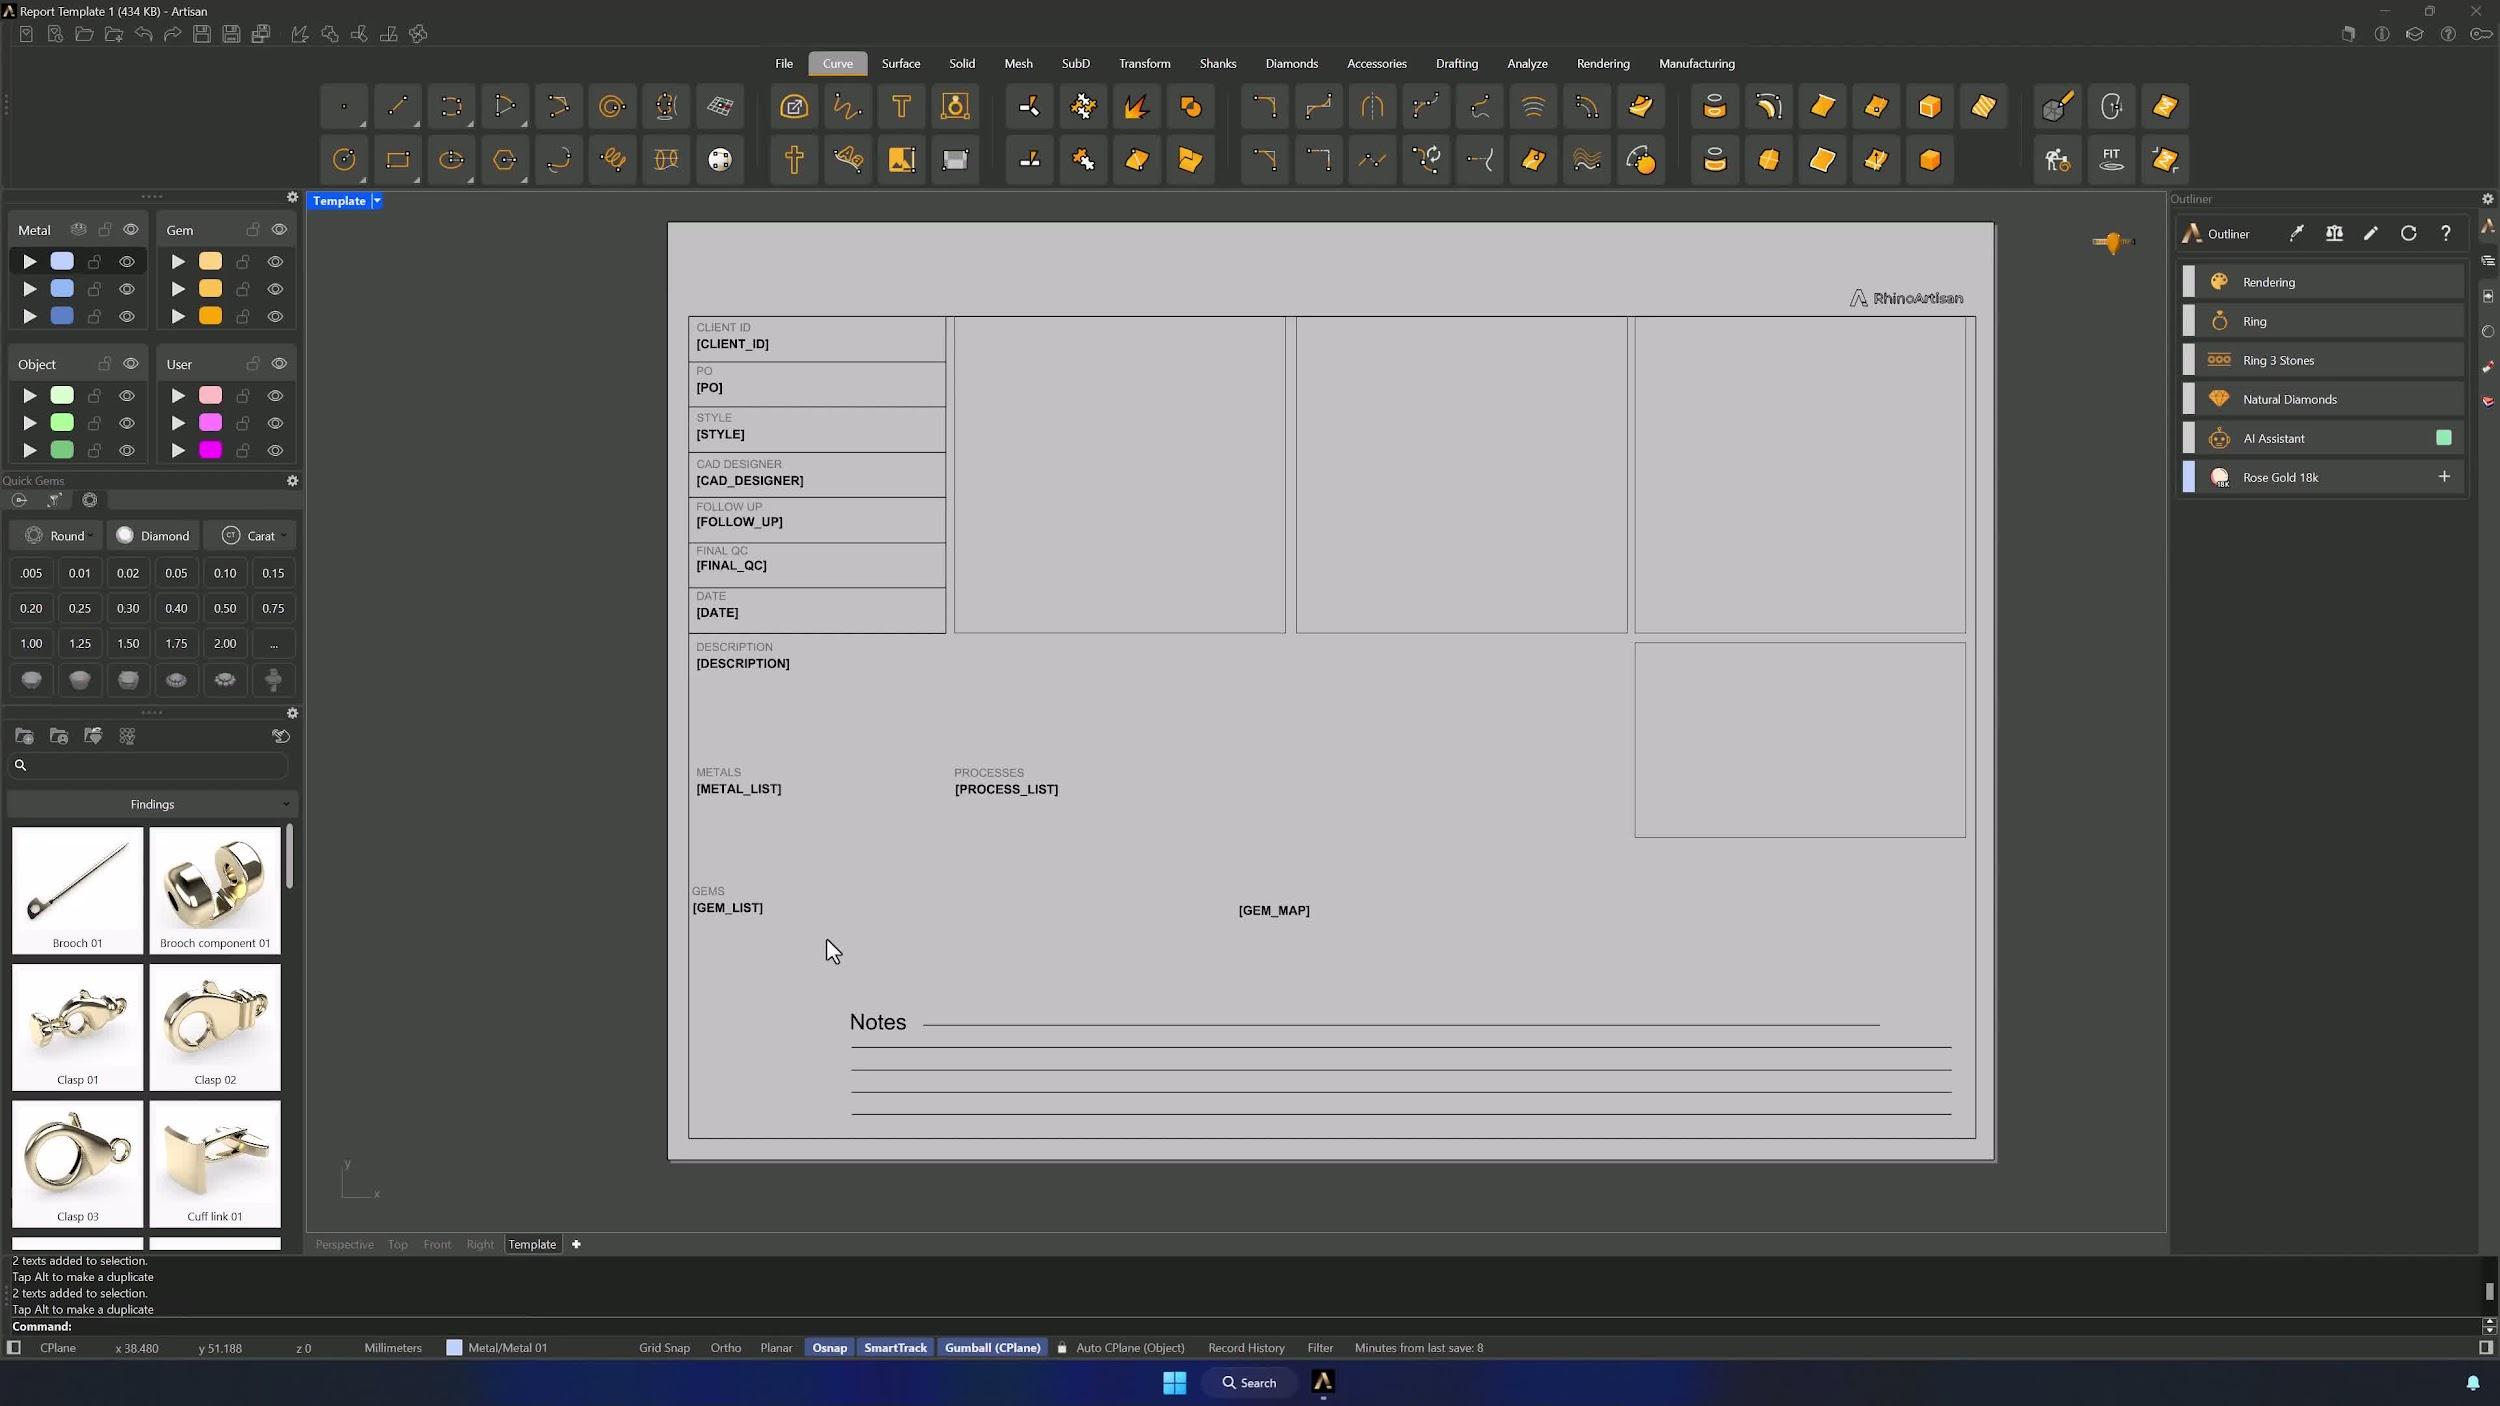
8. Configure Each Viewport Display
Double-click each viewport box and assign its view: Perspective for the first, Front for the second, Right for the third and Top for the last — adjusting position, rotation and display mode per viewport.
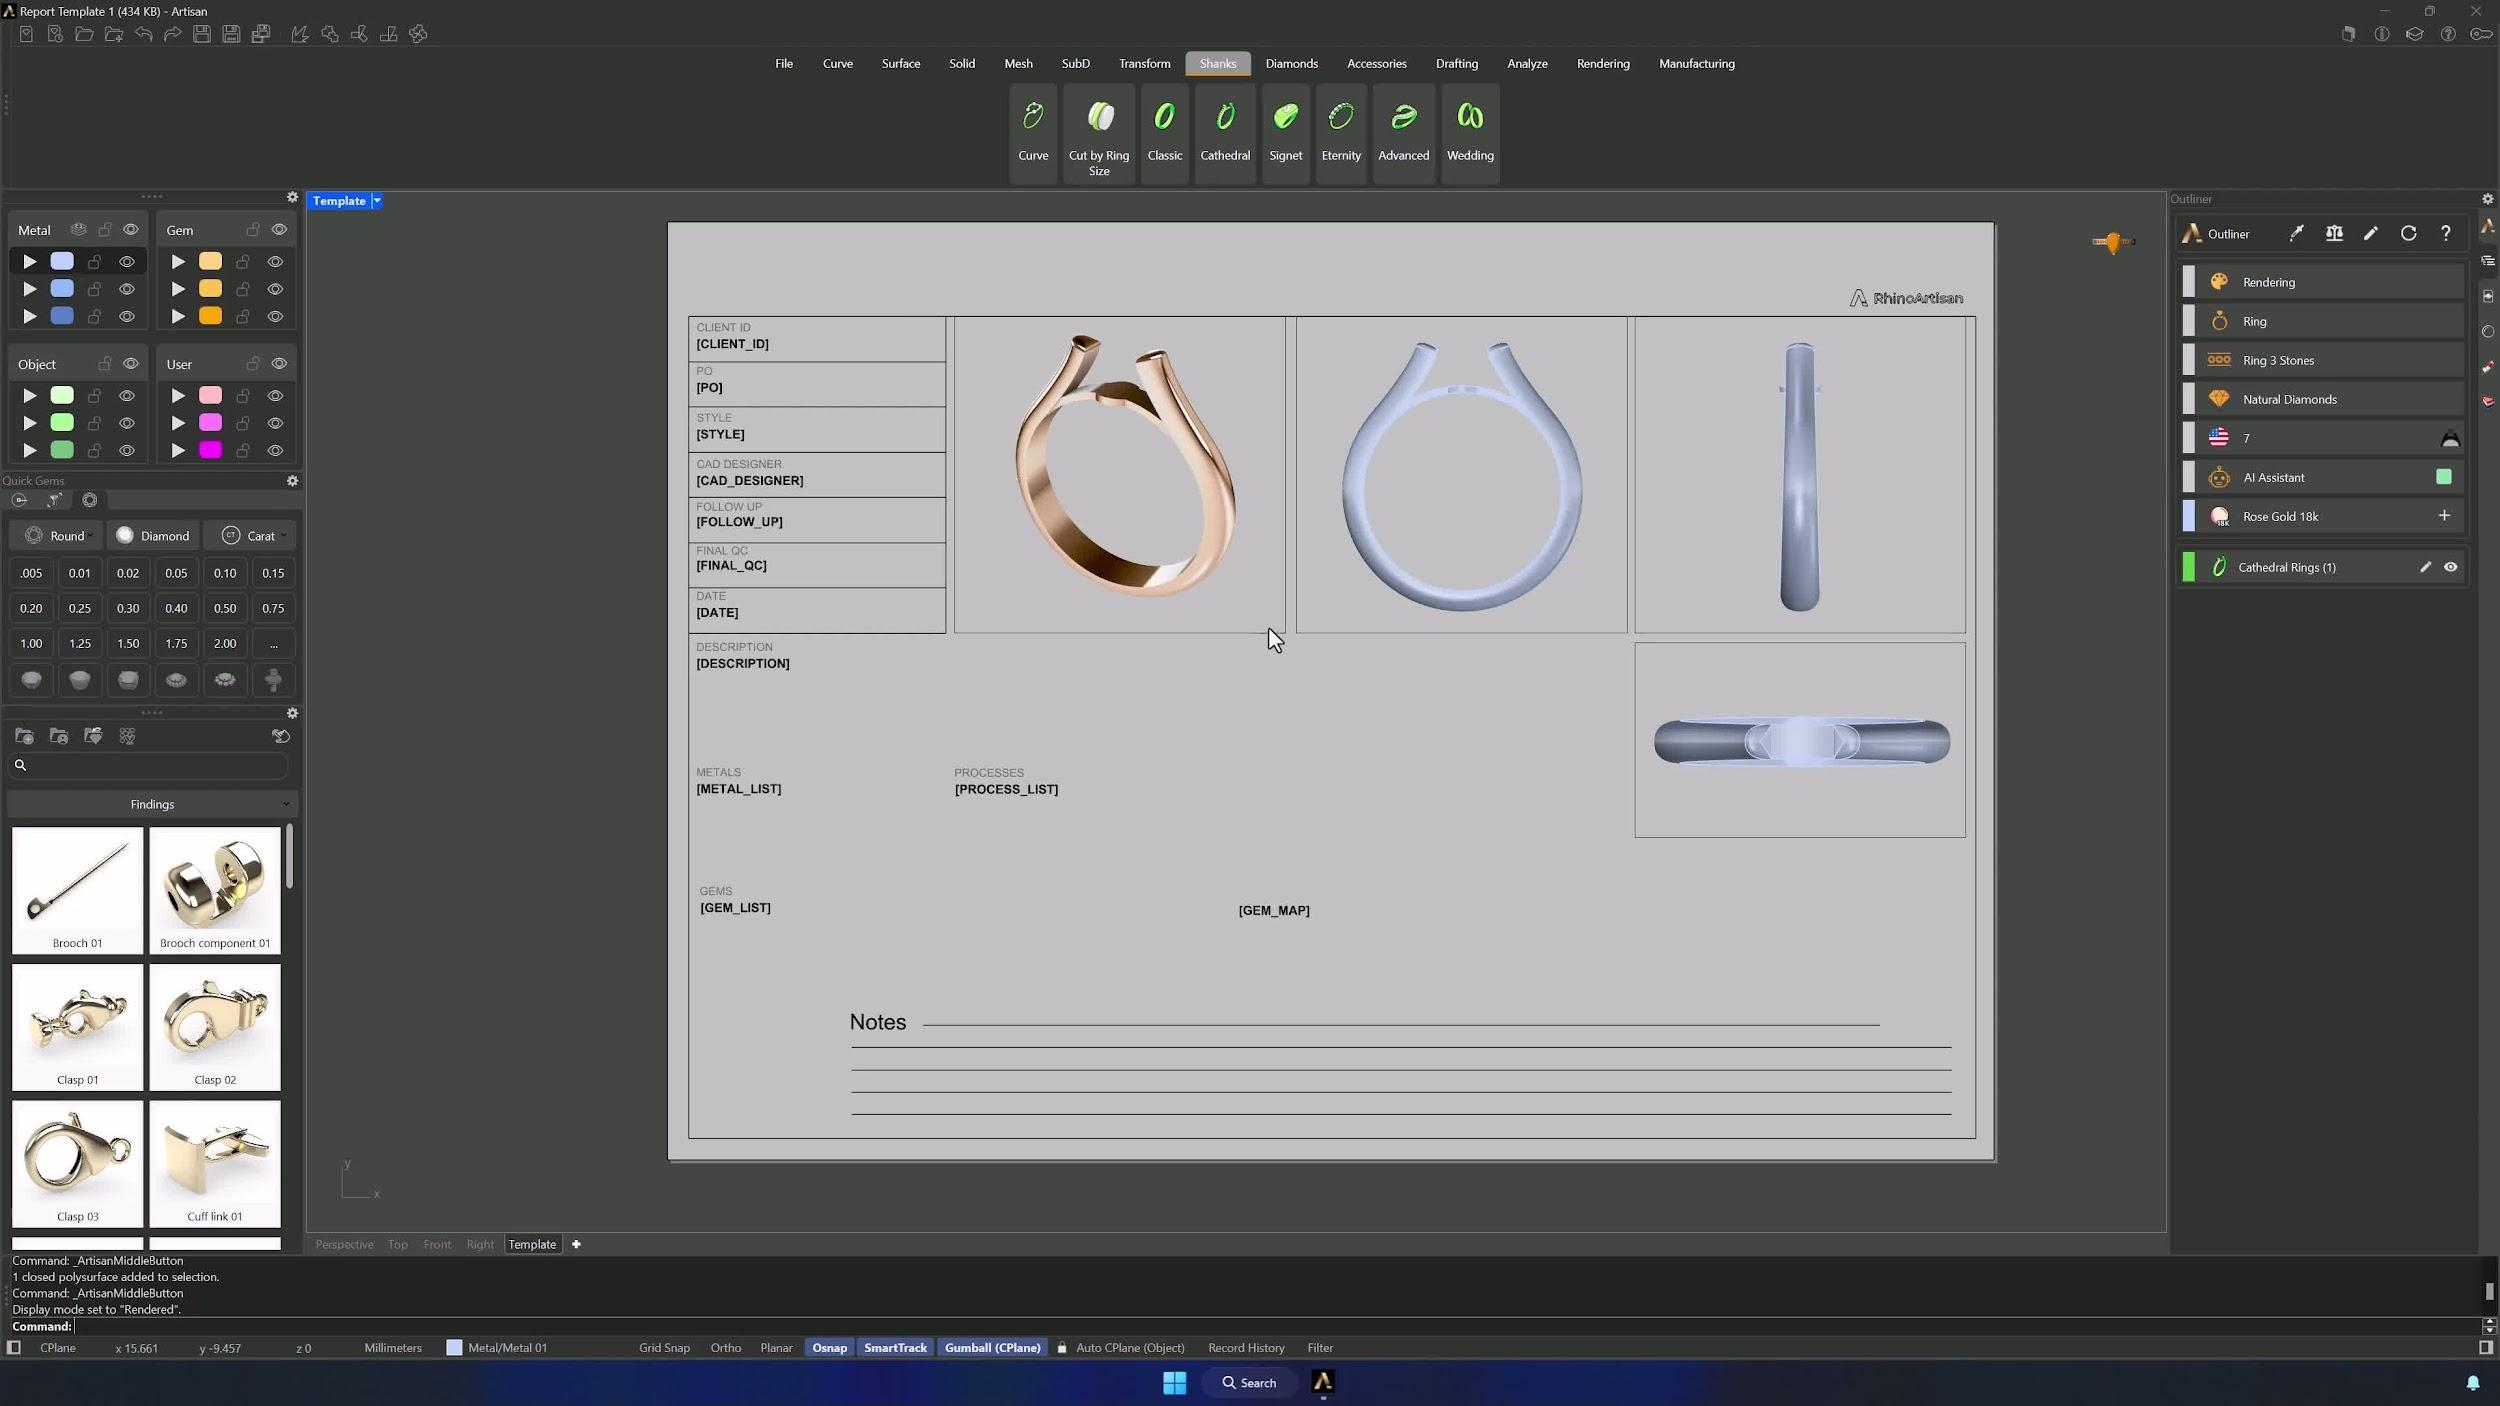
9. Preview and Fine-Tune the View Layout
Drop in a reference model — the Cathedral command from the Shanks tab works nicely — and go back over each viewport, double-clicking to refine position, rotation and display mode (Rendered looks great here). Delete the reference model when the views are dialed in.
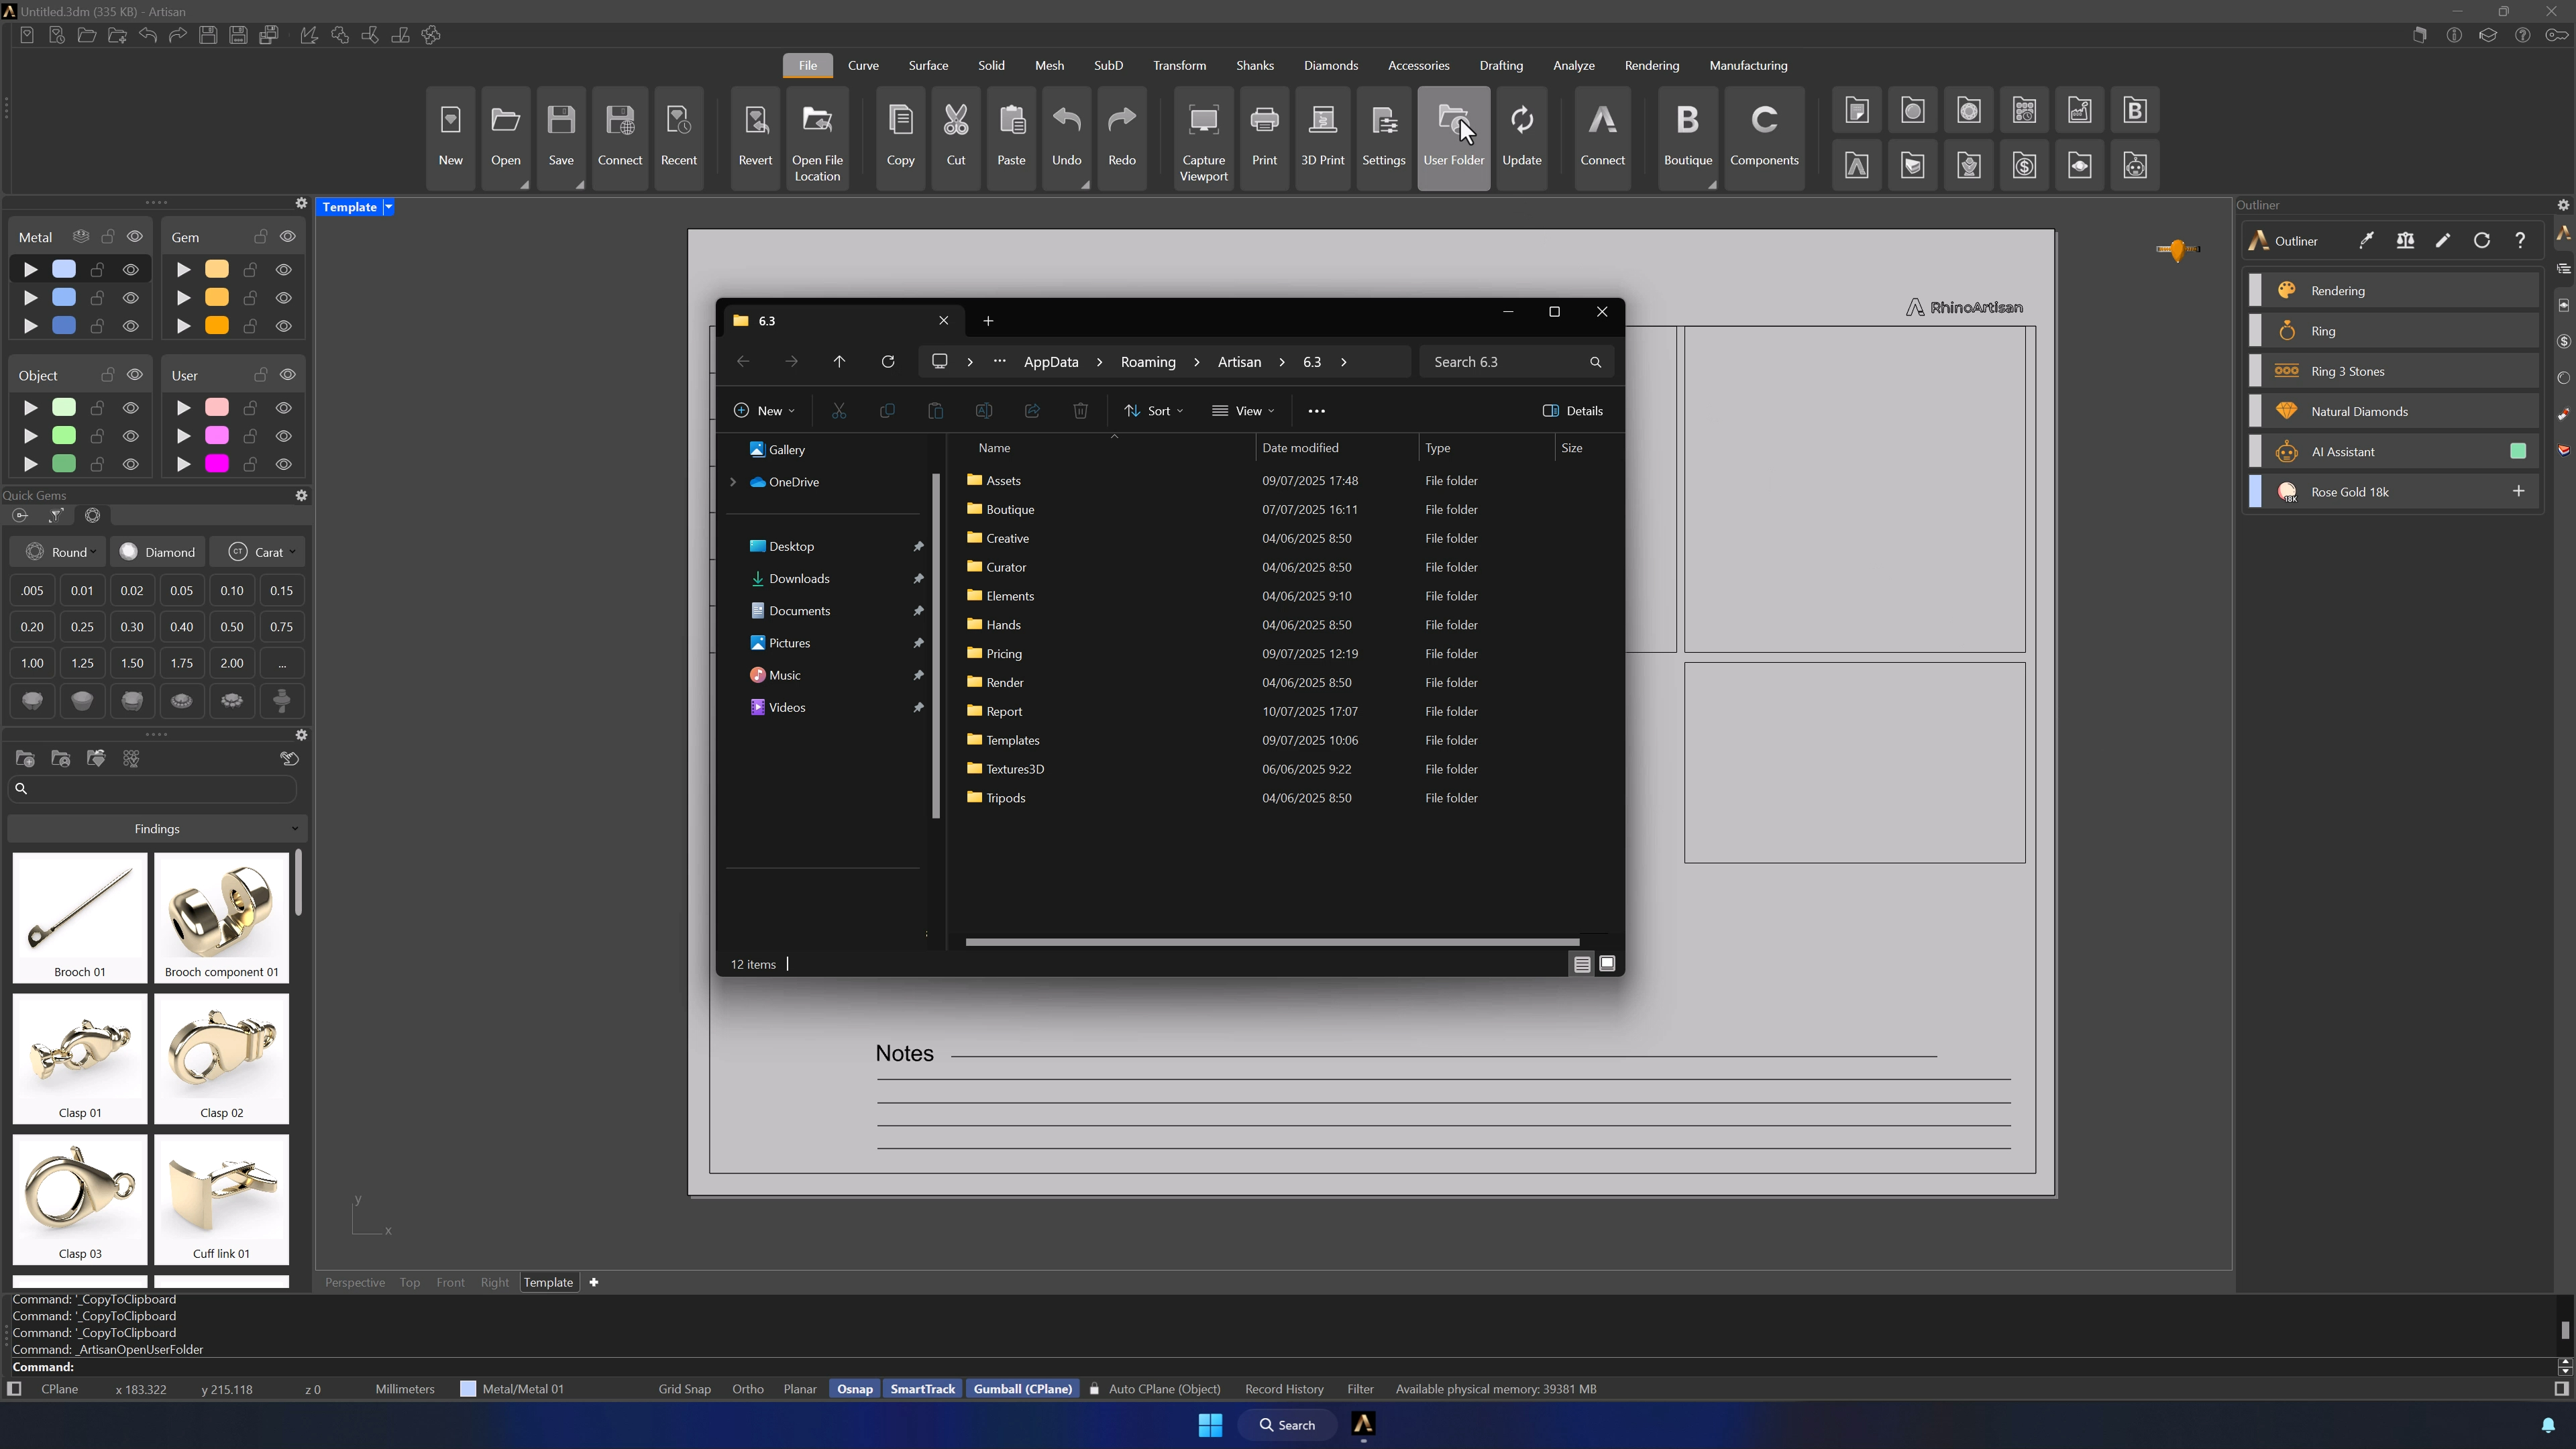
10. Save the Custom Template in the Report Folder
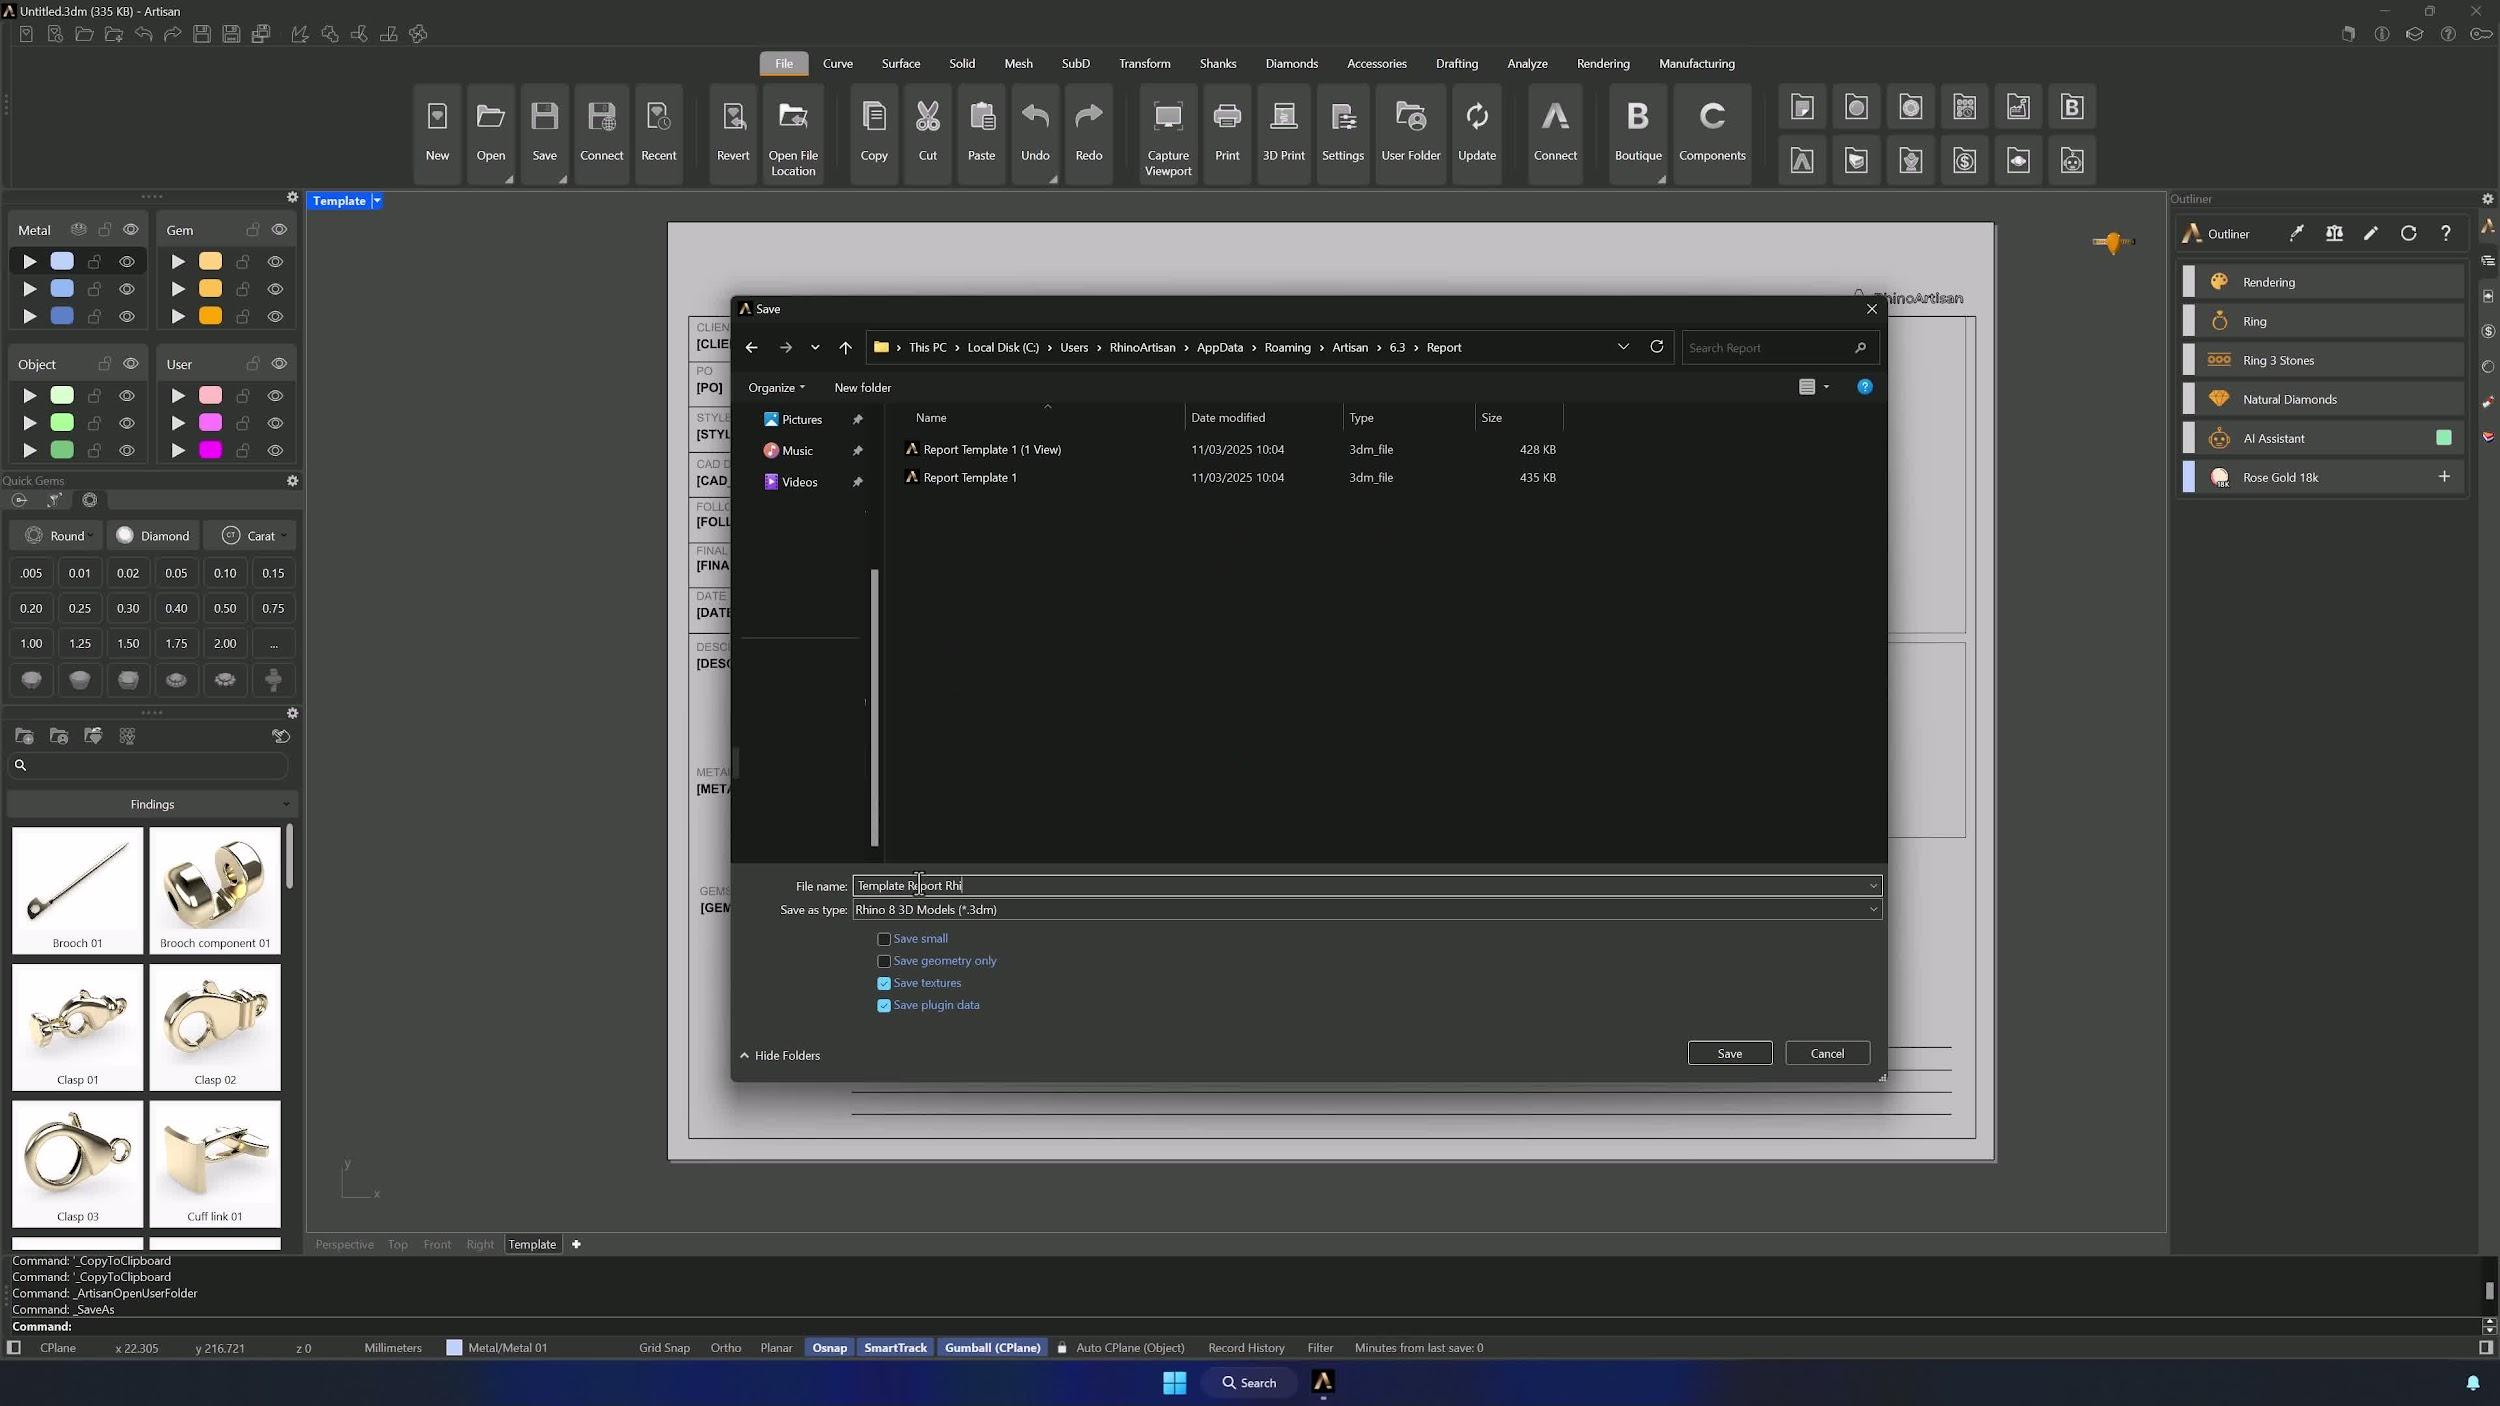
Copy the Report folder path from User Folder (right-click the folder path), then Save As in your project, paste the path, and save the template with a clear, descriptive name — it has to live in that folder to appear during report generation.
11. Use the Template When Generating Reports
From now on, when you generate a report, your custom template shows up in the template list. Generate, review, adjust — and share a report that looks like your studio made it.
Tips for a clean result
- Every field ID must match its report field name exactly, underscores instead of spaces — this is the number one source of empty fields.
- Keep lines and boxes that should print black on the Default layer.
- Careful when deleting view boxes or fields — don’t remove required report elements.
- Verify viewport orientation and display mode before saving.
- Array beats drawing repeated boxes by hand, Align keeps text professional, and a descriptive template name saves you guessing later.
Almost there — you still have some lessons to complete. Jump to the next one →
Impersonating — progress and reviews are disabled.
Course completed
You've completed Jewelry Production & Manufacturing Essentials 🎉
Great work. Get your certificate of completion and, if you have a minute, let other jewelers know what you thought of the course.