Posing
Lesson 24 of 37
Transform: Rotate
Sign in to access this lesson
This lesson is part of Master in Jewelry Rendering in Cycles, which can come bundled with a RhinoArtisan Commercial license subject to current promotions. Log in with your customer account, or get in touch and we'll set you up.
Customers only
Solo para clientes
This lesson is part of Master in Jewelry Rendering in Cycles, which can be included with a RhinoArtisan Commercial license subject to current promotions. If you've already purchased and don't see it in your account, get in touch.
We can rotate an object along the X, Y and Z axes. To do this we must have the option Gumball activated in the lower menu.
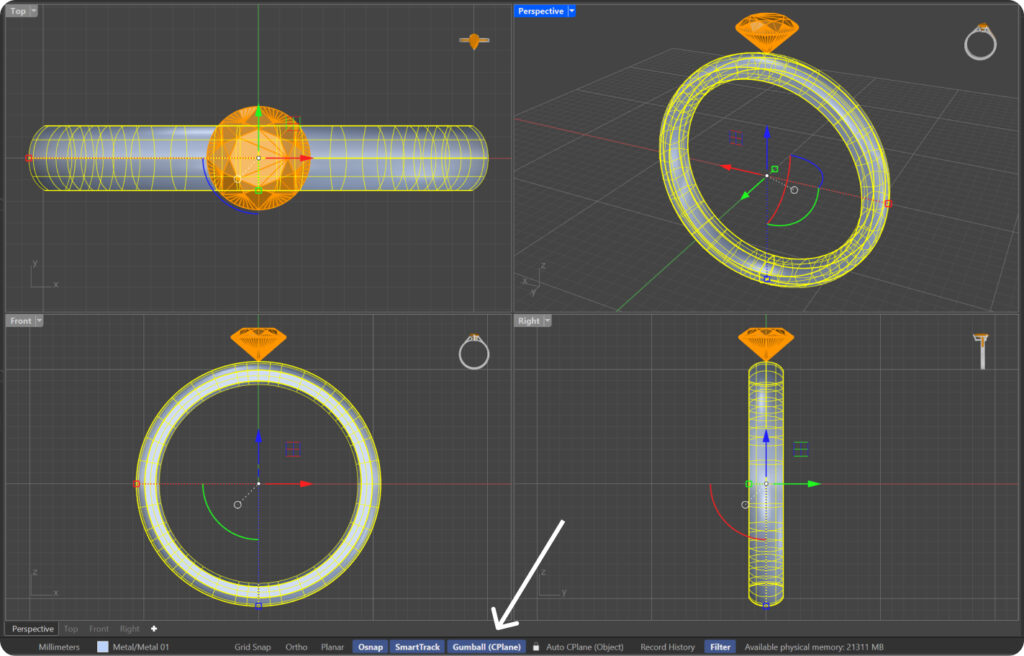
X-Axis Rotation: Red
Y-Axis Rotation: Green
Z Axis Rotation: Blue
To rotate we will click on the rotation arc and drag.
Tip: By pressing each of the rotation arcs we can establish a specific angle.
To rotate an object about a specific point we can:
- Access the Transform → Rotate → Select the element → left-click on the pivot point of rotation → drag the cursor up to one second rotation point → Left click to confirm the point → create a rotation arc → Left click to confirm the new position.
Tip: Pressing shift while we we move along the created arc, we will get more precision.
- Write Rotate in the command bar and follow the same procedure.
Tip: We can copy elements while rotating. Typing the command Rotate, or pressing the Rotate tab, type C in the command bar, and press Enter. In this way we activate the copy mode. To cancel copy mode, we’ll type C again and press Enter.
Tip: Once the arc of rotation is created, we can type the exact angle of rotation in the command bar.