KeyShot Render
Lesson 30 of 31
Applying Materials
Sign in to access this lesson
This lesson is part of From RhinoArtisan to Keyshot: Jewelry Rendering Essentials, which can come bundled with a RhinoArtisan Commercial license subject to current promotions. Log in with your customer account, or get in touch and we'll set you up.
Customers only
Solo para clientes
This lesson is part of From RhinoArtisan to Keyshot: Jewelry Rendering Essentials, which can be included with a RhinoArtisan Commercial license subject to current promotions. If you've already purchased and don't see it in your account, get in touch.
Objective: Import and apply the provided materials to the metals, gems, and display, and add rounded edges for a polished, realistic finish.
So far the scene is only geometry, and everything shares the same default gray. Materials are what turn that geometry into jewelry: they decide how the gold reflects, how each stone transmits light, and how the display reads next to the piece. We’ll bring in the pack included with the section resources and assign it part by part.
Create a Materials Folder
Before importing anything, give the pack a place of its own. In the materials panel on the left of KeyShot, right-click and create a new folder, give it a name, and select it. Then right-click that same folder and import the provided materials. They’ll land inside it instead of being mixed with KeyShot’s default libraries, so you’ll always know where to find them.
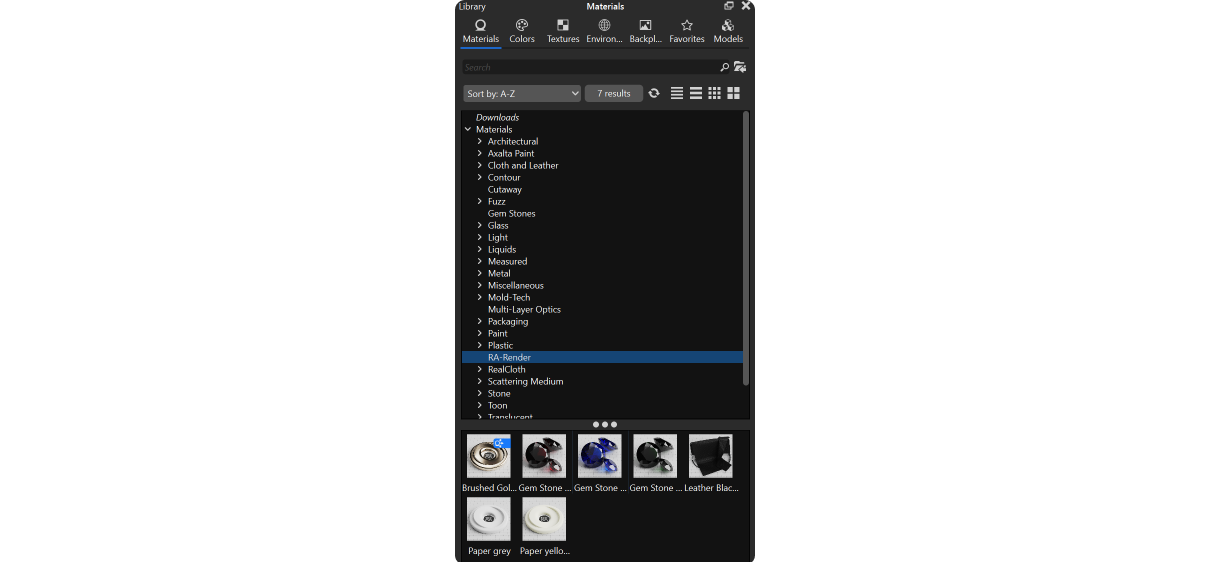
Apply the Materials
Materials are applied by dragging them from the library onto the piece. Start with the metals, so that the ring and its stand share the same finish, and then move on to the gems, which is where the design really comes alive.
- Yellow Gold metal to the ring metal.
- Yellow Gold metal to the display.
- Leather to the cushion.
- Upper ring gems: Tsavorite.
- Lower ring gems: Pink and Tsavorite on the sides, and Sapphire in the center.
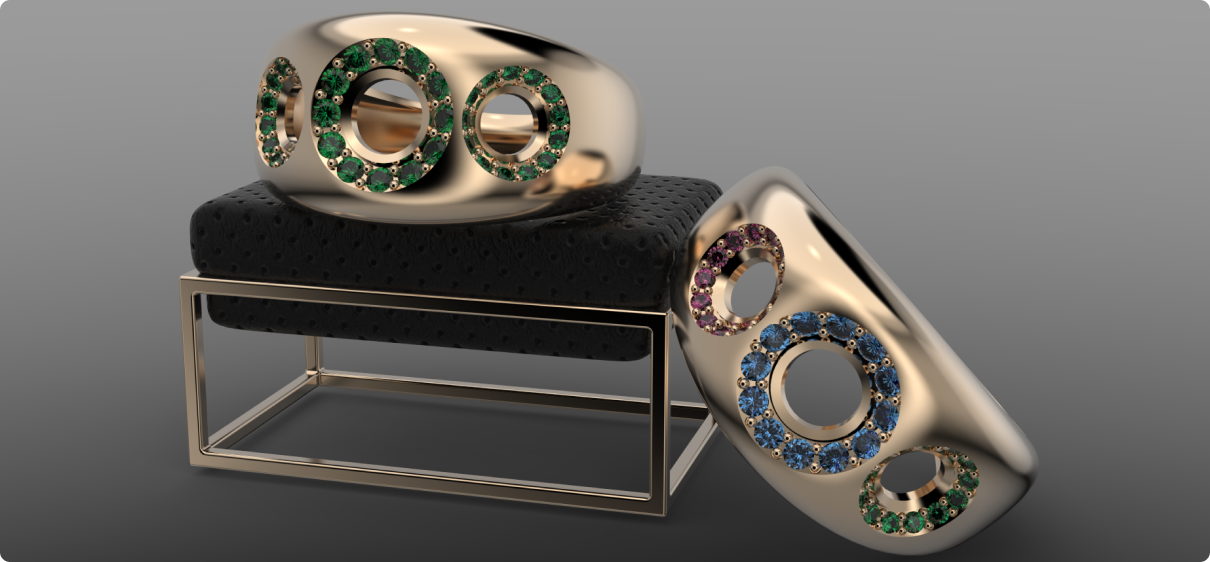
Apply Different Gem Materials by Layer
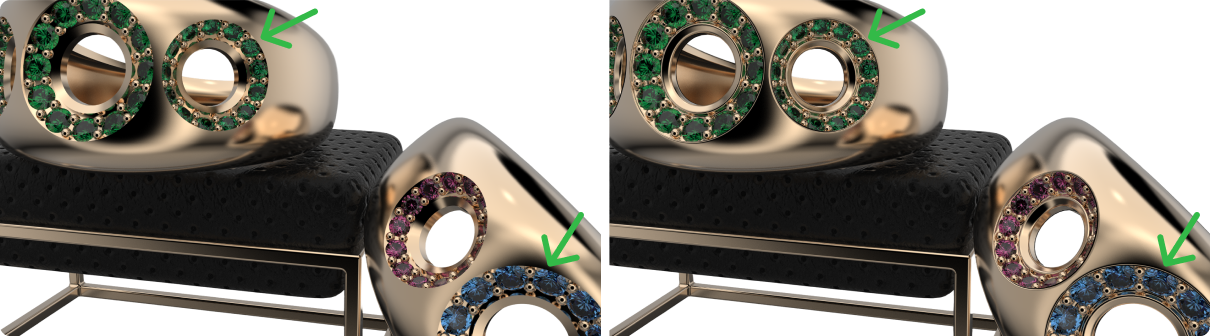
If you drop a gem material straight onto a stone, you’ll notice the gem materials are applied to the lower ring too. The gems arrived grouped in a single layer, so the material you drop onto one stone is the same instance for the whole group: change it and every gem in that group changes with it. That is why we split them into separate gem layers in the previous lesson.
To apply different ones, drag the material directly onto the layer from the Scene panel: for example, Gem 01 of the second ring for the center stone, and Gem 02 for the pink gems. Each layer now holds its own material and can be edited independently. Your materials are now applied.
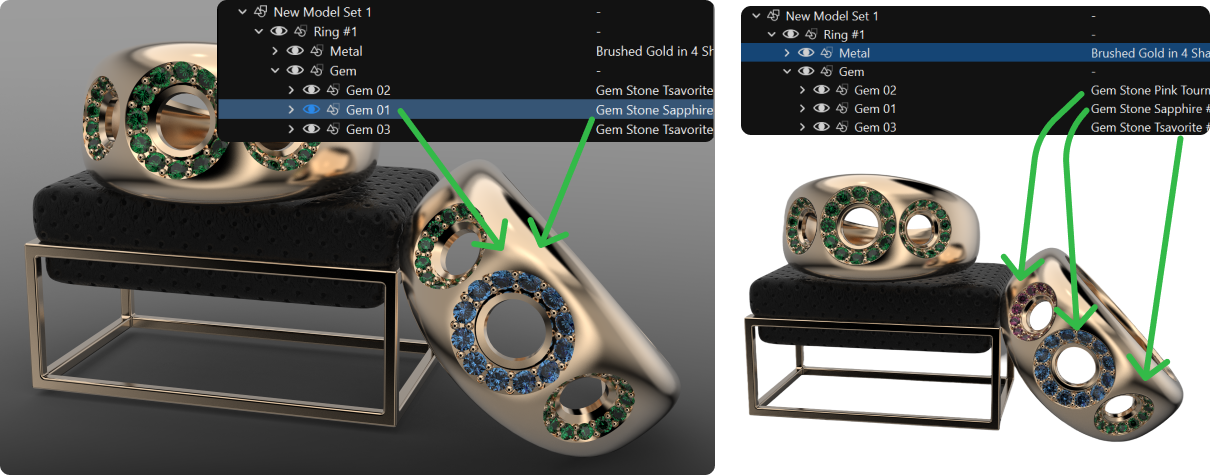
Add Rounded Edges
A polished piece of jewelry never has a perfectly sharp edge: there is always a minute bevel that catches the light, and that thin highlight is a big part of what makes metal look real. KeyShot can reproduce it without touching the model.
Select the metal layer, go to Properties at the bottom, and scroll down to Rounded Edges. Set a value of 0.18. This rounds the edges and gives the metal a polished effect.
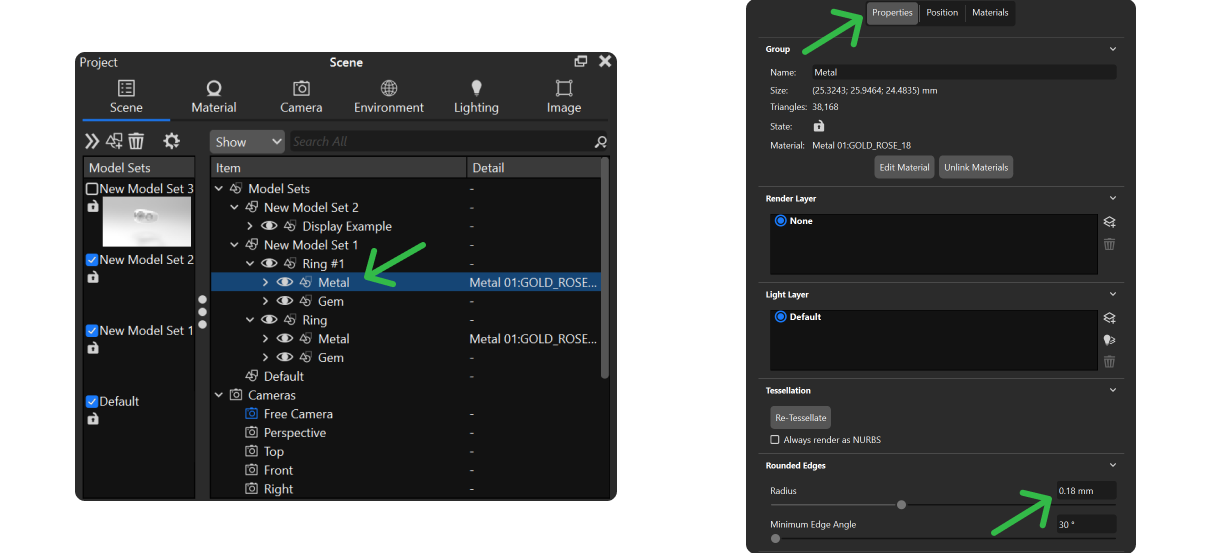
Compare the metal before and after. It’s a subtle change, but it’s the kind of detail that separates a render that looks modeled from one that looks photographed.
Next Lesson: Creating the Lighting and Render
Almost there — you still have some lessons to complete. Jump to the next one →
Impersonating — progress and reviews are disabled.
Course completed
You've completed From RhinoArtisan to Keyshot: Jewelry Rendering Essentials 🎉
Great work. Get your certificate of completion and, if you have a minute, let other jewelers know what you thought of the course.