KeyShot Render
Lesson 29 of 31
Importing and Posing in KeyShot
Sign in to access this lesson
This lesson is part of From RhinoArtisan to Keyshot: Jewelry Rendering Essentials, which can come bundled with a RhinoArtisan Commercial license subject to current promotions. Log in with your customer account, or get in touch and we'll set you up.
Customers only
Solo para clientes
This lesson is part of From RhinoArtisan to Keyshot: Jewelry Rendering Essentials, which can be included with a RhinoArtisan Commercial license subject to current promotions. If you've already purchased and don't see it in your account, get in touch.
Downloads
Objective: Import the model into KeyShot, organize the gems into separate layers, and position the rings realistically on the display using collision and settle.
Posing is what turns a technical screenshot into something that looks like jewelry photography. In this lesson we’ll bring the ring into KeyShot, fix the way its gems arrive grouped, and let KeyShot’s own physics drop both rings onto the display for us.
Download the Resources
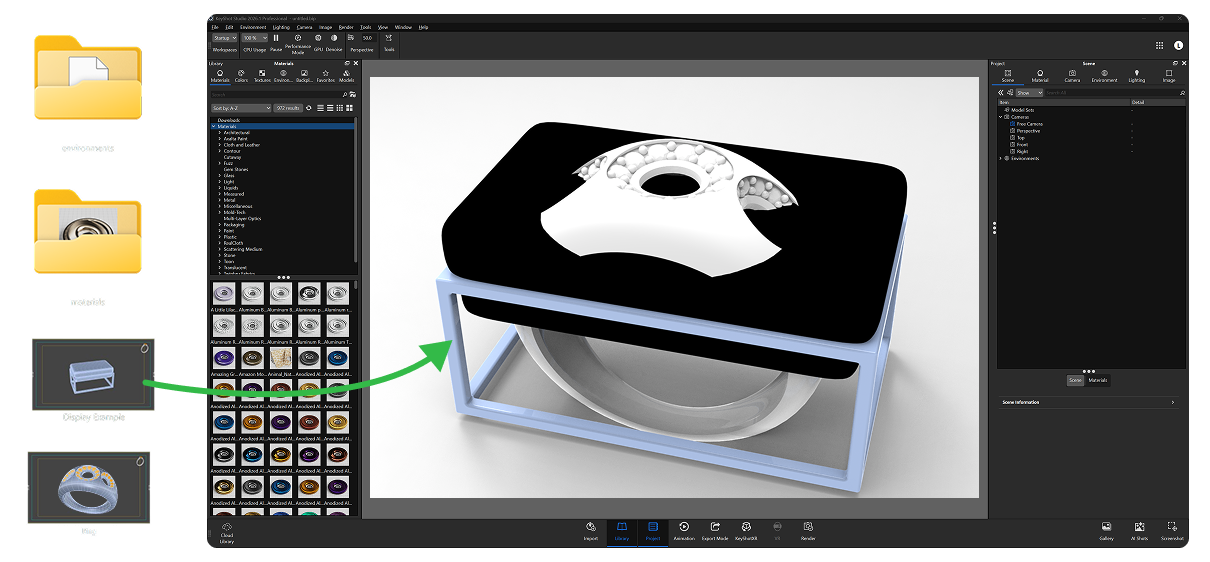
Everything for this section travels in a single pack, so you’ll be working with exactly the same files as the tutorial. Download the resource pack for this section from the RhinoArtisan course resources and unzip it. It contains the render model, the Display Example, the materials, and the environment you’ll use throughout this section.
Import the Resources
KeyShot imports by drag and drop, so there’s no menu to go through. Drag the render model and the Display Example into the workspace.
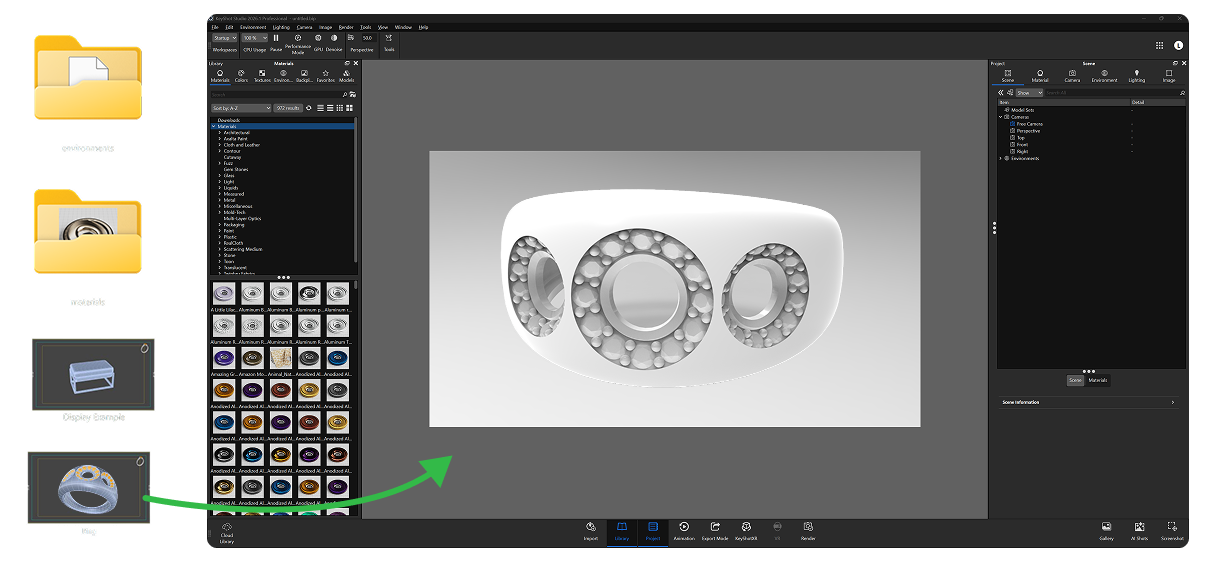
Enable GPU
If you have a graphics card, enable GPU to get the best performance out of KeyShot. The real-time view will resolve much faster, which matters when you’re moving gems and lights and want to judge the result straight away.

Check the Layers
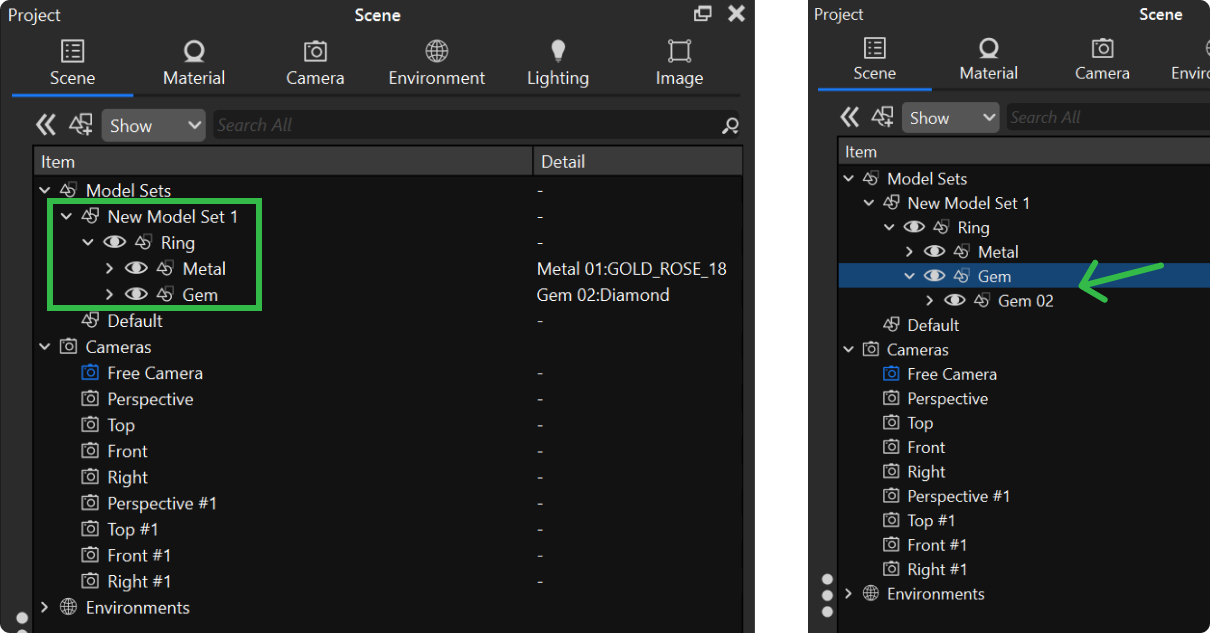
Before touching anything, look at how the model arrived. KeyShot builds its scene tree from the layers of the RhinoArtisan file, and materials can be assigned by layer, so how the model is organized decides how much control you’ll have later.
Notice how the model and the metal and gem layers appear. If you open the gem layers, you’ll see there’s only one: all the gems are grouped together. That single layer is the problem, because with every stone in the same block they would all have to share one material. We’ll go back to the model in RhinoArtisan to fix this.
Separate the Gems in RhinoArtisan
What we’re after is three independent groups of stones, each one on its own gem layer, so each set can later take a different material. Hide the shank by typing Hide in the command bar, or hide it from the Layers panel. With the metal out of the way, selecting the gems is far easier. Then select them and type Ungroup in the command bar, or use the middle mouse button. The goal is to have 3 groups, adding each group to its own gem layer.
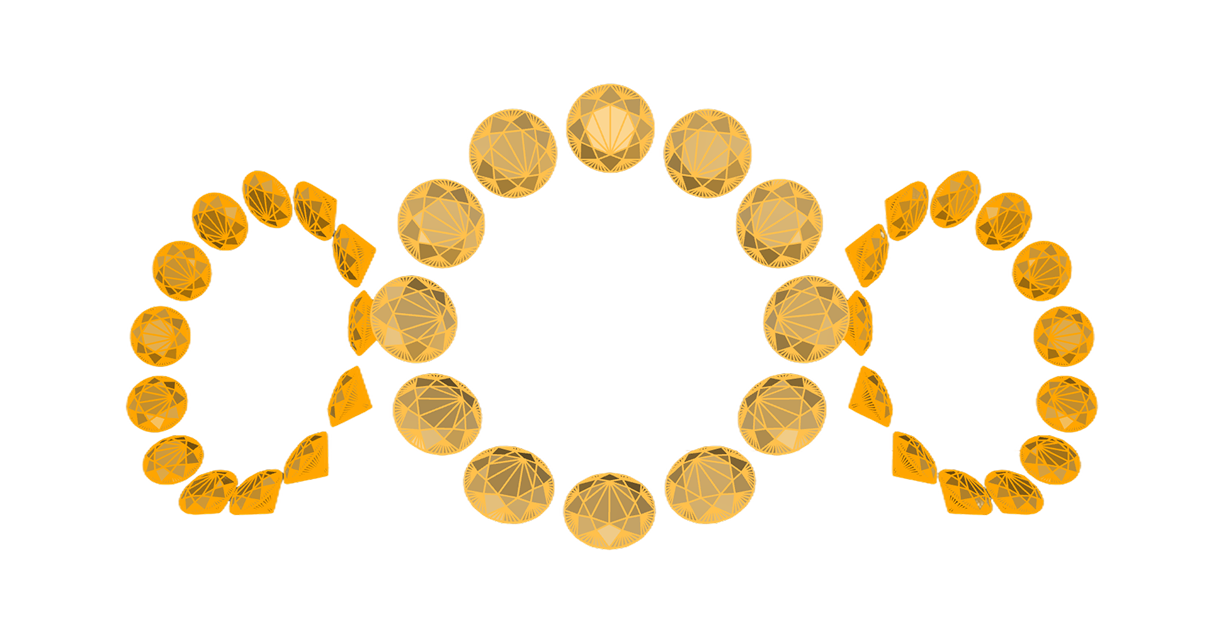
Save the file so the change reaches KeyShot.
Update the Geometry in KeyShot
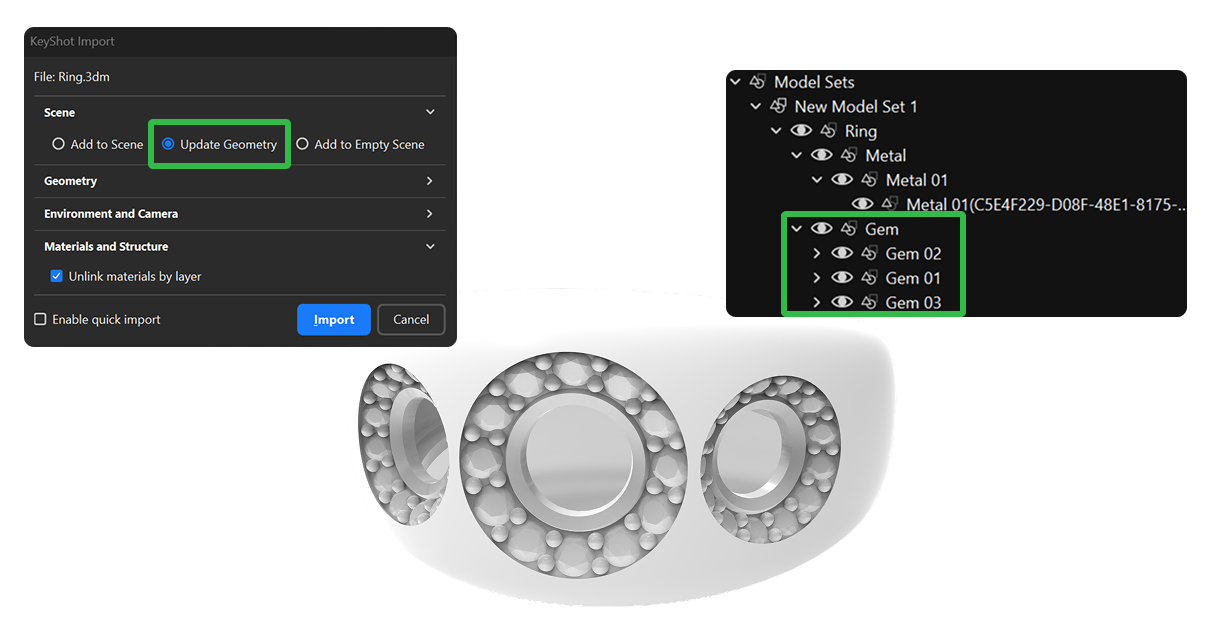
Drag the ring into the KeyShot workspace again, but this time select Update Geometry. This replaces the geometry that’s already in the scene instead of bringing in a second copy of the ring. You’ll now see the three layers, which makes it easy to apply different materials to each gem group.
Add the Display
The display is a separate piece of the scene, and it’s worth importing it as one. Drag your display into the scene and change the option to Add to Scene, adding it to a separate Model Set to keep your project organized. The rings and the display stay as separate blocks in the tree, so each one is easy to find and move later.
Position the First Ring on the Display
Instead of eyeballing the contact between the ring and the cushion, we’ll let KeyShot do the physical work: place the ring roughly above the display and drop it.
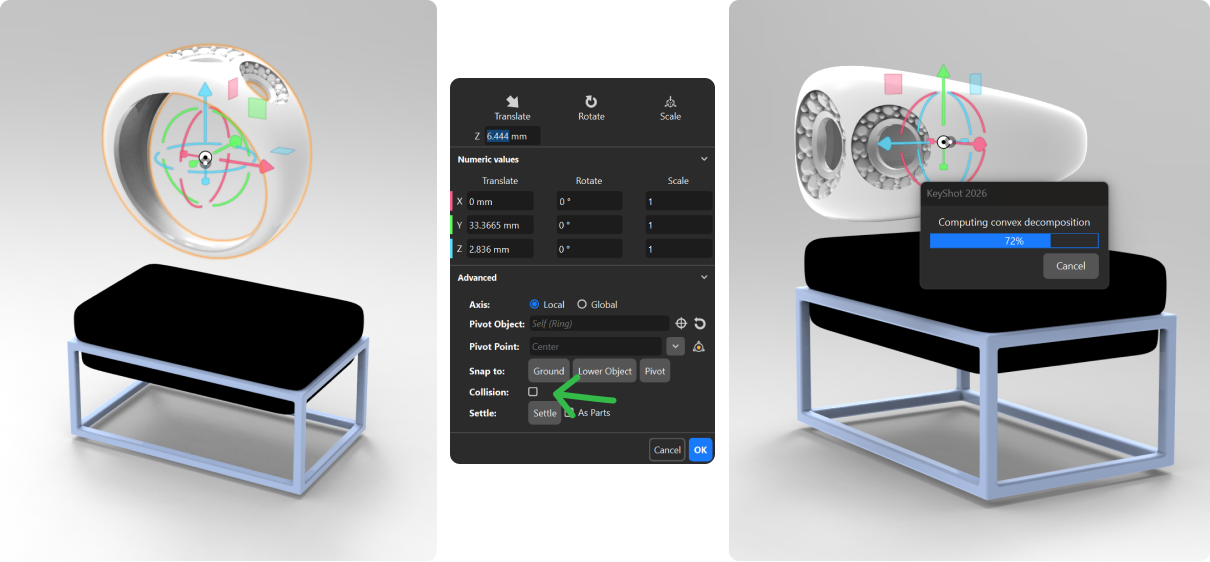
Zoom out with the mouse wheel. In the Scene panel, select the Ring, and at the bottom click the Move Tool, which is similar to RhinoArtisan’s gumball. Use the arrows to place it on top, then rotate it 90° on the X axis. Leave it just above the display, because Settle works by letting the piece fall and needs a little room.
Enable Collision on the ring, and do the same with the display cushion. Both parts need it: the ring has to know what it can land on, or it will drop straight through. Depending on your computer, this may take longer or shorter to compute. If it’s too slow, you can position it manually with the gumball instead.
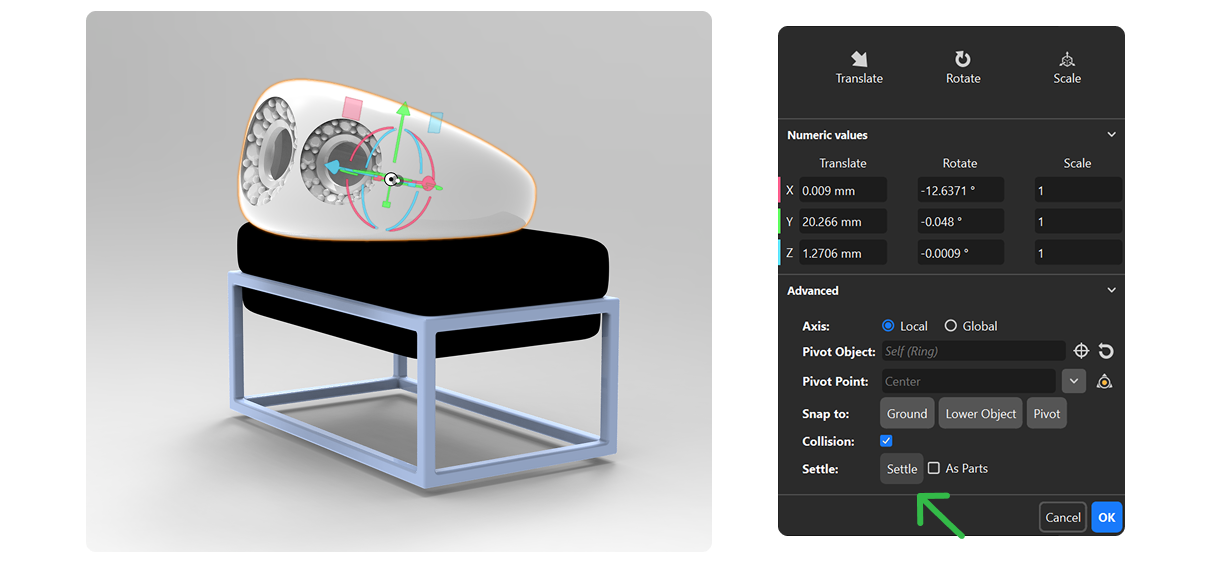
Select the ring again and, in the Move Tool, click Settle. The ring will drop perfectly onto the cushion.
The way the metal meets the leather is now the one physics calculated, not one you approximated by hand, and that’s exactly what reads as real in the final image.
Duplicate the Ring
The second ring doesn’t need to be imported again, because a copy keeps the layers and the setup you’ve already prepared. Copy the ring and paste it into the same Model Set to create a duplicate.
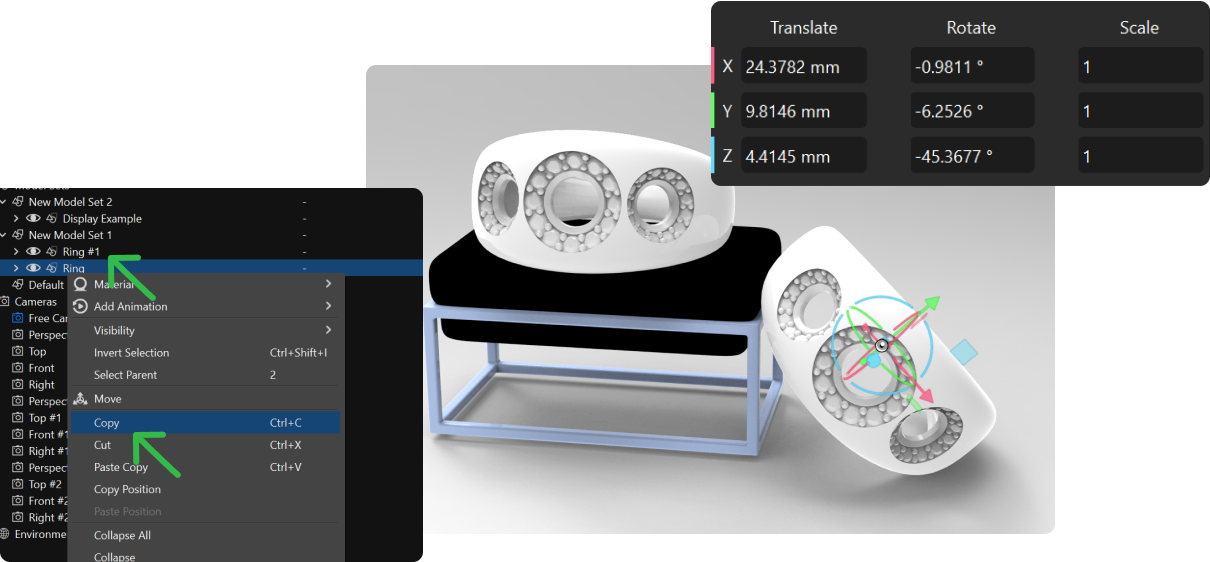
Position it roughly where you need it with the gumball, enable Collision, and click Settle. The second ring is positioned automatically, following the same routine as before: rough placement by hand, precise contact by physics.
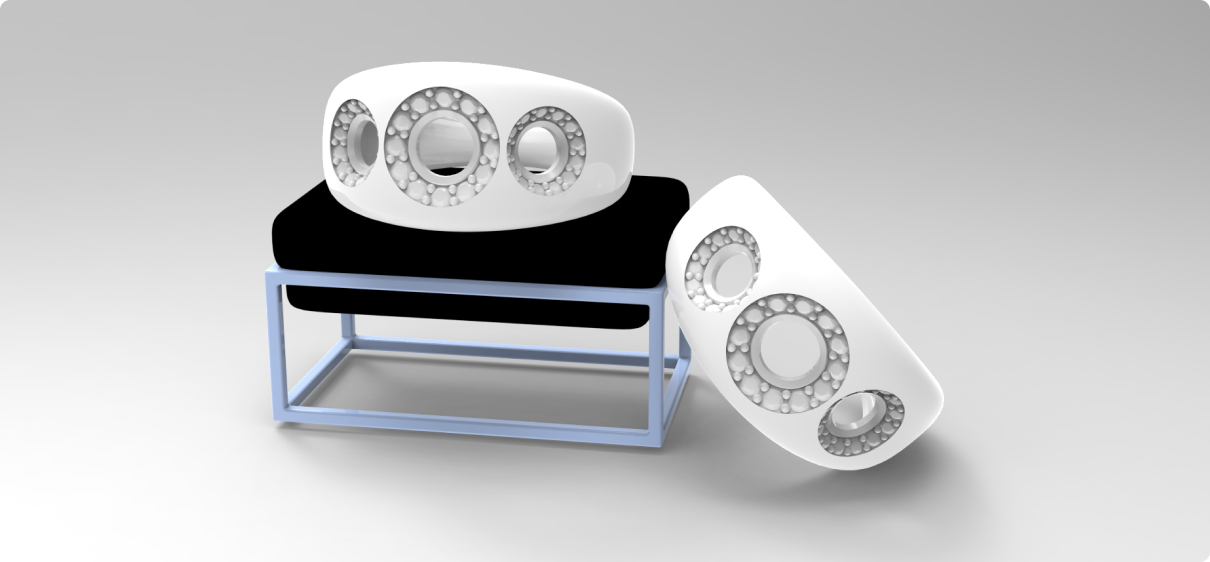
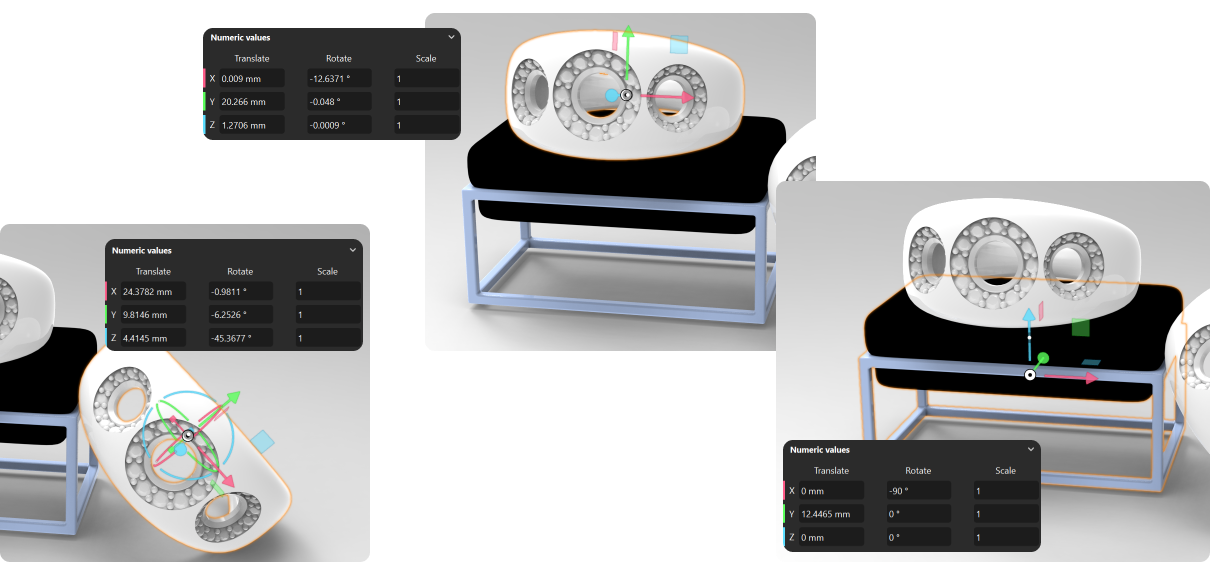
If you position it with the gumball instead, you can match the values shown in the image to set it up like the tutorial.
Next Lesson: Applying Materials
Almost there — you still have some lessons to complete. Jump to the next one →
Impersonating — progress and reviews are disabled.
Course completed
You've completed From RhinoArtisan to Keyshot: Jewelry Rendering Essentials 🎉
Great work. Get your certificate of completion and, if you have a minute, let other jewelers know what you thought of the course.