RhinoArtisan Modeling
Lesson 23 of 31
Positioning and Projecting Curves
Sign in to access this lesson
This lesson is part of From RhinoArtisan to Keyshot: Jewelry Rendering Essentials, which can come bundled with a RhinoArtisan Commercial license subject to current promotions. Log in with your customer account, or get in touch and we'll set you up.
Customers only
Solo para clientes
This lesson is part of From RhinoArtisan to Keyshot: Jewelry Rendering Essentials, which can be included with a RhinoArtisan Commercial license subject to current promotions. If you've already purchased and don't see it in your account, get in touch.
Objective: Learn how to position and project curves onto the shank for the lateral channel, and mirror them to obtain a symmetrical setting on both sides.
The two circles from the previous lesson still lie on the construction plane, not on the metal. Before they can define a channel, they need to follow the curvature of the shank, and that takes two moves: first we place them on the surface, then we project them onto it.
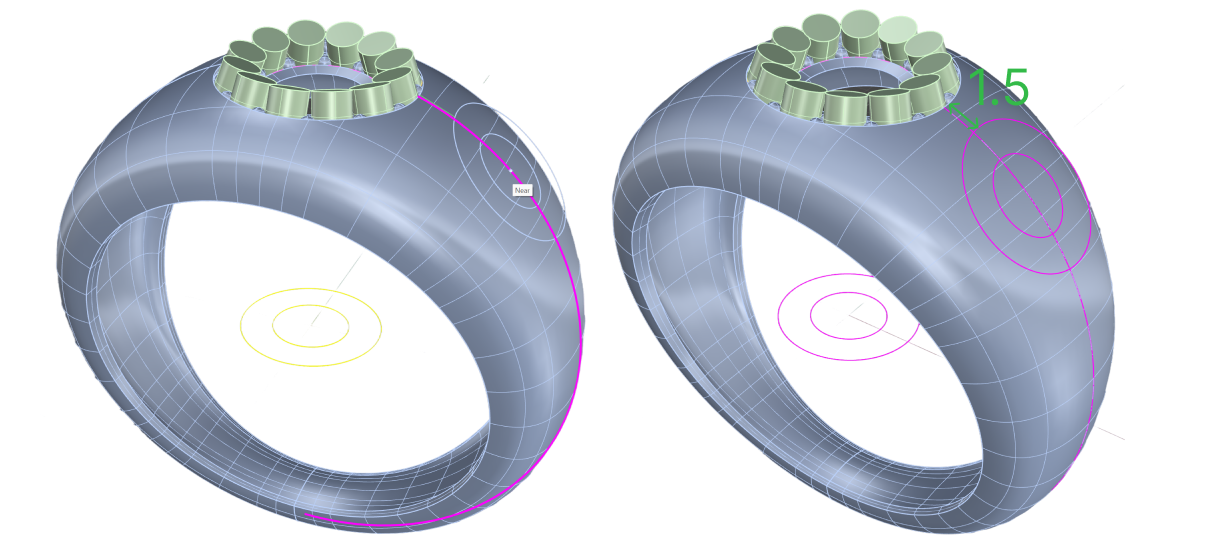
To begin, go to the Transform tab and use the Quick Orient on Surface command. This command drops objects directly onto a surface, so the curves will sit on the shank instead of the flat plane where we drew them, guided by the isocurve we extracted earlier.

The command bar walks you through the rest. It first prompts you to select a base geometry, which is the shank. Next it asks for the objects to orient: select both curves and press Enter. Finally, with Osnap active, choose a point on the isocurve approximately 1.5 mm away from the central channel. That small separation is what keeps the lateral setting from running into the central one.
Setting the Work Plane for Projection
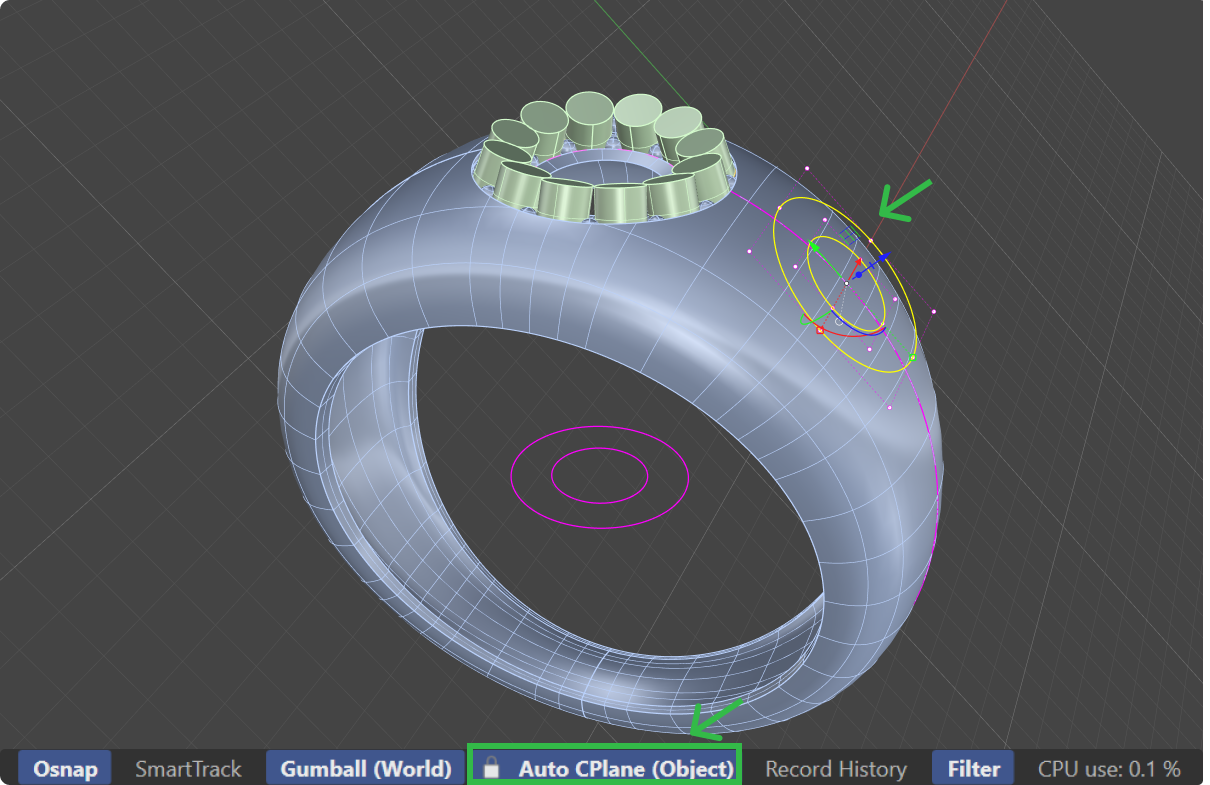
Project pushes the curves in the direction perpendicular to the active construction plane, so the plane you are working on is what decides where they land on the model.
Select one of the positioned curves as a reference, and in the lower toolbar click on Auto CPlane to change the working plane. The construction plane now matches the plane of that curve, so the projection will travel straight into the side of the shank.
Projecting the Curves
Now we can project the curves onto the surface. Go to the Curve tab, select the curves and click the Project command.

In the command bar, it will ask for the surface to project onto: select the shank and press Enter. The curves are now drawn on the metal itself, wrapping around the shank.
Cleaning Up the Curves
Because the projection travels straight through the model, it also lands on the lower part of the shank, and those copies are of no use to us. Delete them and keep the upper curves: the larger curve on the top and the smaller one on the inner side of the shank. These two are the outlines the lateral channel will be built from in the next lesson.
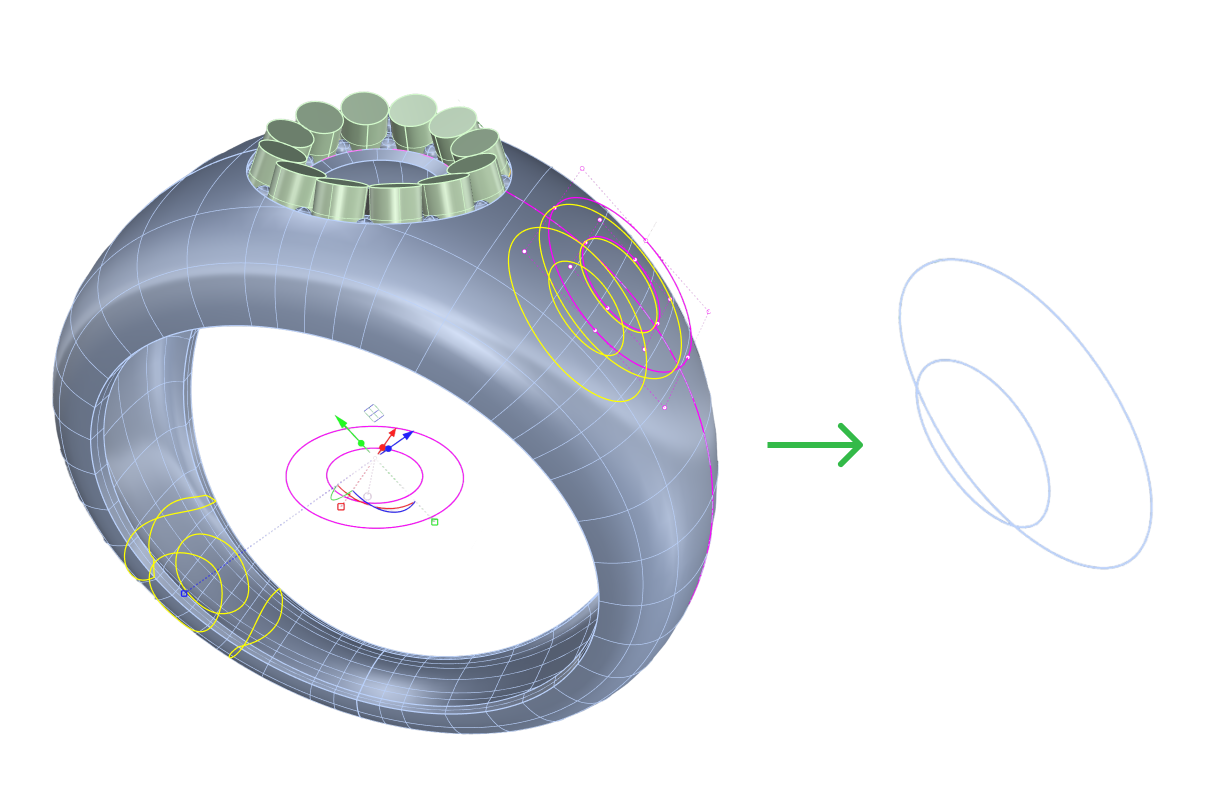
Once the view is clean, deactivate the Auto CPlane option so the commands that follow go back to working on the standard construction plane.
Creating a Mirror of the Projected Curves
The design needs the same channel on the left side. We could project a second pair of curves, but mirroring the ones we already have guarantees that both sides come out identical.
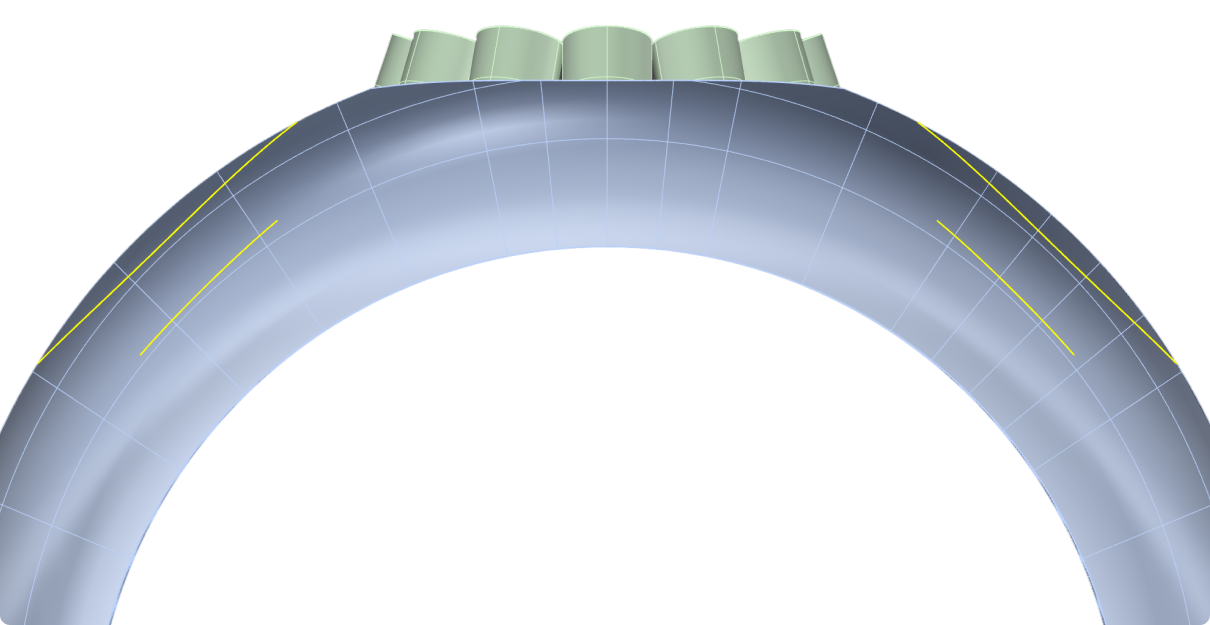
In the Transform tab, select the projected curves and click the Mirror command.

Set the central axis point by typing 0 in the command bar and pressing Enter to confirm. Starting from the origin keeps the mirror centered on the model. Then, in the Front view, hold down Shift and click on the top of the model to create the mirror in the correct position. Holding Shift constrains the direction, so the mirror axis stays perfectly vertical.
Next Lesson: Creating the Lateral Channels for Setting
Almost there — you still have some lessons to complete. Jump to the next one →
Impersonating — progress and reviews are disabled.
Course completed
You've completed From RhinoArtisan to Keyshot: Jewelry Rendering Essentials 🎉
Great work. Get your certificate of completion and, if you have a minute, let other jewelers know what you thought of the course.