KeyShot Render
Lesson 31 of 31
Creating the Lighting and Render
Sign in to access this lesson
This lesson is part of From RhinoArtisan to Keyshot: Jewelry Rendering Essentials, which can come bundled with a RhinoArtisan Commercial license subject to current promotions. Log in with your customer account, or get in touch and we'll set you up.
Customers only
Solo para clientes
This lesson is part of From RhinoArtisan to Keyshot: Jewelry Rendering Essentials, which can be included with a RhinoArtisan Commercial license subject to current promotions. If you've already purchased and don't see it in your account, get in touch.
Objective: Import the environment, build custom lighting with a spot light, add a backdrop, and produce your final render.
Materials give the piece its finish, but it’s the lighting that makes it read as jewelry. Here we’ll set the environment, add a light of our own to control where the highlights fall, and put the rings on a backdrop before the final render.
Import and Apply the Environment
The environment is what lights the scene and what the metal and the gems reflect, so it’s the first thing to put in place. Import the provided environment the same way you imported the materials, then apply it by dragging it into the Environments panel.
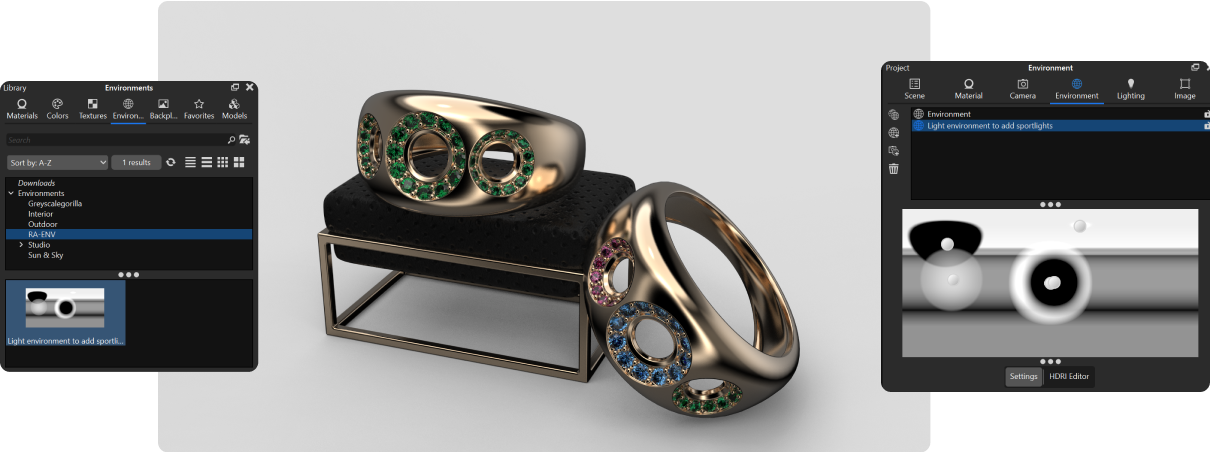
Add a Spot Light
This environment doesn’t light the scene much, so we’ll add a light of our own. In KeyShot any piece of geometry can become a light source, so we start by adding an object and later turn its material into a light. Go to Edit → Add Geometry and add a Sphere.
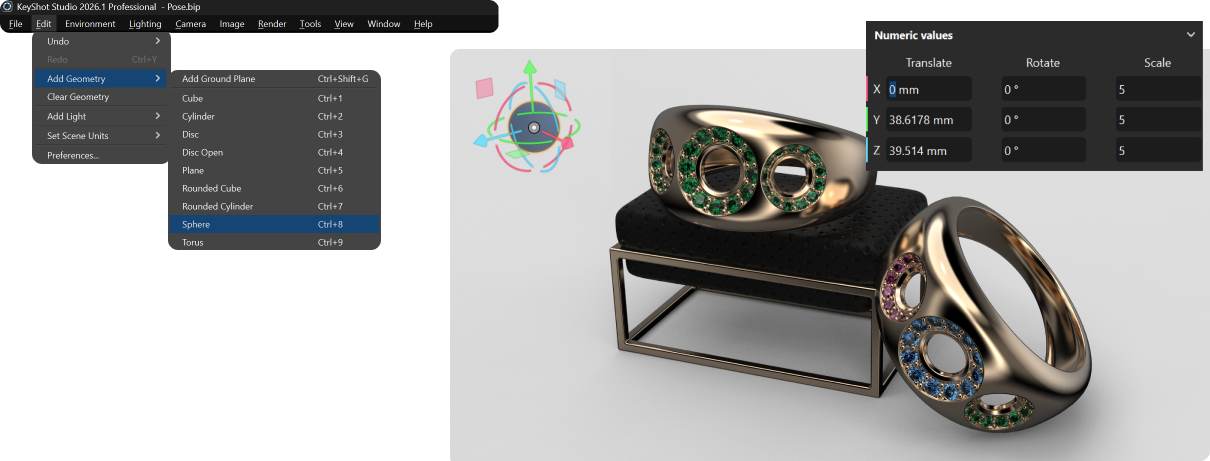
You’ll be moving around the scene to place the sphere, so save the view you’ve already framed first. If you’ve already positioned the camera and don’t want to lose the current view, go to Camera and add one. Name it and it will be saved: if you move and then return to that camera, your view is kept.

Turn the Sphere into a Light
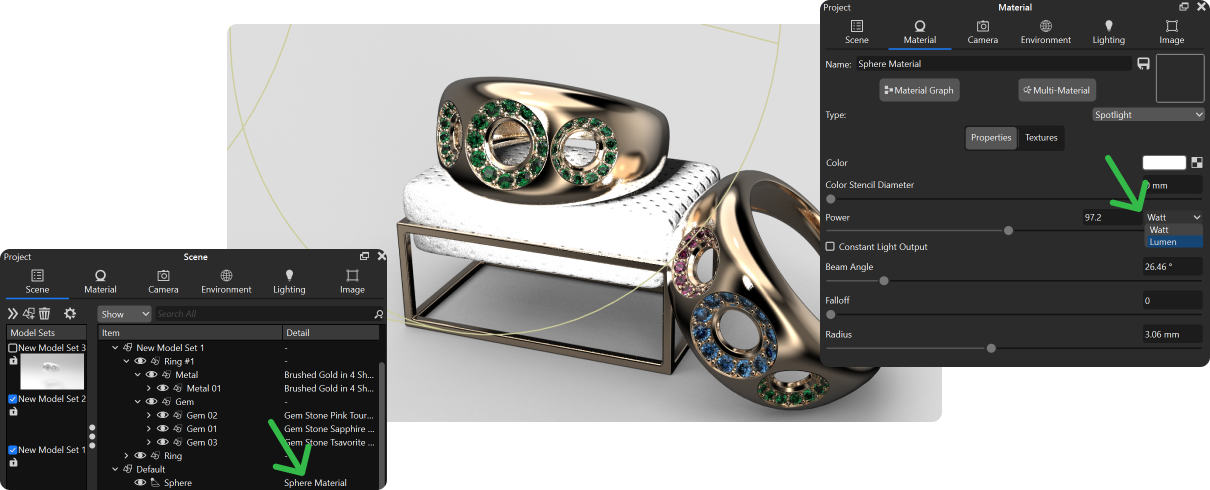
Zoom out to position the sphere and place it away from the model, toward the top. In the Scene panel, double-click its default material and choose Spot Light, and aim the spot at the scene. The sphere stops behaving like an object and starts lighting the piece.
It will light the scene too strongly and burn it, so adjust the parameters: switch from Watt to Lumen and tune the values to taste, until the piece is bright but the highlights still hold their detail.
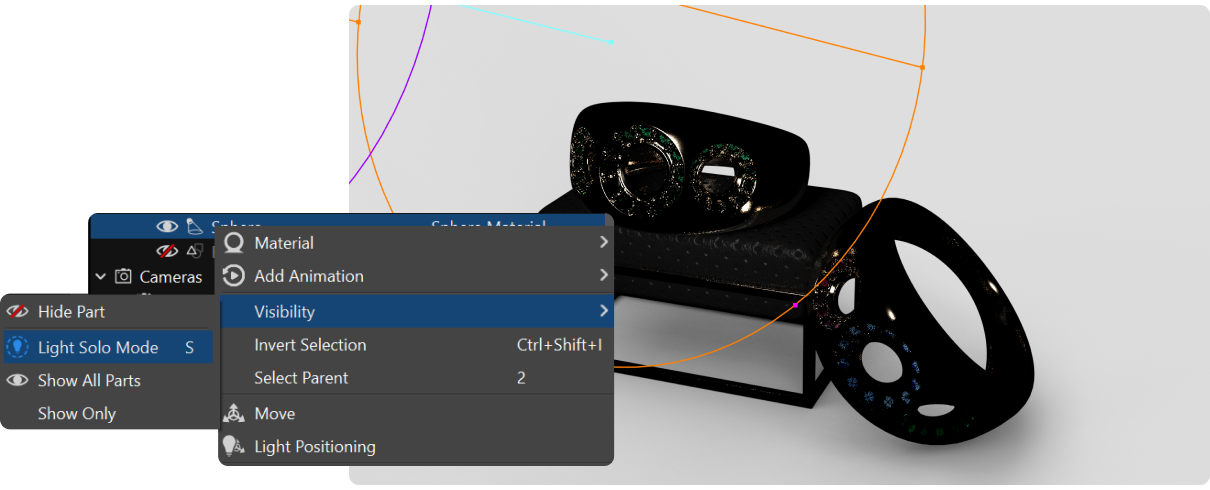
Enabling the only lights visualization, by right-clicking the element in the Scene panel, lets you control and see exactly what each light affects. Judging one light at a time is what lets you create custom lighting, with shadow and light zones to your taste.
Edit the Environment (Optional)
The spot light isn’t the only way to shape the lighting: the environment itself can be edited. You can work on it directly in the Environment panel, where you can create your own environments or modify existing ones. Just by moving the pieces in the editor you can enable or disable panels and change tones and brightness.
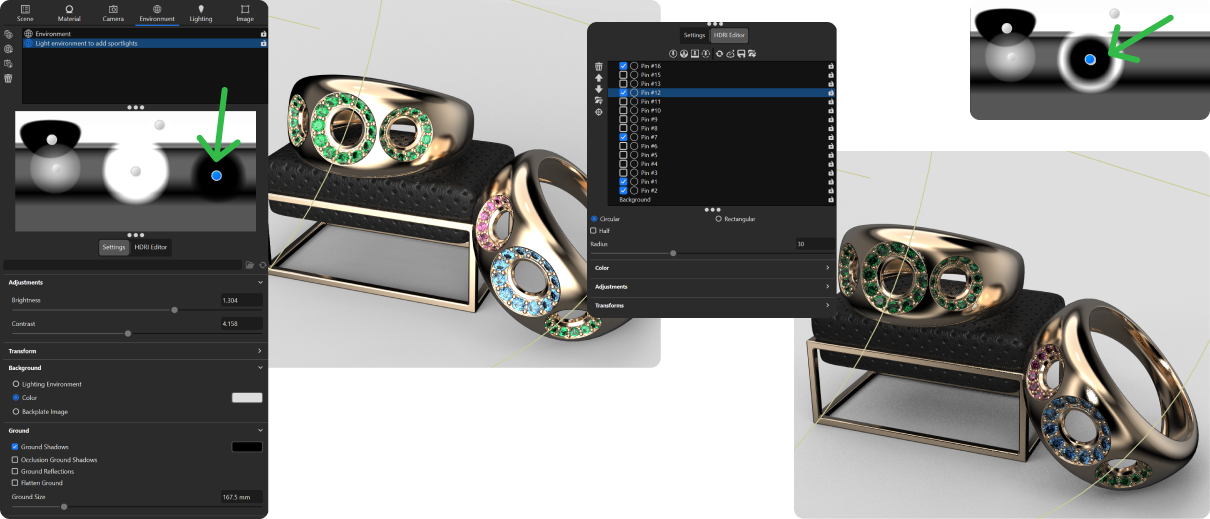
We encourage you to try different combinations, create your own environments, and share your results. Try the environments from the first render too, and play with the lights. This is what adds the most realism to your render.
Add a Backdrop and Render
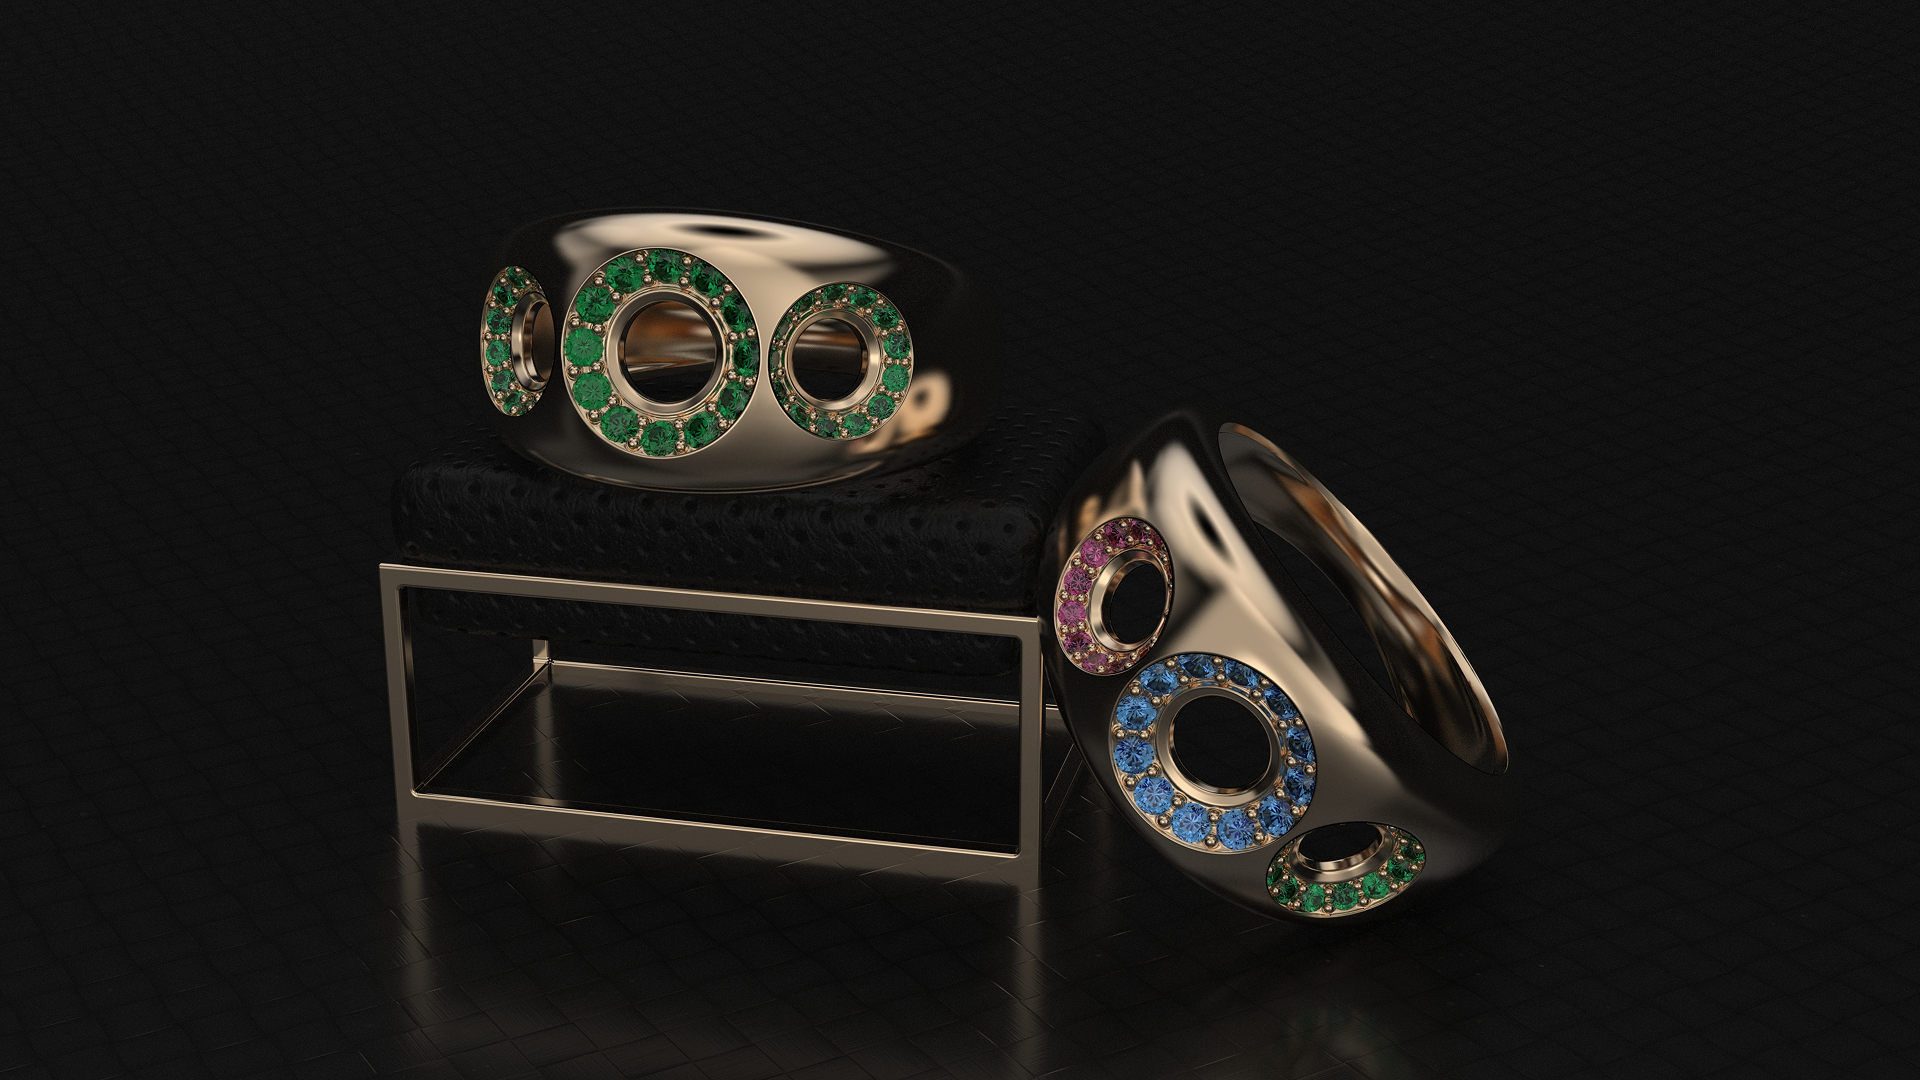
The rings sit on the display, but there’s nothing underneath for the shadows and reflections to land on. To finish, you can add a floor. In Models, KeyShot offers several options, and a double-click on one of them adds it to the scene. In this case, add the backdrop.
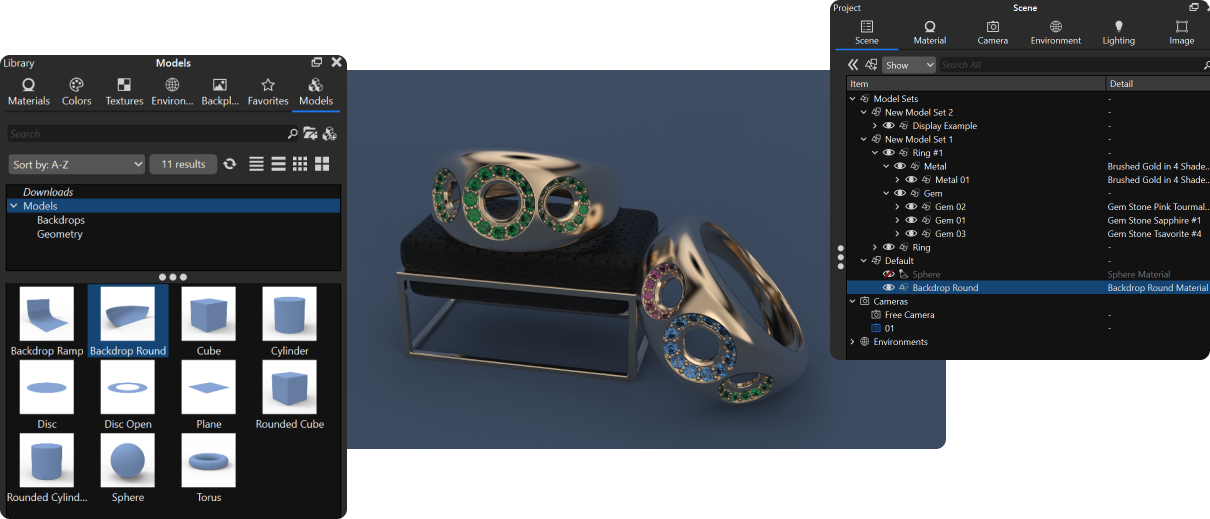
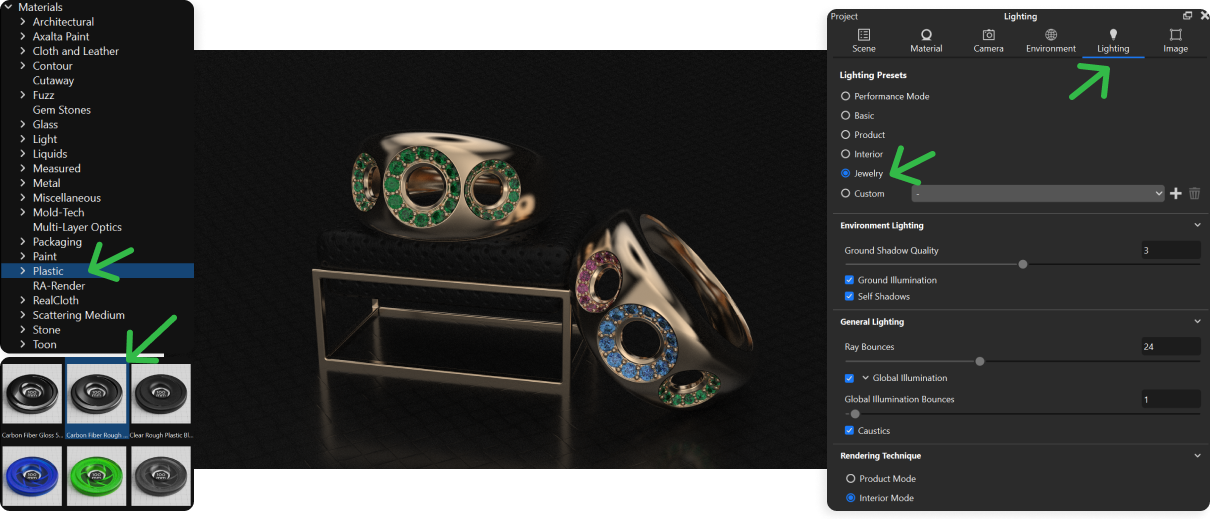
Apply a Plastic Carbon Fiber material to it, and in Lighting change the lighting preset to Jewelry, the preset meant for pieces with stones and polished metal.
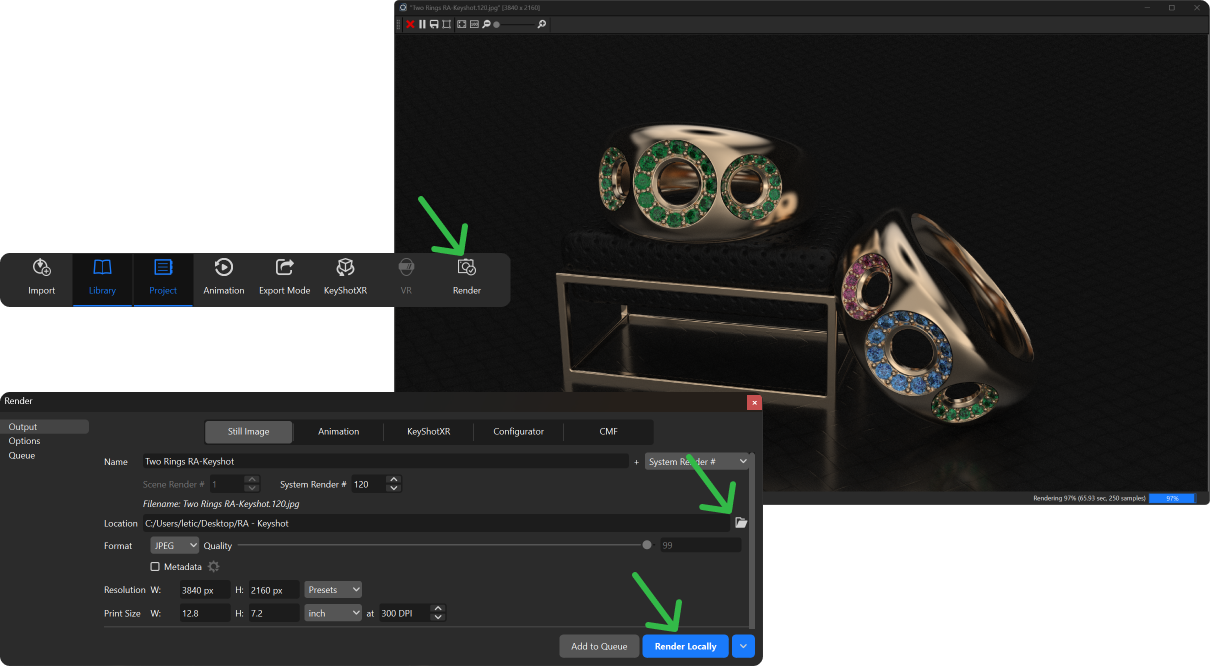
Adjust the camera to frame the piece and create your render, using the same render settings you worked with in your first render.
Congratulations!
You have completed the whole workflow: the ring was modeled in RhinoArtisan, posed in KeyShot, dressed with materials, lit with a light of your own, and rendered. Now you can experiment with other environments, lights, and materials to make each piece unmistakably yours. We’d love to see your renders!
Almost there — you still have some lessons to complete. Jump to the next one →
Impersonating — progress and reviews are disabled.
Course completed
You've completed From RhinoArtisan to Keyshot: Jewelry Rendering Essentials 🎉
Great work. Get your certificate of completion and, if you have a minute, let other jewelers know what you thought of the course.