RhinoArtisan Modeling
Lesson 24 of 31
Creating the Lateral Channels for Setting
Sign in to access this lesson
This lesson is part of From RhinoArtisan to Keyshot: Jewelry Rendering Essentials, which can come bundled with a RhinoArtisan Commercial license subject to current promotions. Log in with your customer account, or get in touch and we'll set you up.
Customers only
Solo para clientes
This lesson is part of From RhinoArtisan to Keyshot: Jewelry Rendering Essentials, which can be included with a RhinoArtisan Commercial license subject to current promotions. If you've already purchased and don't see it in your account, get in touch.
Objective: Learn how to create the lateral channels for setting by trimming, lofting, and joining surfaces to form a solid.
The curves we projected and mirrored in the previous lesson are the outline of the lateral openings. Now we’ll cut those openings out of the shank, close the walls they leave behind, and join everything back into one body. Trim, loft, join, and only then check that the model is still a solid.
We start by removing the material inside the projected outlines. In the upper-left corner, click on the Trim icon.

As in the central setting, the command works in two stages. When the command bar prompts you for the cutting objects, select the four projected curves and press Enter. When it asks for the elements to cut, click inside the projected curves to trim the shank and press Enter to complete the trimming process.
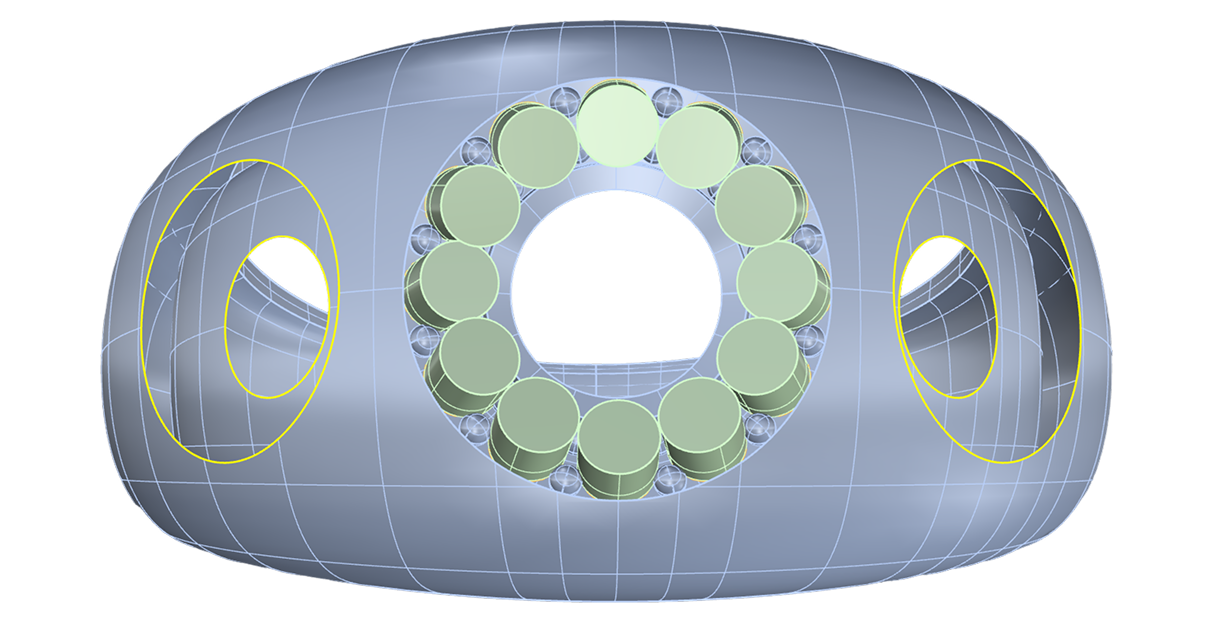
The curves have done their job, so you can now hide them to declutter the view. With them out of the way, the open edges of the cut are easy to see and select.
Lofting to Close the Cut Surfaces
Trimming opens the shank along the cut, so the model is no longer closed. Lofting builds a new surface between the two edges of the opening and turns it back into a solid piece.
Go to the Surface tab and use the Loft command to close the cut surfaces and create a solid.

Select the two edges of the cut and press Enter. In the options window, set Rebuild with 18 control points and click OK, for the same reason as in the central setting: a clean surface with evenly spaced control points is easier to join.
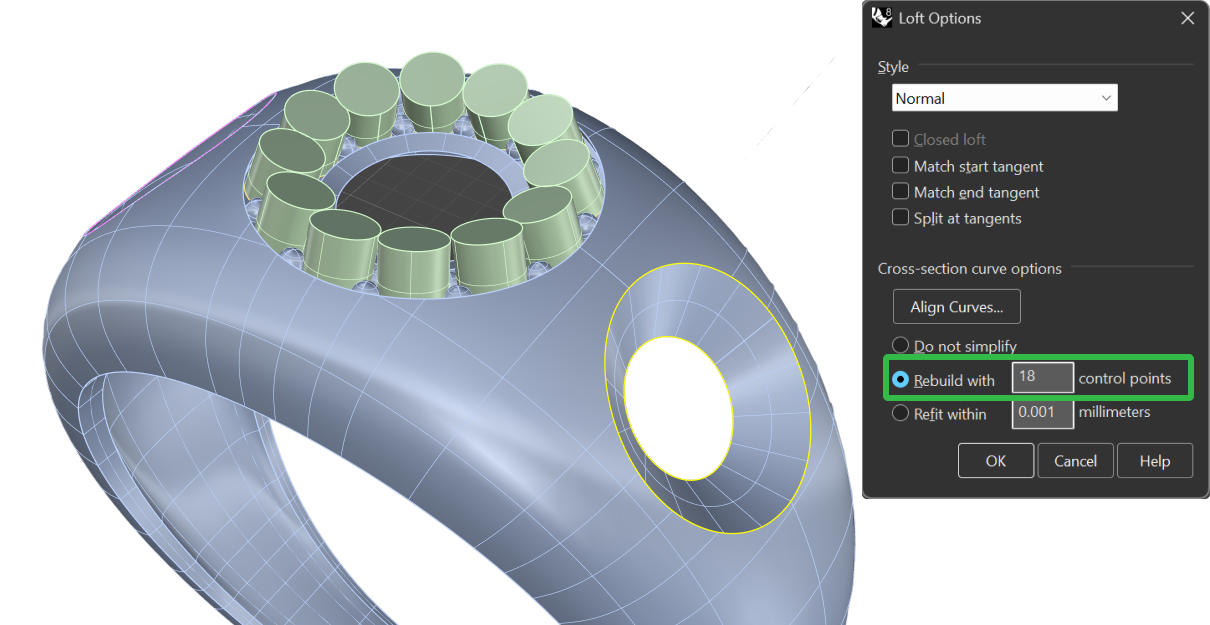
Repeat the same process for the other side. Both openings come from mirrored curves, so treating them identically keeps the design symmetrical.
Joining the Lofts and Shank
At this point the shank and the two lofted surfaces are still three separate pieces. Joining them makes the model behave as a single body.
To create the final solid, select both lofts and the shank. Click on the Join command, located next to the Trim icon in the upper-left corner.

Verifying the Solid
Joining doesn’t always close every edge, so it’s worth checking before moving on rather than discovering the problem later.
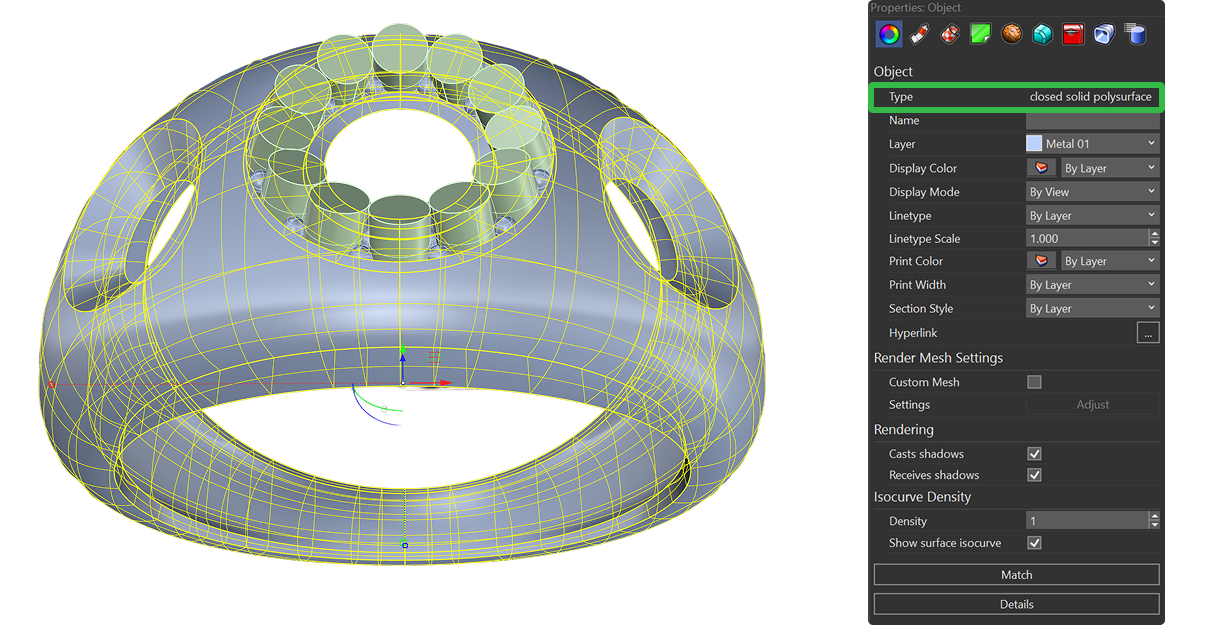
To verify that the result is a solid, select the model and press F3 to view its properties. In the properties panel, you should see the description: Closed Solid Polysurface. That confirms you have a single, complete solid element, which is what the Boolean operations in the next lessons need in order to work correctly.
If You Don’t Have a Closed Solid Polysurface
If the properties say anything else, there’s a gap somewhere along the join. Instead of guessing where it is, let RhinoArtisan show you: use the Show Edges command from the Analyze tab.

This command lets you see which edges are open, as in this example.
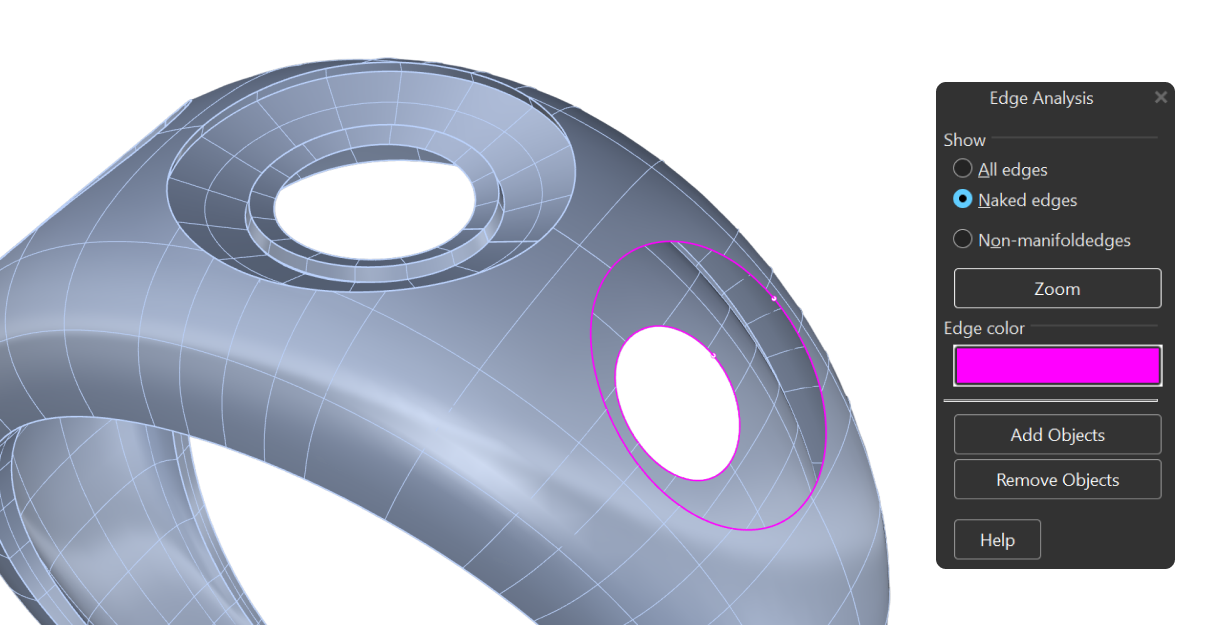
To fix it, you can either redo the loft in that spot or use the Merge command, found in the Surface tab.

This command lets you merge two surfaces. If you still don’t get the result, repeat the process from the start, at the point where the open edge was created. Rebuilding that section cleanly is quicker than patching a gap that keeps coming back.
Next Lesson: Creating the Lateral Channels
Almost there — you still have some lessons to complete. Jump to the next one →
Impersonating — progress and reviews are disabled.
Course completed
You've completed From RhinoArtisan to Keyshot: Jewelry Rendering Essentials 🎉
Great work. Get your certificate of completion and, if you have a minute, let other jewelers know what you thought of the course.