RhinoArtisan Modeling
Lesson 19 of 31
Preparing the Central Setting
Sign in to access this lesson
This lesson is part of From RhinoArtisan to Keyshot: Jewelry Rendering Essentials, which can come bundled with a RhinoArtisan Commercial license subject to current promotions. Log in with your customer account, or get in touch and we'll set you up.
Customers only
Solo para clientes
This lesson is part of From RhinoArtisan to Keyshot: Jewelry Rendering Essentials, which can be included with a RhinoArtisan Commercial license subject to current promotions. If you've already purchased and don't see it in your account, get in touch.
Objective: Learn how to prepare a central setting by creating and projecting curves onto the ring shank, trimming the surface, and forming a solid using loft.
The central setting starts as two flat circles drawn in the Top view. Once we project them onto the band they become the outline of the opening that passes through the metal, so the diameter we give them now is what decides how wide the setting ends up being.
Go to the Curve tab and use the Circle command.

Set the center point to 0 in the command bar and press Enter. Typing 0 places the center at the origin, which is where the ring itself is centered, so the setting comes out symmetrical on both sides of the band.
Ensure that the option in the command bar is set to Diameter, and input 8 mm as the diameter. This is the larger of the two circles and it defines the opening on the top of the shank.
Keep in mind that when the command is already working in diameter mode, the command bar still shows a Radius option: that’s the toggle to switch over to radius, not the mode you are currently in. It’s an easy one to misread. The options should appear as shown in the reference image.
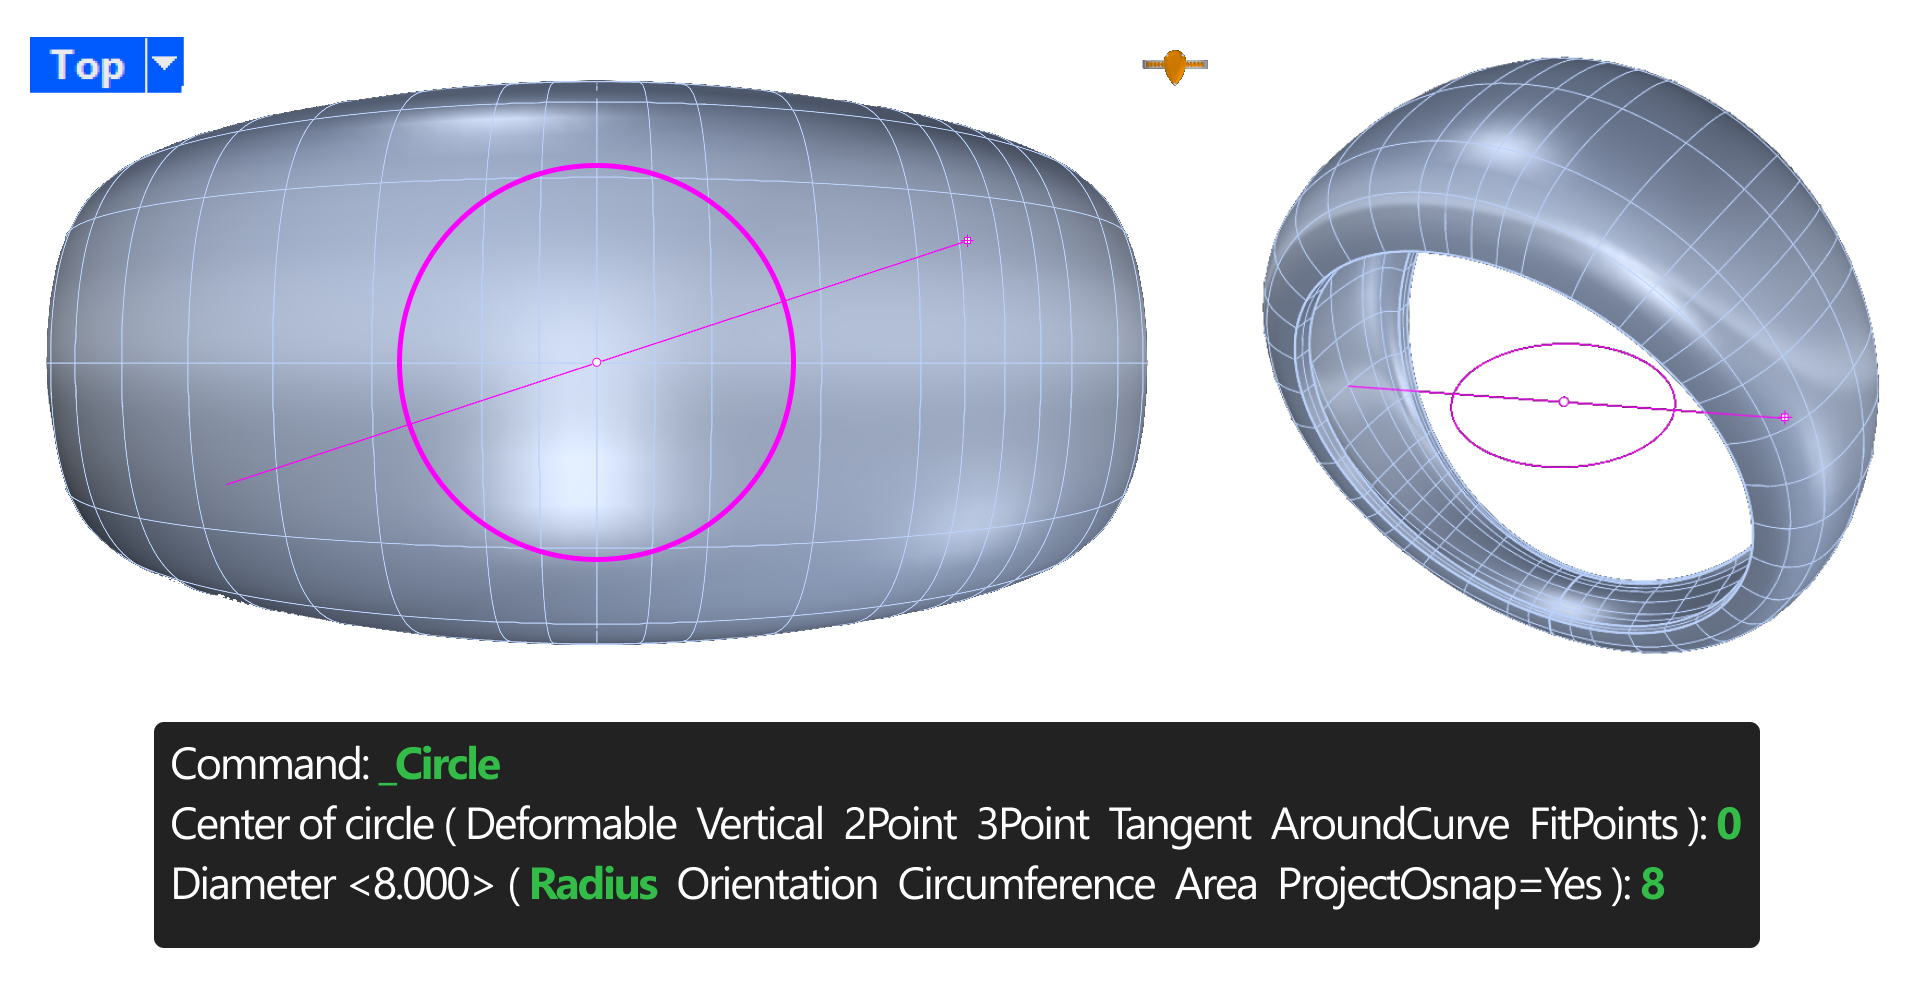
Make sure you are in the Top view when you click to create the circle, ensuring the correct plane is used.
Creating the Second Circle
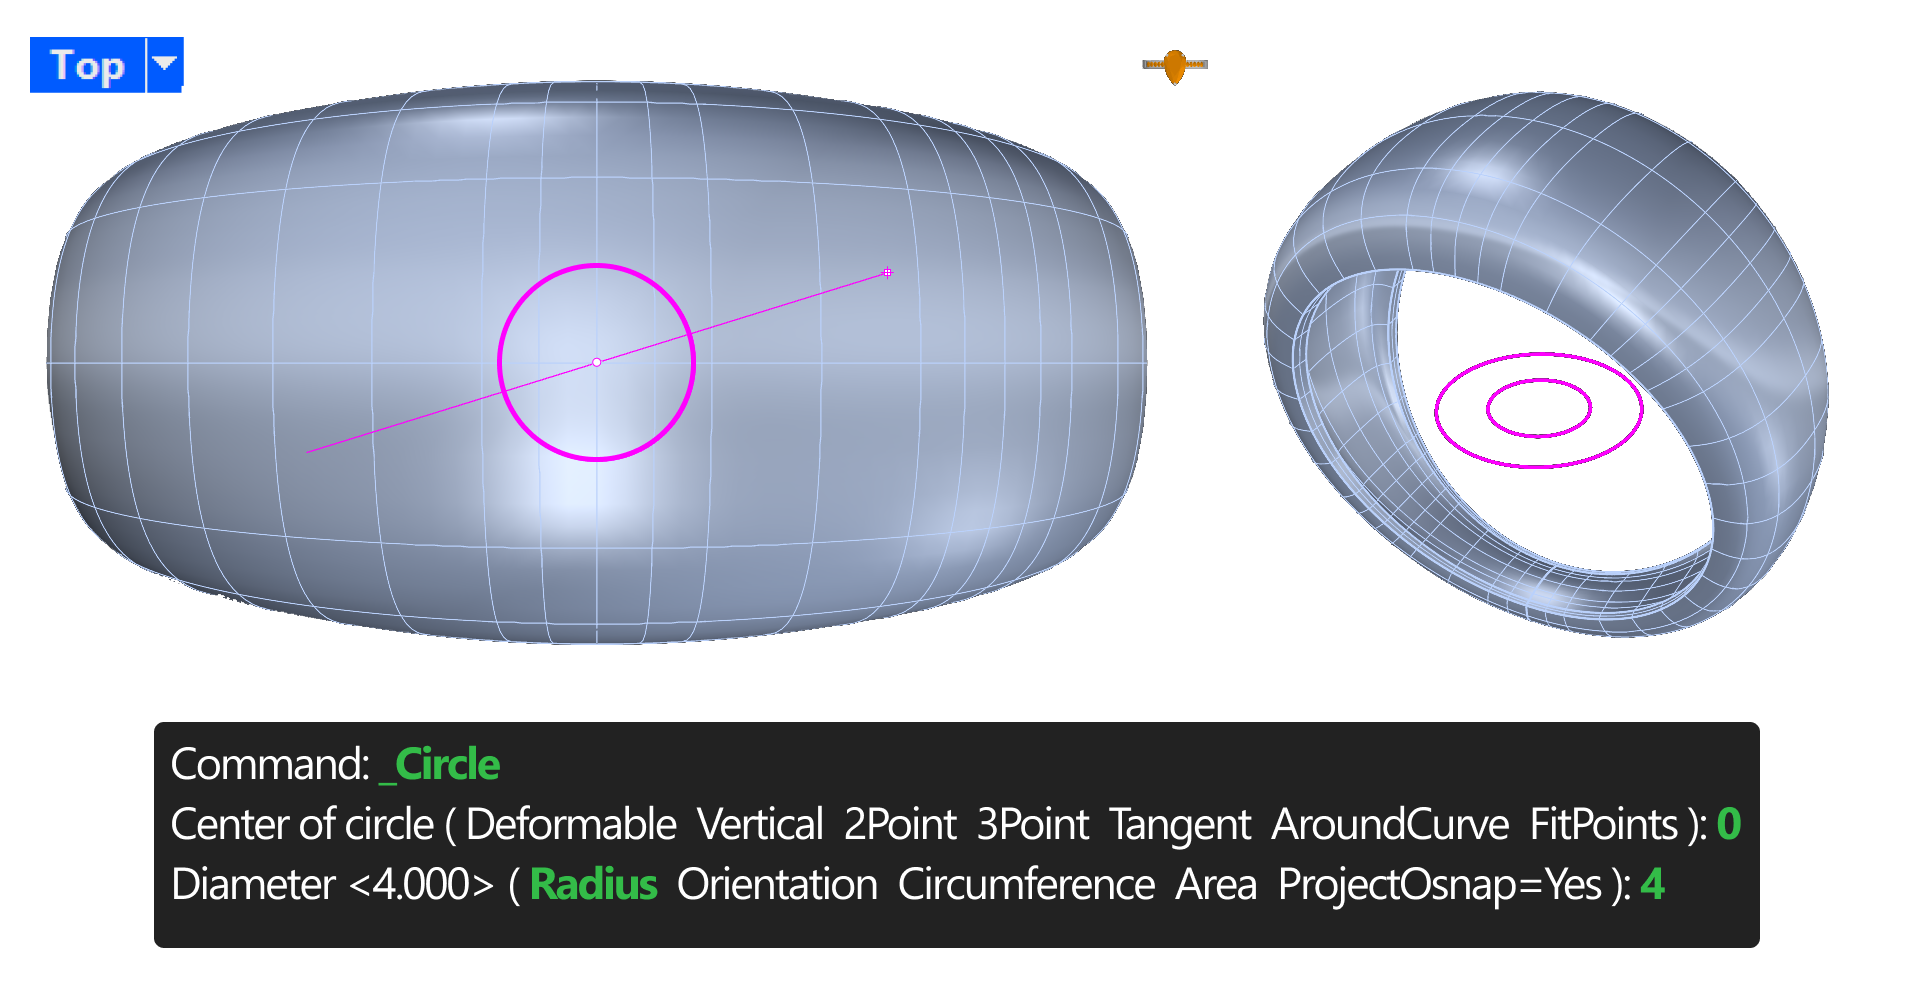
Create another circle with a diameter of 4 mm in the same way. At half the size of the first one, this is the curve that will end up underneath the band, so the opening narrows as it travels through the metal.
Select the Circle command again or right-click to repeat the last command.
Type 0 and press Enter.
Input 4 to set the diameter of the new circle, ensuring you are still in the Top view.
Organizing Curves by Layers
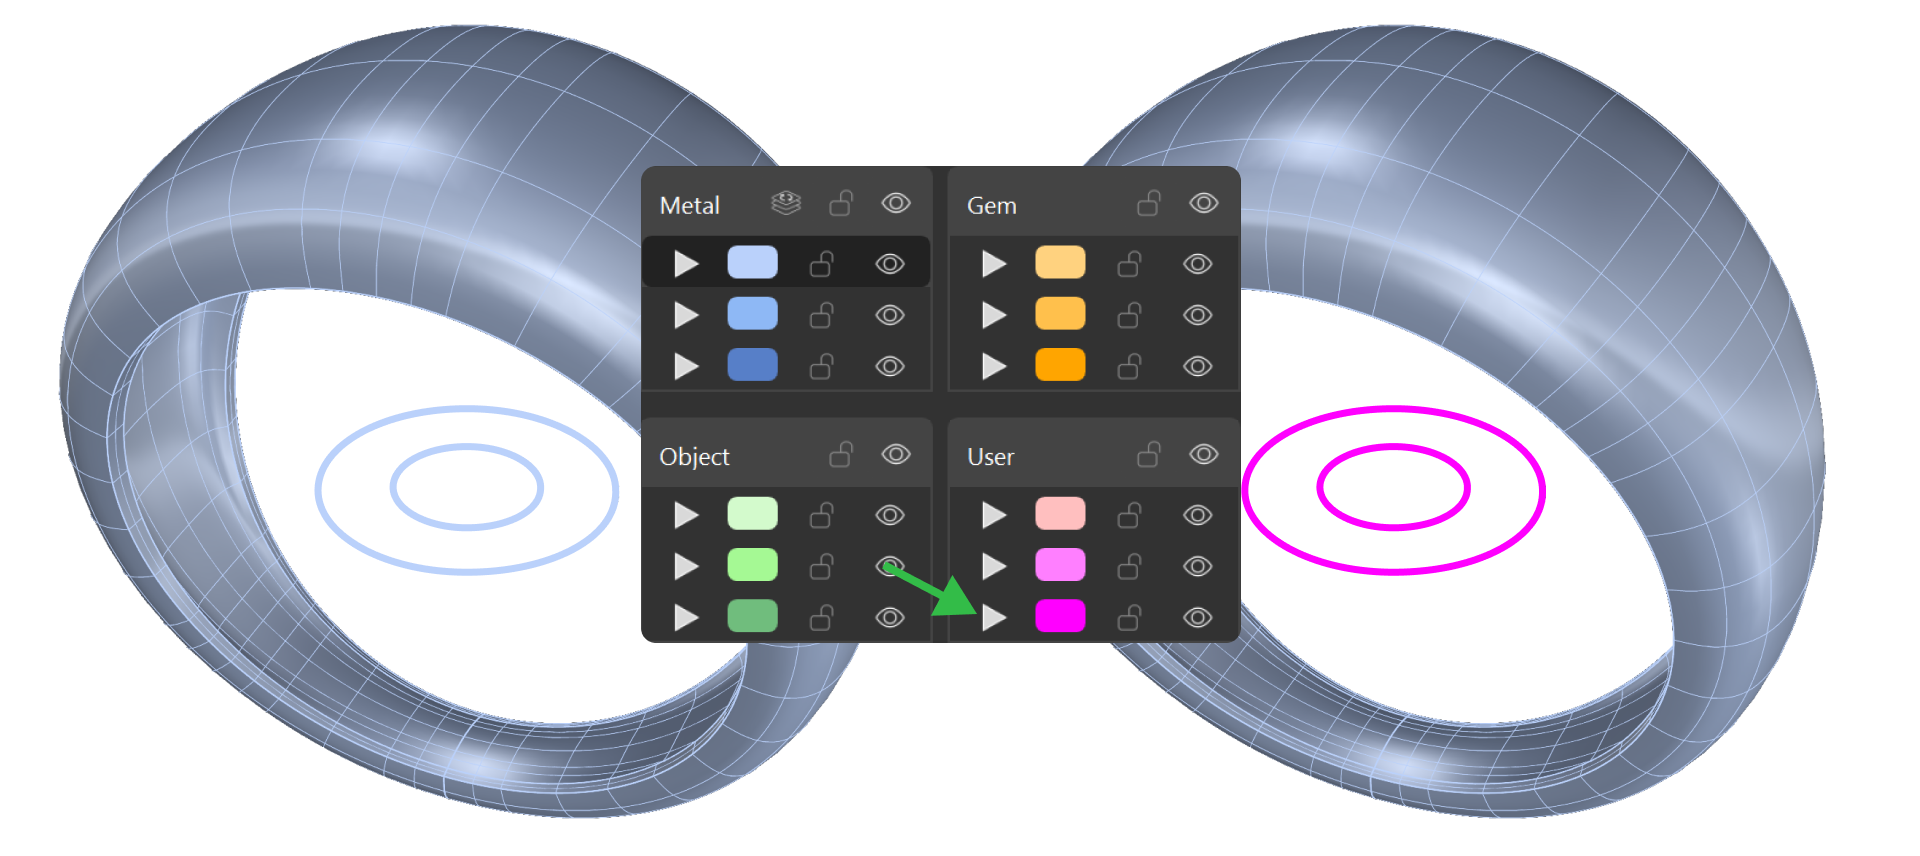
Before projecting anything, it’s worth keeping the drawing tidy. To differentiate the curves, select them and click on the layer arrow to assign them to one of the User layers. In a moment the projection will add a second set of curves on top of these, and having the originals on their own layer is what lets you tell the two sets apart and hide whichever you aren’t working with.
Projecting the Curves
Select the curves and click on the Project command.

The command bar will prompt you to select a surface for projection. Select the ring shank and press Enter. The circles are flat and the band is curved, so projecting wraps each outline onto the surface of the metal.
Once projected, some curves will not be needed: the command leaves a curve everywhere the circle meets the shank. To clearly view the projected curves, select the shank and type Hide in the command bar.
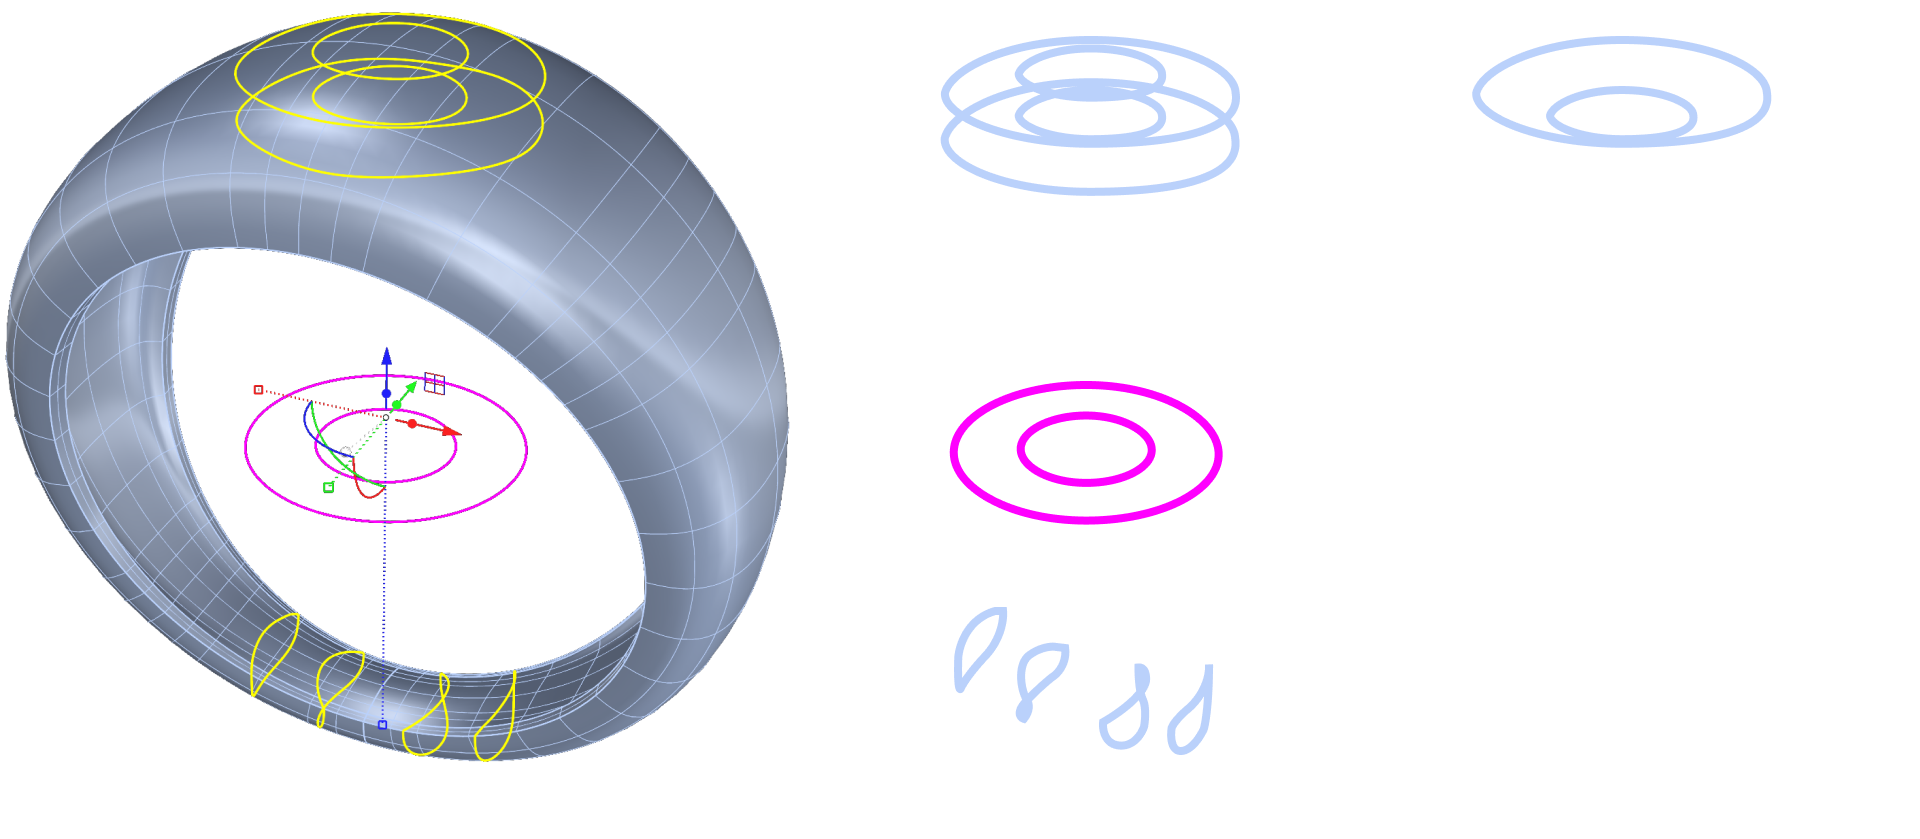
Out of all of them, keep only two: the larger top curve and the smaller bottom curve. Between them they describe the opening we’re after, wide on the outside of the band and narrower on the inside.
You can delete the rest. Retain the original curves as reference by moving them to another layer.
Afterward, type Show to make the shank visible again.
Trimming the Shank
With those two curves in place we can cut away the metal they enclose. In the toolbar in the upper-left corner, click on the Trim icon.

The command bar will prompt you to select cutting objects. Select the two projected curves and press Enter.
Next, the command bar will ask for the objects to trim. Click inside the projected curves to cut the shank, and press Enter to finish. Trim removes exactly what you click on, so click inside the outlines to open the hole and not outside them.

You can now hide the curves.
Creating a Solid Using Loft
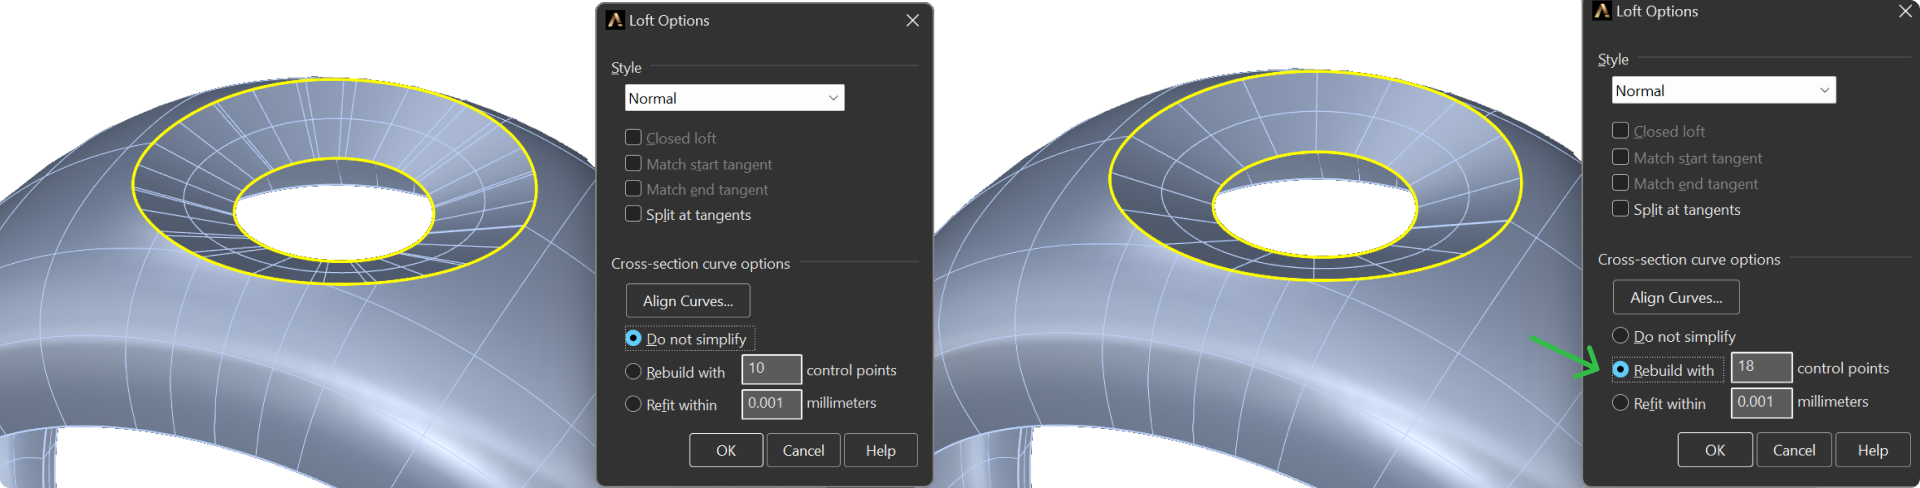
Trimming leaves the shank open along both curves, so now we’ll build the wall that connects them. Go to the Surface tab and use the Loft command to close the trimmed surface and create a solid.

Select the two curves and press Enter.
In the options window, set Rebuild to 18 control points and click OK. Rebuilding gives a clean surface with evenly spaced control points, which is easier to join and to edit further on.
To create the solid, select both the lofted surface and the shank, then click on Join, located next to the Trim icon in the same toolbar in the upper-left corner.

Checking the Solid
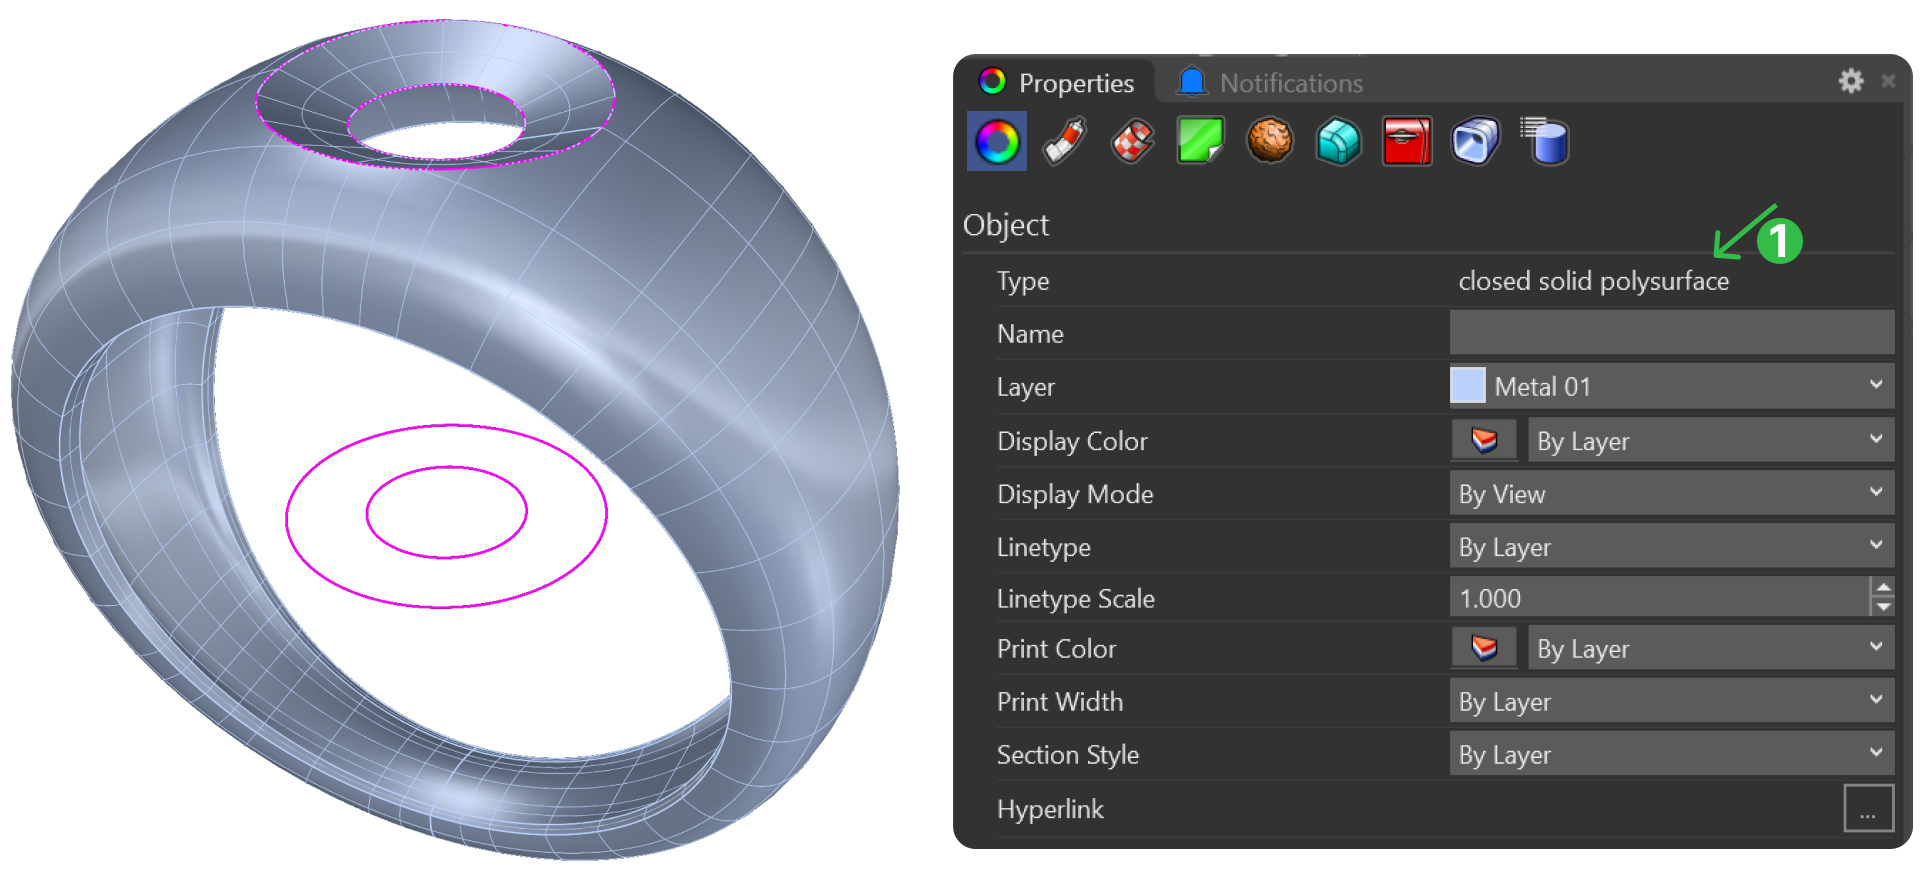
To verify that the object is a solid, select the model and press F3 to view its properties. You should see Closed Solid Polysurface, confirming that it is now a single solid element. It’s worth checking at this point, because the Boolean operations we use in the following lessons need a closed solid to work on. If the surface is still open, the problem only shows up later.
Next Lesson: Creating the Central Channel for Setting
Almost there — you still have some lessons to complete. Jump to the next one →
Impersonating — progress and reviews are disabled.
Course completed
You've completed From RhinoArtisan to Keyshot: Jewelry Rendering Essentials 🎉
Great work. Get your certificate of completion and, if you have a minute, let other jewelers know what you thought of the course.