KeyShot Render
Lesson 28 of 31
Preparing the Model for KeyShot
Sign in to access this lesson
This lesson is part of From RhinoArtisan to Keyshot: Jewelry Rendering Essentials, which can come bundled with a RhinoArtisan Commercial license subject to current promotions. Log in with your customer account, or get in touch and we'll set you up.
Customers only
Solo para clientes
This lesson is part of From RhinoArtisan to Keyshot: Jewelry Rendering Essentials, which can be included with a RhinoArtisan Commercial license subject to current promotions. If you've already purchased and don't see it in your account, get in touch.
Objective: Prepare the model in RhinoArtisan before sending it to KeyShot: apply the Boolean difference with the cutters and offset the gems slightly so they cast a realistic shadow on the metal.
Before the piece travels to KeyShot it needs a short clean-up in RhinoArtisan. Everything we do here is about how the model will behave under light: the metal needs a real seat carved for every stone, and the stones shouldn’t sit perfectly flush against that metal. Two commands are enough, and the difference shows up straight away in the render.
Apply the Boolean Difference
The cutters we built along with the gems are still separate volumes sitting inside the shank. Subtracting them is what actually opens the seats, so the metal reads as a proper setting instead of a stone resting on a solid band.
Go to the Solid tab and use the Boolean Difference command.

As always, the first selection is the one we keep. Select the shank and press Enter, then select the cutters and press Enter. This creates the setting zones for the gems.
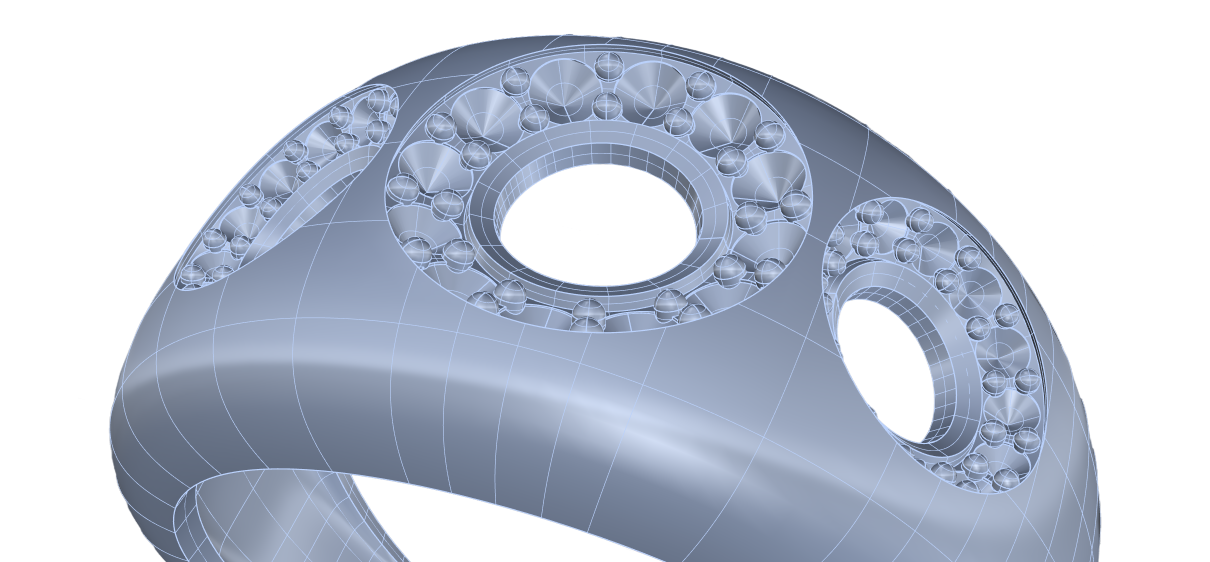
With the seats open, no metal is left running through the volume of the stones. That’s what a render engine needs: where metal and gem overlap, light can’t be reflected and refracted correctly and the stone loses its brilliance.
Select All the Gems
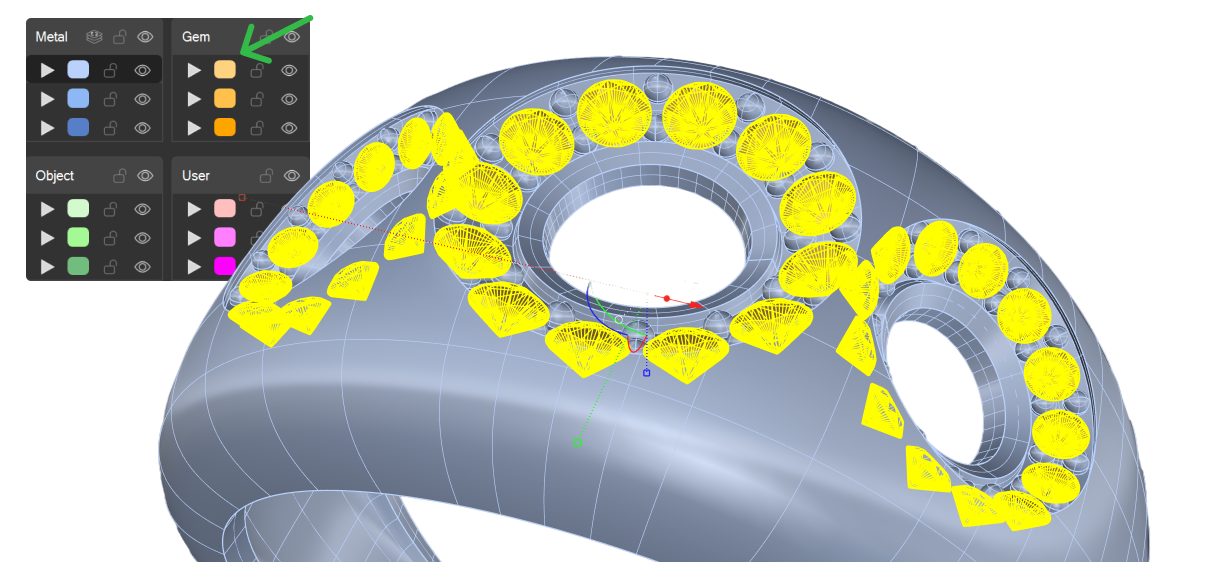
Now we’ll nudge every stone by the same amount, so the whole set has to be selected in one go. Picking them one by one is slow and easy to get wrong, and there are two faster ways. Right-click their layer color, or type SelMesh in the command bar. The gems are mesh objects, so this picks them all up in one step.
Offset the Gems for Realism
With the gems still selected, we’ll apply a tiny offset of a hundredth of a millimeter. The Gem Move command is the one to use here, and it offsets the whole selection at once. Go to the Diamonds tab and use the Gem Move command.

Move the gems 0.01 and press Enter. This is visually unnoticeable, but in the render it leaves a shadow projected onto the metal, adding extra realism. When a stone sits perfectly flush there is no gap for light to work with, and the contact area comes out flat and lifeless.
Save and Open KeyShot
Save the model, and open KeyShot. KeyShot brings in the file as it was last saved, so don’t skip this: the seats you cut and the offset you just applied only travel with the model once it’s saved.
Next Lesson: Importing and Posing in KeyShot
Almost there — you still have some lessons to complete. Jump to the next one →
Impersonating — progress and reviews are disabled.
Course completed
You've completed From RhinoArtisan to Keyshot: Jewelry Rendering Essentials 🎉
Great work. Get your certificate of completion and, if you have a minute, let other jewelers know what you thought of the course.