RhinoArtisan Modeling
Lesson 27 of 31
Creating the Final Solid Model
Sign in to access this lesson
This lesson is part of From RhinoArtisan to Keyshot: Jewelry Rendering Essentials, which can come bundled with a RhinoArtisan Commercial license subject to current promotions. Log in with your customer account, or get in touch and we'll set you up.
Customers only
Solo para clientes
This lesson is part of From RhinoArtisan to Keyshot: Jewelry Rendering Essentials, which can be included with a RhinoArtisan Commercial license subject to current promotions. If you've already purchased and don't see it in your account, get in touch.
Objective: Learn how to finalize the model by using the projected curves and the Push and Pull command to create support zones for the gems, leaving the piece ready for rendering.
The ring is almost finished. The only thing missing is the support zone for the lateral gems, the area of the shank that gives the stones something to sit on. We don’t need to draw anything new for it: the curves we projected earlier already describe exactly where that zone has to go.
Use the Projected Curves
We’ll now use the curves we projected on the lower part of the model. Their outline is what tells RhinoArtisan which part of the shank has to move.
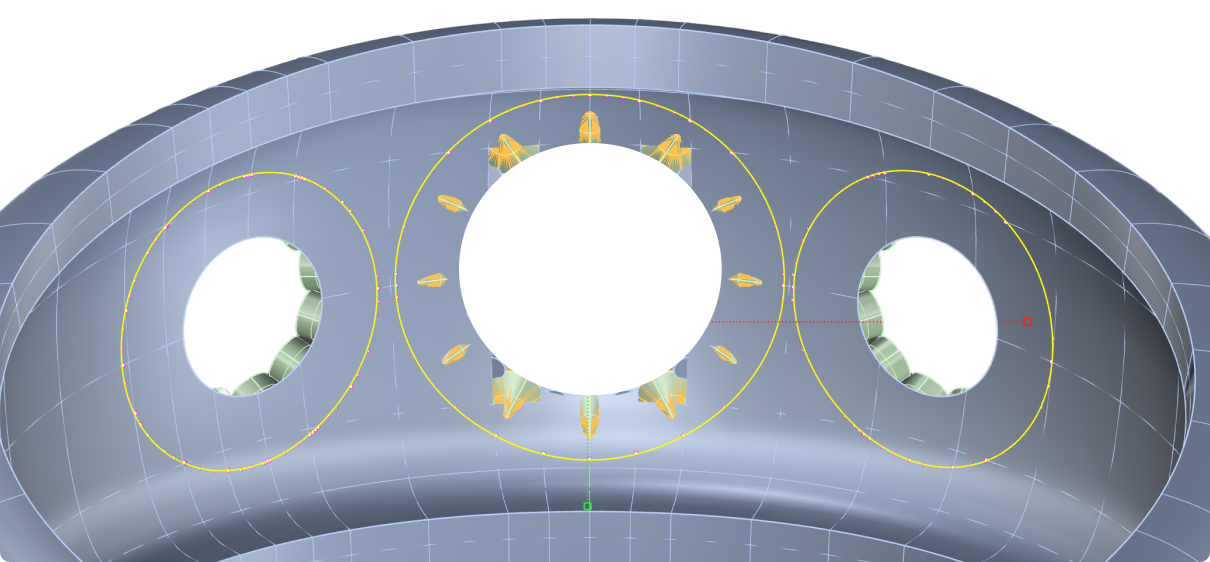
If you accidentally deleted them, project the upper (largest) curve again in each case and you’ll get the same reference back. For the lateral curves, remember to take the working plane into account, as we saw when we projected them.
Create the Gem Support Zones with Push and Pull
Use the Push and Pull command. It takes a closed region of a surface and displaces it, which is exactly what we need to shape the support zone without rebuilding the shank.

Select the areas of the shank that fall inside the curves. Those enclosed regions are the ones that will move.
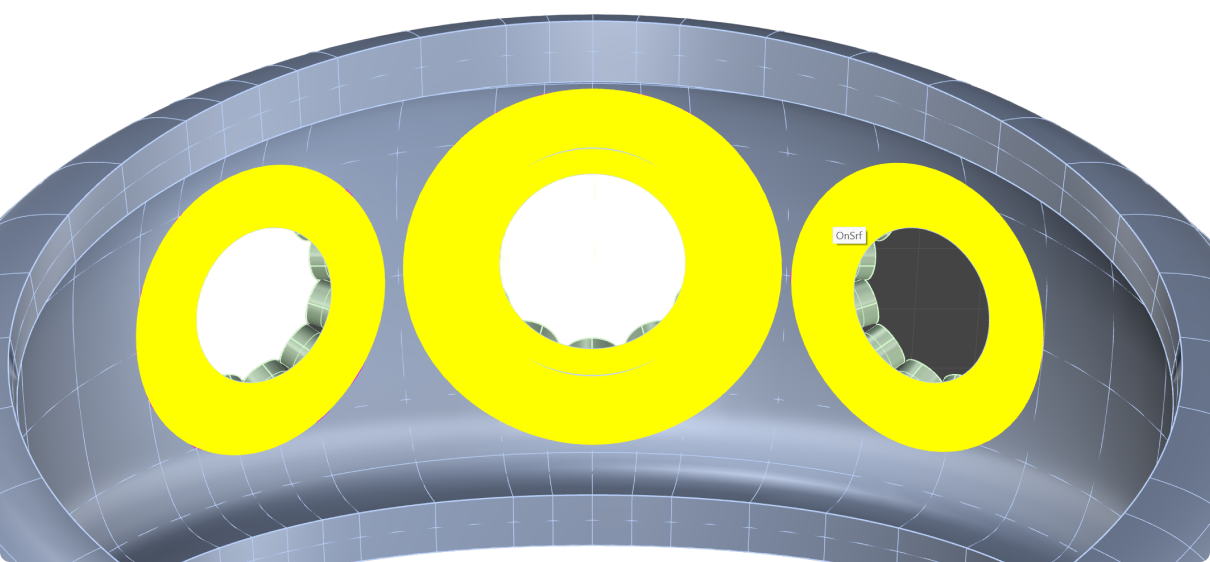
If they aren’t selected, the command isn’t recognizing the region, usually because the curve is sitting slightly off the metal instead of on it. Use the Pull Curve command so the curve sits exactly on the surface of the shank, and then select the areas again.

Set the Support Depth
With the areas selected, type 0.6 in the command bar and press Enter to create the support zone for the gems.
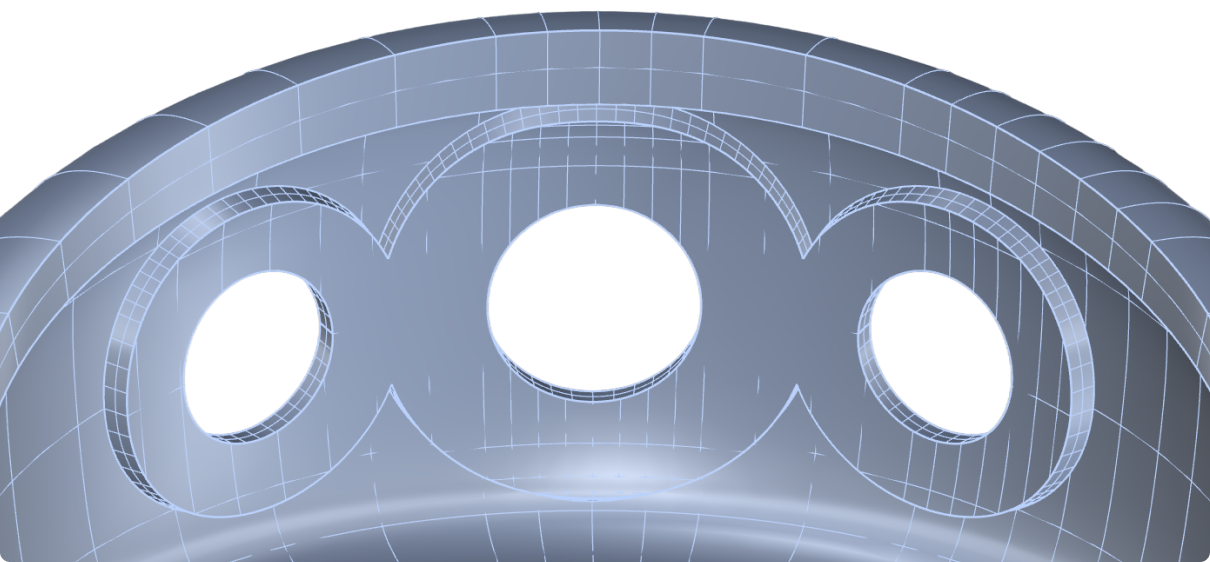
Save Your Work
Save the file in your working folder and keep it at hand, because we’ll open it again at the start of the next section.
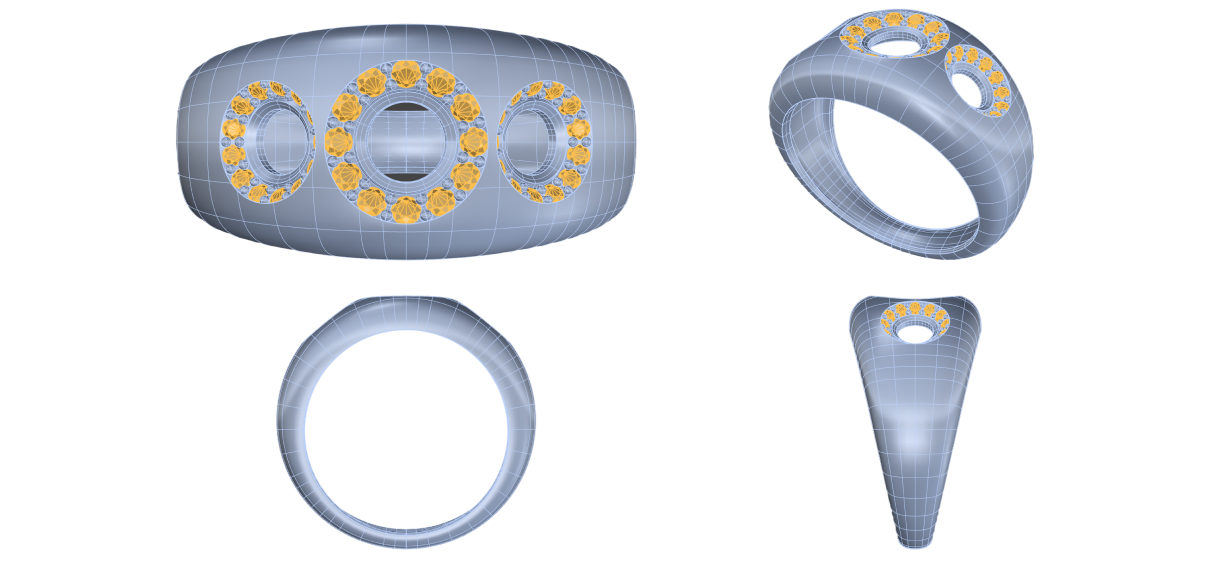
Result: The solid model is finished. In the next section we’ll prepare it in RhinoArtisan before taking it into KeyShot.
Next Lesson: Preparing the Model for KeyShot
Almost there — you still have some lessons to complete. Jump to the next one →
Impersonating — progress and reviews are disabled.
Course completed
You've completed From RhinoArtisan to Keyshot: Jewelry Rendering Essentials 🎉
Great work. Get your certificate of completion and, if you have a minute, let other jewelers know what you thought of the course.