RhinoArtisan Modeling
Lesson 20 of 31
Creating the Central Channel for Setting
Sign in to access this lesson
This lesson is part of From RhinoArtisan to Keyshot: Jewelry Rendering Essentials, which can come bundled with a RhinoArtisan Commercial license subject to current promotions. Log in with your customer account, or get in touch and we'll set you up.
Customers only
Solo para clientes
This lesson is part of From RhinoArtisan to Keyshot: Jewelry Rendering Essentials, which can be included with a RhinoArtisan Commercial license subject to current promotions. If you've already purchased and don't see it in your account, get in touch.
Objective: Learn how to create the central channel for setting stones by extracting curves, splitting surfaces, and using Boolean operations.
A channel setting holds a row of stones inside a groove cut into the metal, with a wall of metal on each side keeping them in place. We won’t model that groove by hand: we’ll take the surface we prepared in the previous lesson, give it thickness, and subtract it from the shank. Everything starts with a single reference point.
To begin creating the channel, we need a reference point on the surface. Go to the Curve tab and use the Point command.

Before clicking, make sure the Osnap option is enabled with Int and End selected. This is what guarantees the point lands exactly on the geometry instead of a fraction of a millimeter away from it, and every measurement that follows depends on it.
Click on the bottom part of the seam on the lofted surface to place the point.
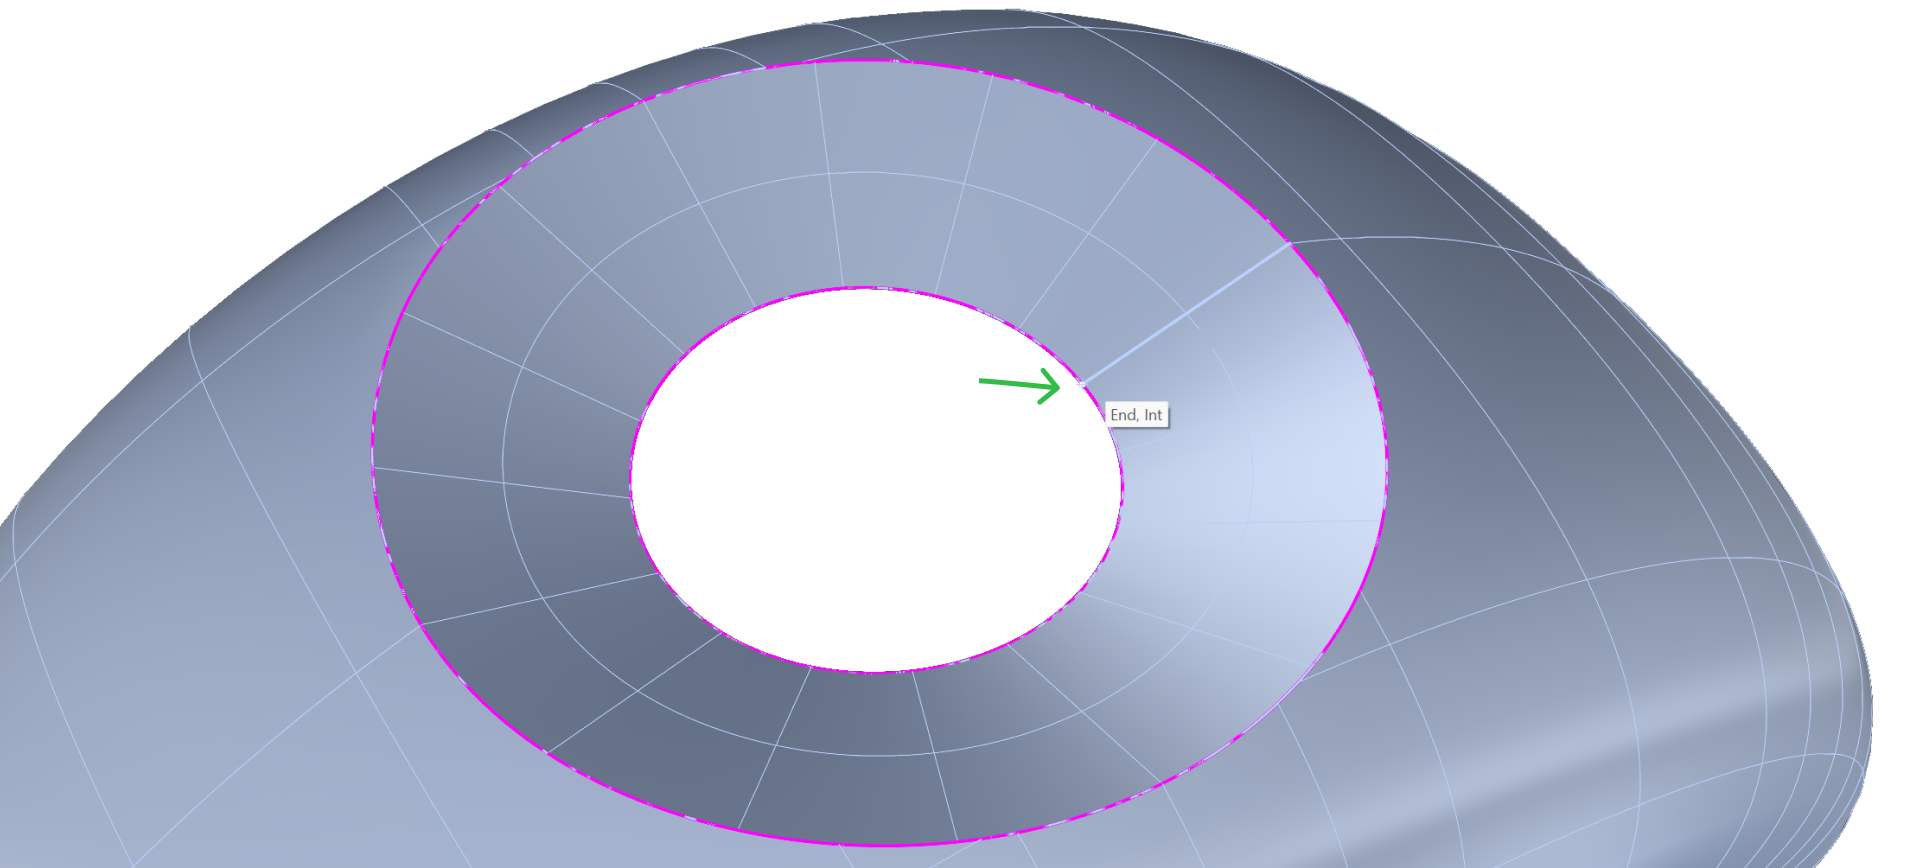
Once the point is created, move it by 0.5 mm along the seam. That short displacement is what decides where the channel starts, so we move it numerically instead of dragging it by eye.
Select the point, go to the Transform tab and click on the Move command.

Click on the point to set it as the reference, then type 0.5 in the command bar to move it precisely by 0.5 mm.
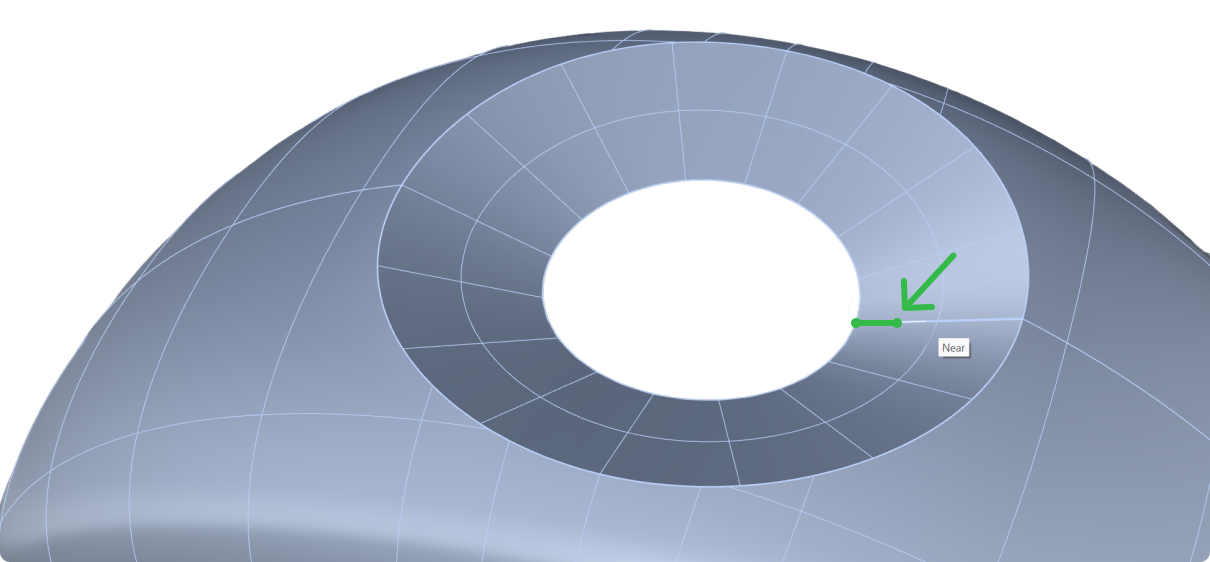
With Osnap and the Near option enabled, select the seam to guide the movement. The Near snap keeps the point traveling along the seam instead of drifting off it, so the 0.5 mm is measured exactly where we want it.
Extracting the Isocurve
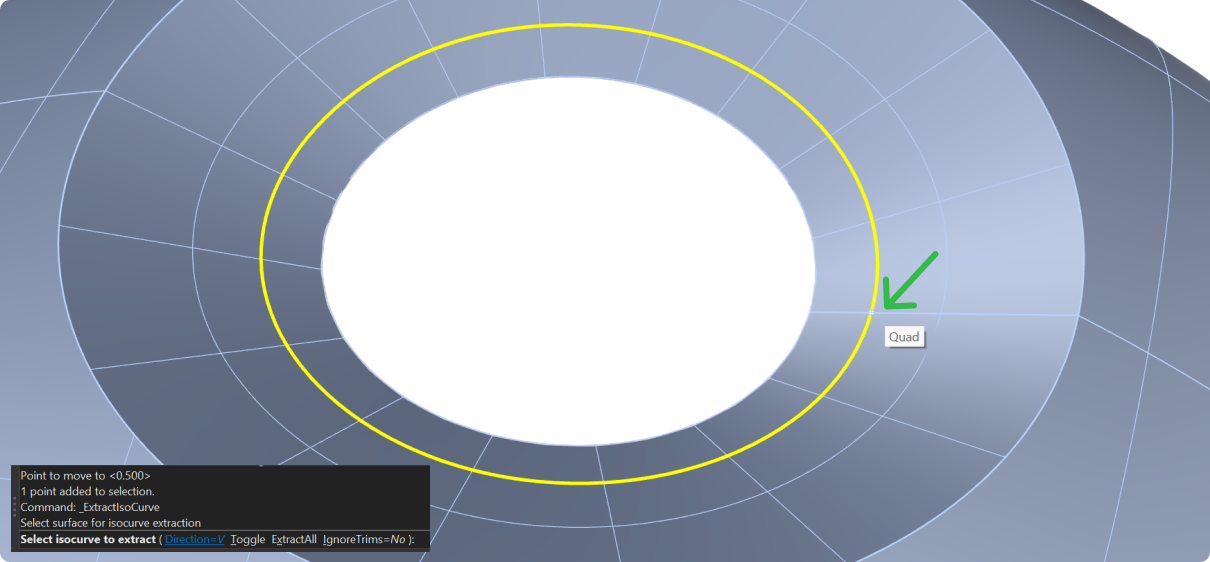
Now, we will use the Extract Isocurve command, found in the Curve tab, at the point we just created. An isocurve is generated on the surface itself, so the curve we get sits perfectly on the geometry and there’s nothing to project or adjust afterward.
Select the Extract Isocurve command.

Click on the surface and change the direction to V. Then click on the previously created point, and press Enter to complete the command. You’ll see the curve appear exactly where the point sits, following the shape of the surface.
Splitting the Surface
That isocurve is our cutting line. Switch to the Surface tab and use the Split Refit Surface command.

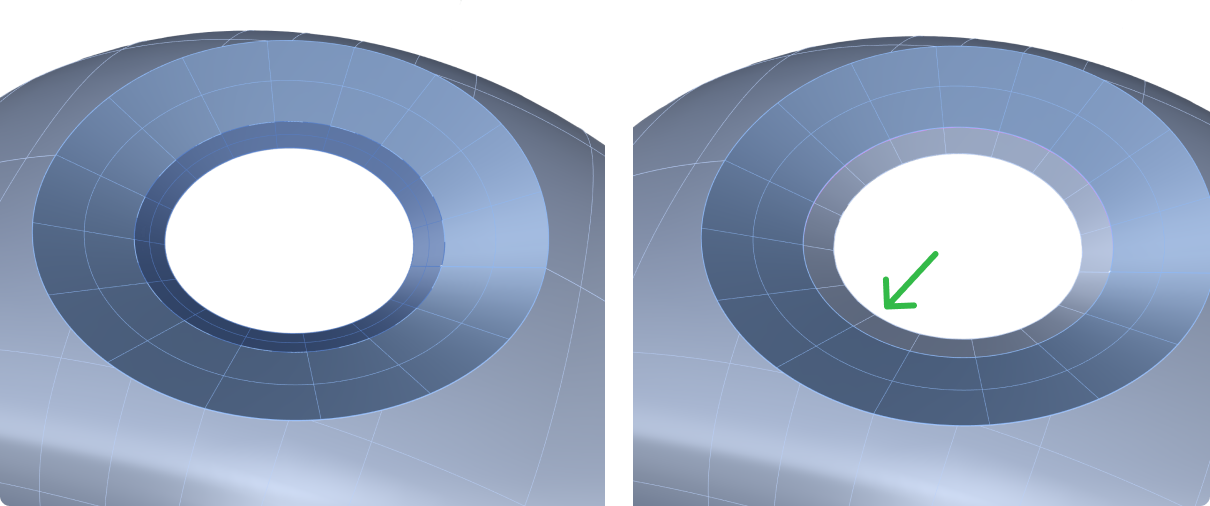
Select the surface, then select the extracted isocurve. Now, the surface is split into two parts. Delete the smaller surface: it’s the narrow strip left by the 0.5 mm move, and the larger piece is the one that defines the run of the channel.
Creating the Offset
A surface has no thickness, so on its own it can’t cut anything out of the shank. The Offset command is what turns it into a volume we can subtract.
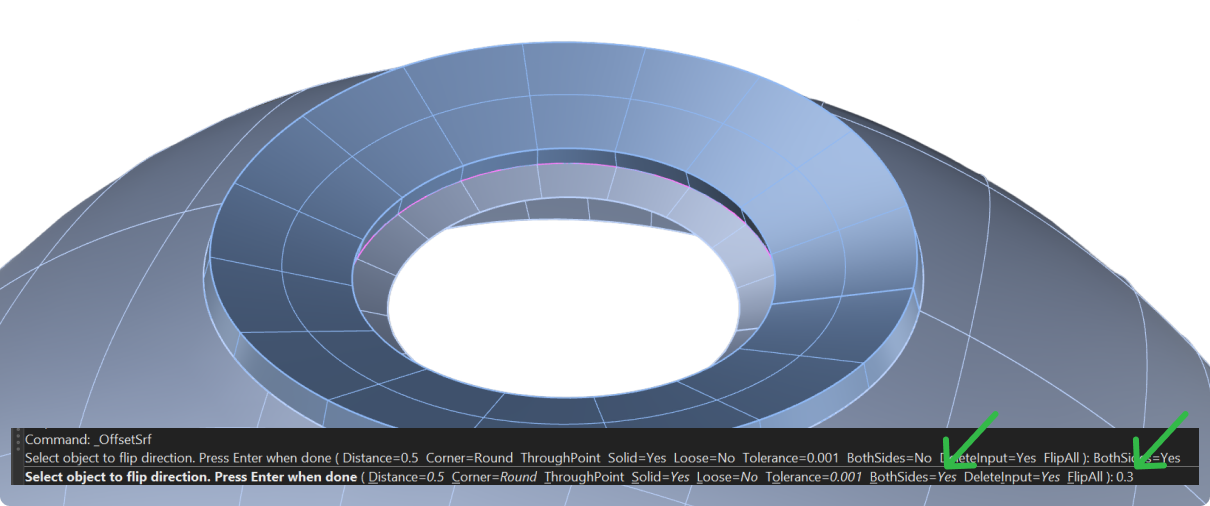
Select the larger surface, and click on the Offset command.

Change the BothSides option to Yes to create an offset in both directions, enter 0.3 mm as the offset distance, and press Enter twice to complete the command. Growing the surface 0.3 mm to each side leaves the original surface right in the middle of the new volume, so the channel ends up centered on the setting rather than shifted to one face.
Performing the Boolean Difference
With the cutter ready, the channel is simply a subtraction: we remove the volume of the offset from the metal of the shank.
Go to the Solid tab and select the Boolean Difference command. First, select the shank and press Enter. The first selection is always the object we keep. Then, select the offset surface we just created and press Enter to complete the Boolean operation. This second object is the one that disappears, leaving its shape carved into the metal. The central channel is now created.
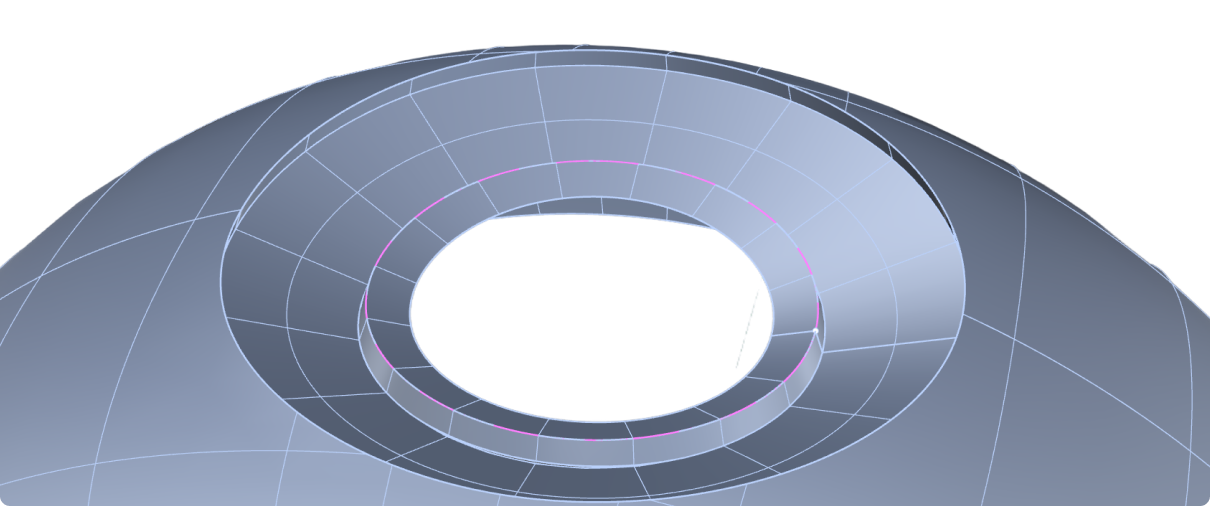
With the groove cut into the shank, the setting is ready to receive its row of stones.
Next Lesson: Adding Gems to the Channel
Almost there — you still have some lessons to complete. Jump to the next one →
Impersonating — progress and reviews are disabled.
Course completed
You've completed From RhinoArtisan to Keyshot: Jewelry Rendering Essentials 🎉
Great work. Get your certificate of completion and, if you have a minute, let other jewelers know what you thought of the course.