Solitaire Collection: Third Ring
Lesson 40 of 49
Basket Rail settings
Sign in to access this lesson
This lesson is part of Crafting Engagement Masterpieces, which can come bundled with a RhinoArtisan Commercial license subject to current promotions. Log in with your customer account, or get in touch and we'll set you up.
Customers only
Solo para clientes
This lesson is part of Crafting Engagement Masterpieces, which can be included with a RhinoArtisan Commercial license subject to current promotions. If you've already purchased and don't see it in your account, get in touch.
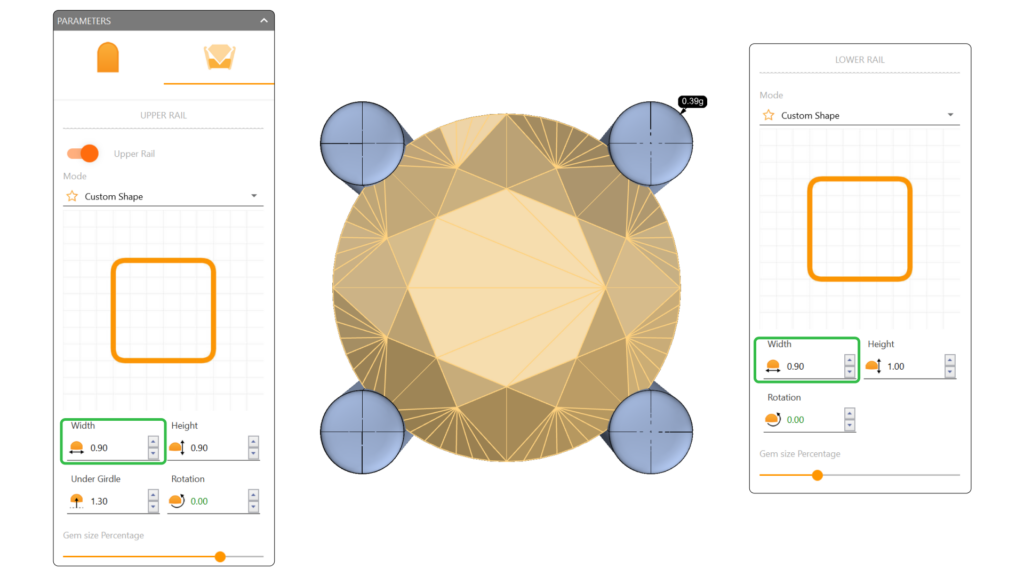
Objective: Adjust the rail widths and align the basket with the reference curve.
Step 1: Adjust the rail widths. Set both the upper and lower rails to 0.9 millimeters.
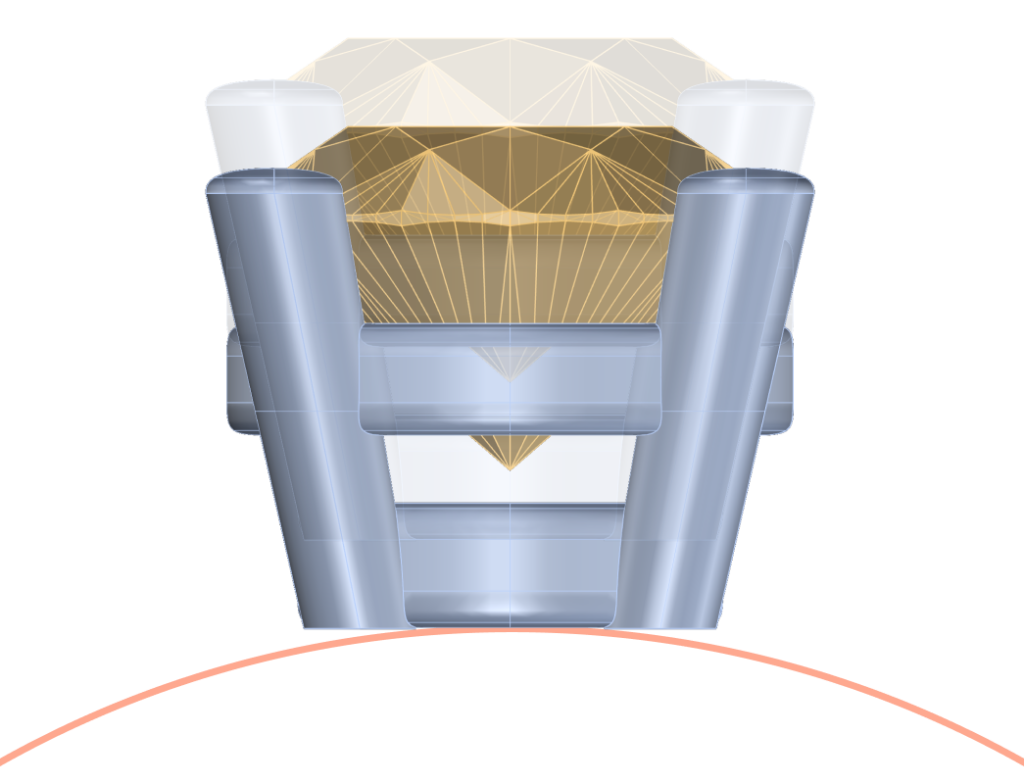
Step 2: In the front view, if the basket is not aligned with the curve, move it to the top:
- Select the basket and the gem.
- Type Move in the command bar, select the bottom point of the basket, and align it with the curve.
- Use Shift to move vertically
Video Lesson
Next Step
Create the shank helix for the ring.