Apply Materials and Render
Lesson 26 of 28
Adding and Customizing the Ground Plane
Checking access…
Sign in to access this lesson
This lesson is part of Organic SubD Ring Design: Elegance Redefined, which can come bundled with a RhinoArtisan Commercial license subject to current promotions. Log in with your customer account, or get in touch and we'll set you up.
Customers only
Solo para clientes
This lesson is part of Organic SubD Ring Design: Elegance Redefined, which can be included with a RhinoArtisan Commercial license subject to current promotions. If you've already purchased and don't see it in your account, get in touch.
Objective: Add a ground plane for realistic rendering.
Enable Ground Plane
- Go to the Rendering Panel. If not available, enable it by going to Settings(1) and clicking Show Panels(2).
- Check the Rendering Panel (3)
- In the Rendering Panel, navigate to the Ground Plane section and enable it (4).
- Click Use Material (5) to apply the material to the ground plane..
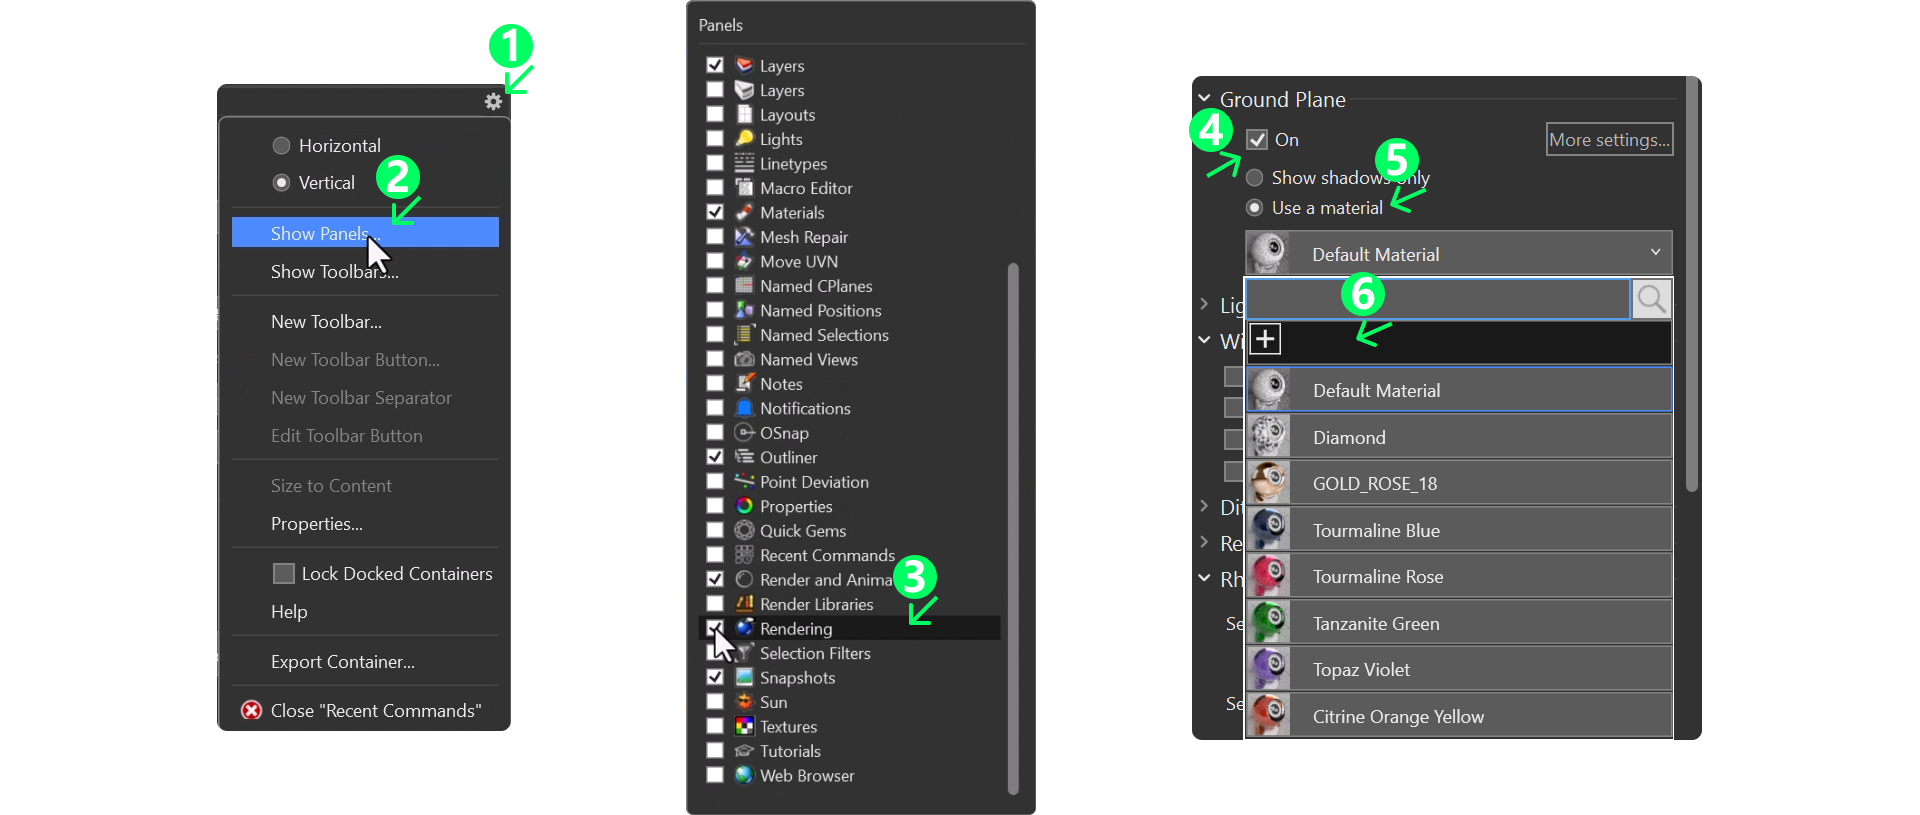
Create a Custom Metallic Material
- Click on the New Material (6) icon and choose Metallic (1).
- Go to the Materials Panel (2), If not available, enable it by going to Settings and check it.
- Double-click on the material (3) in the Materials Panel to edit it.
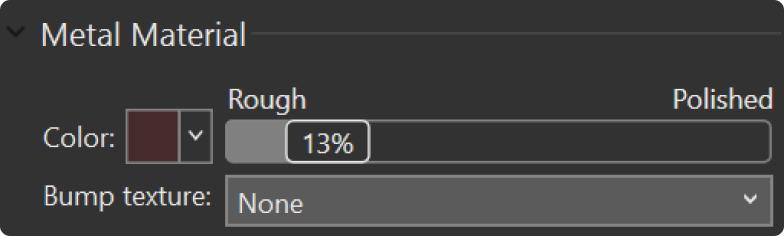
- Set the color (4) to a dark tone (use the hex code: #452B2B) (5).
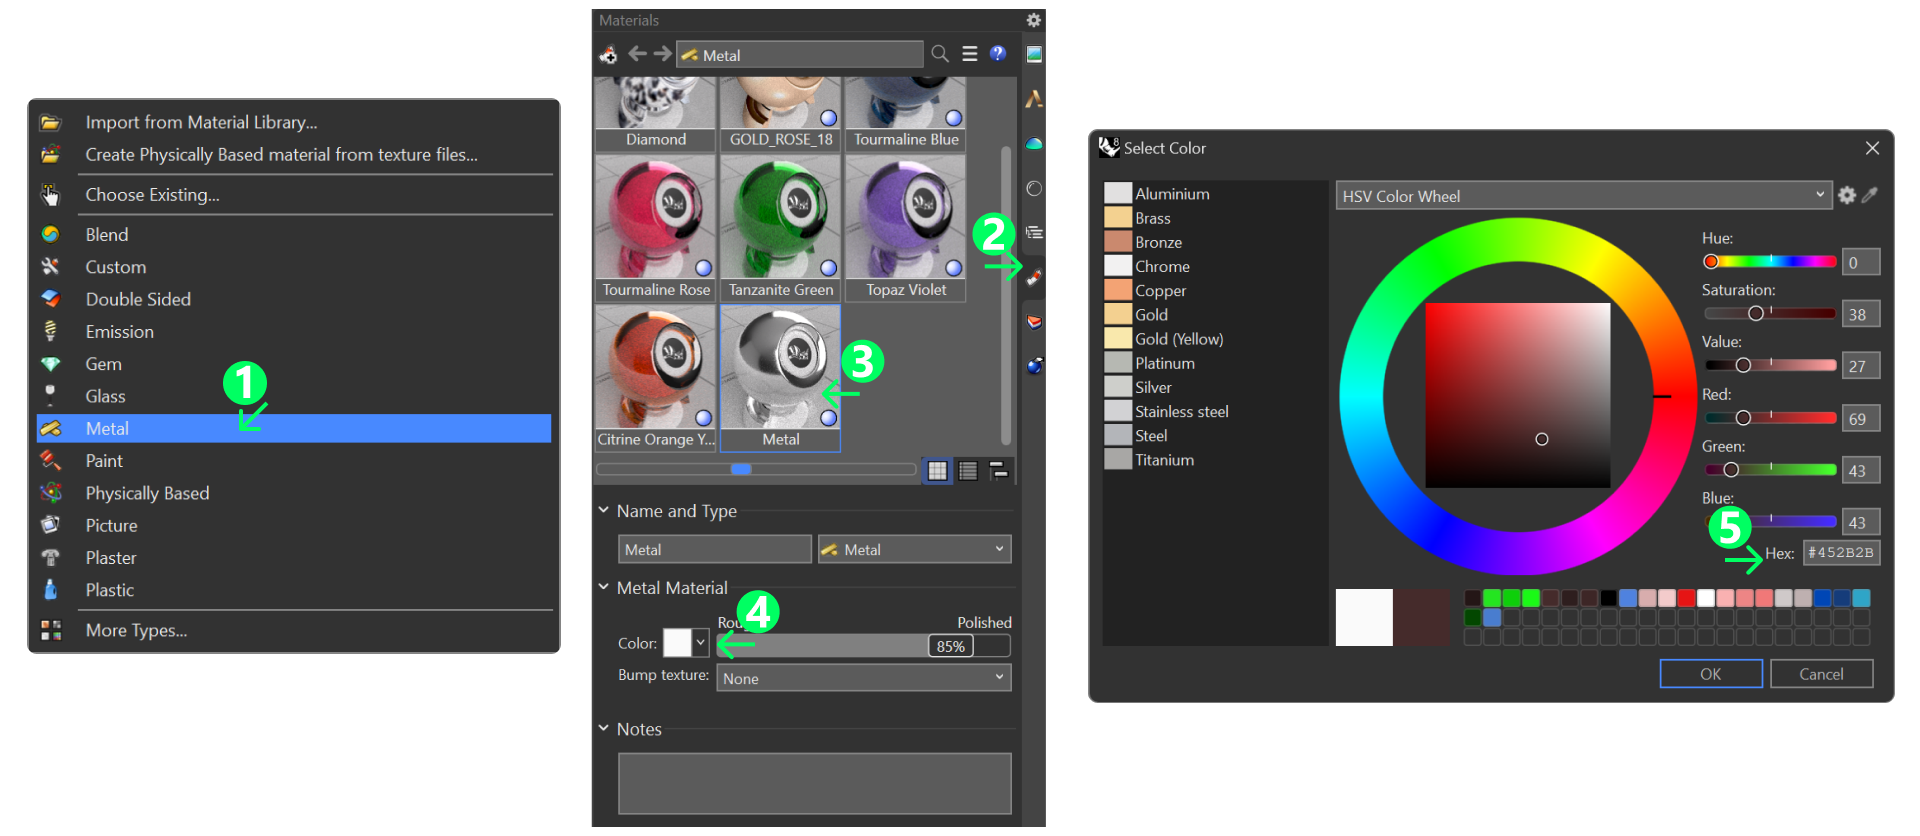
- Lower the Roughness to 13% for a polished finish.
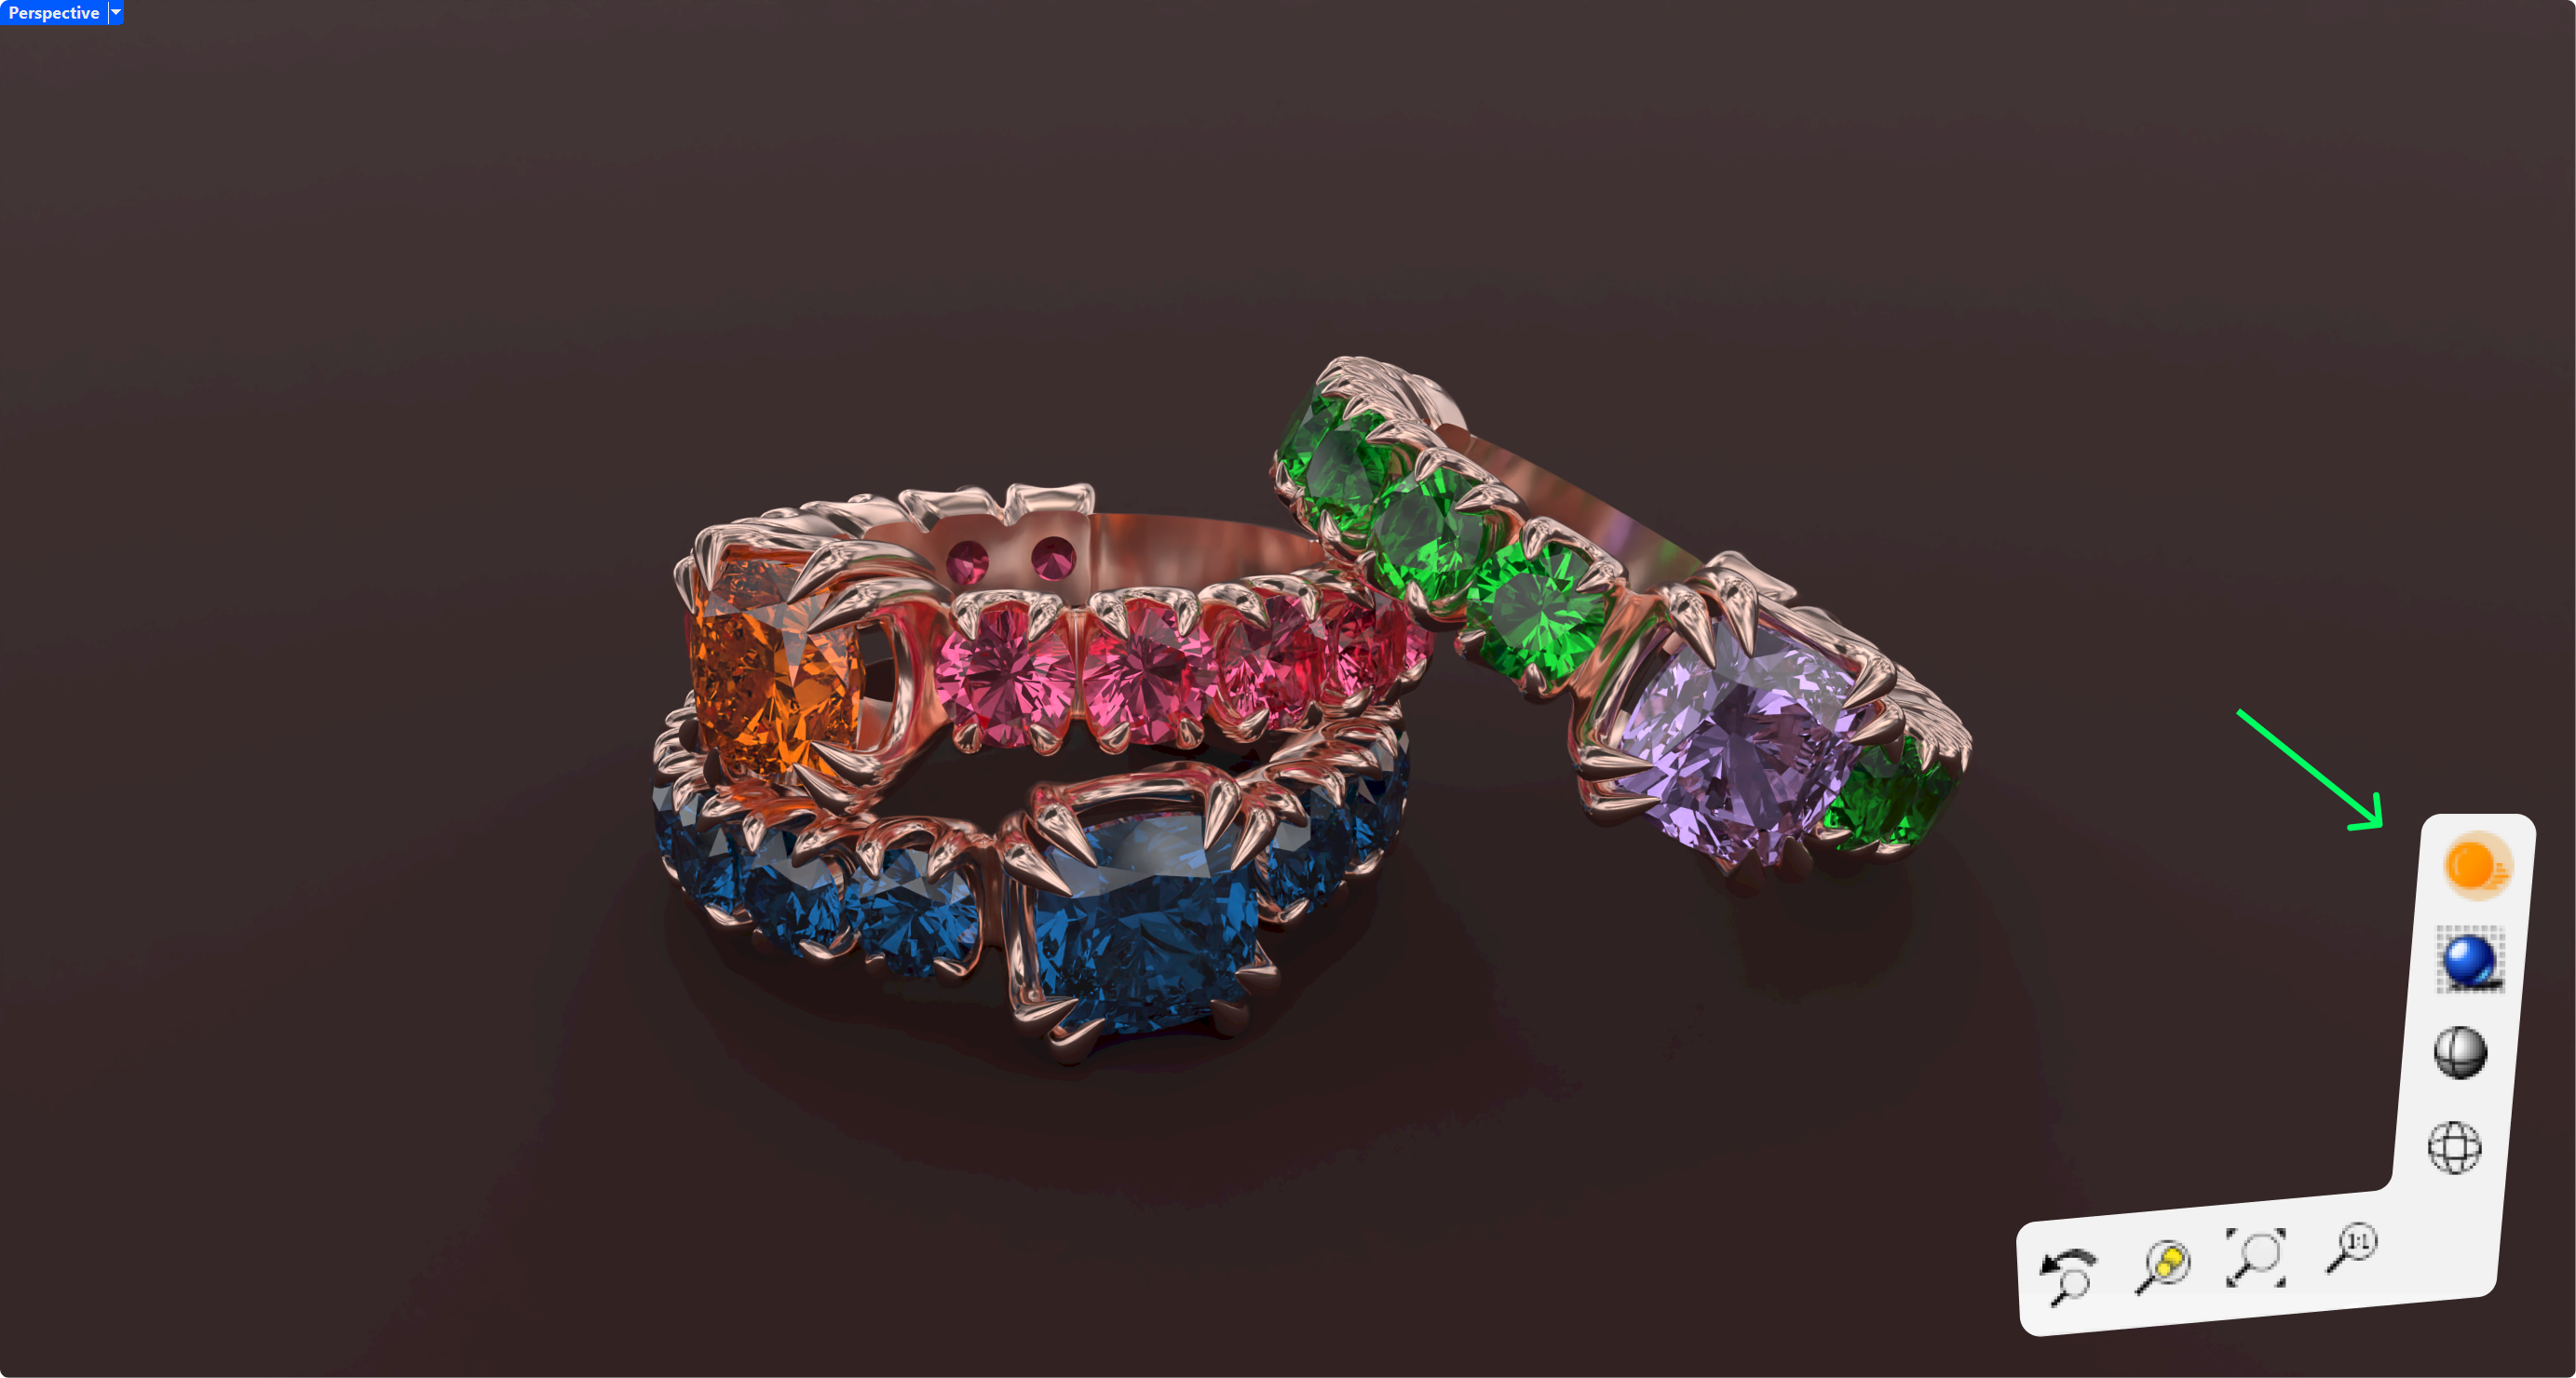
Adjust View and Lighting
- Switch to Raytracing Mode to view the changes to the ground.
- Position the view to your liking and ensure it is ready for the final render.
Video Lesson
Next Lesson: Finalizing the Render Settings