First Basket: Cushion Gem
Lesson 4 of 28
Pose the Prong
Sign in to access this lesson
This lesson is part of Organic SubD Ring Design: Elegance Redefined, which can come bundled with a RhinoArtisan Commercial license subject to current promotions. Log in with your customer account, or get in touch and we'll set you up.
Customers only
Solo para clientes
This lesson is part of Organic SubD Ring Design: Elegance Redefined, which can be included with a RhinoArtisan Commercial license subject to current promotions. If you've already purchased and don't see it in your account, get in touch.
Objective: Position the prong accurately and mirror it for symmetrical placement.
Content
Deactivate the selection filter by clicking on Object.

Position the Prong
- From the Top View, press Shift and use the Gumball tool to move the prong to the top corner of the Cushion.
Notice the reference lines painted on the gem to help with accurate placement.
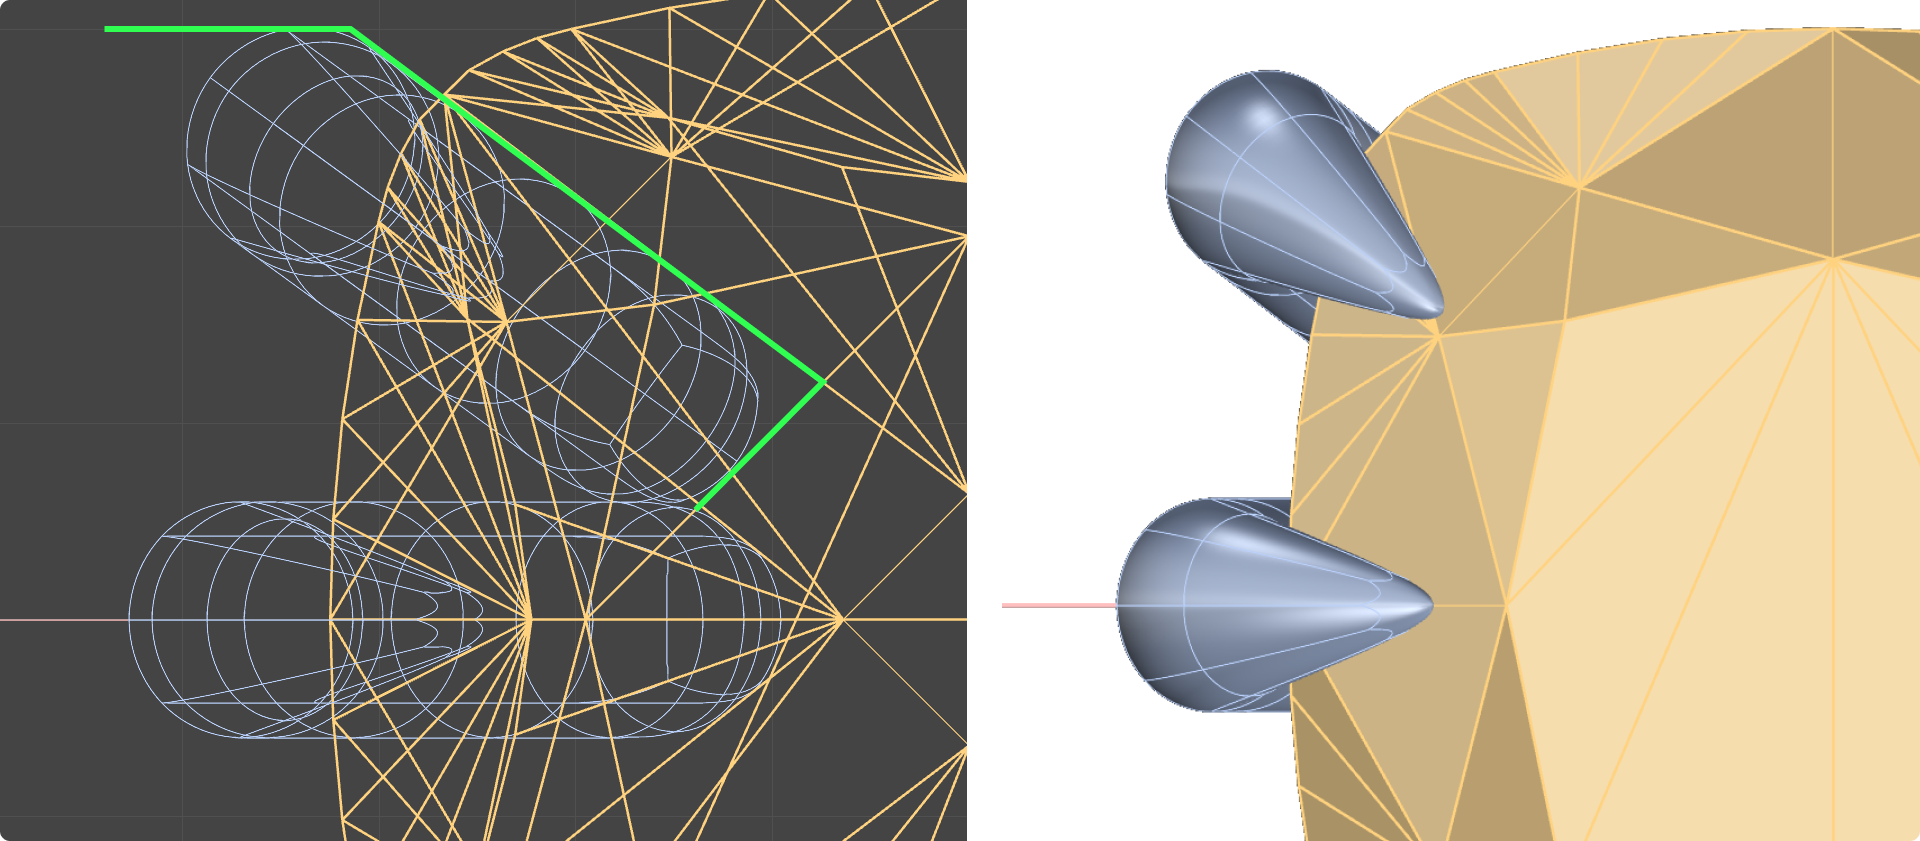
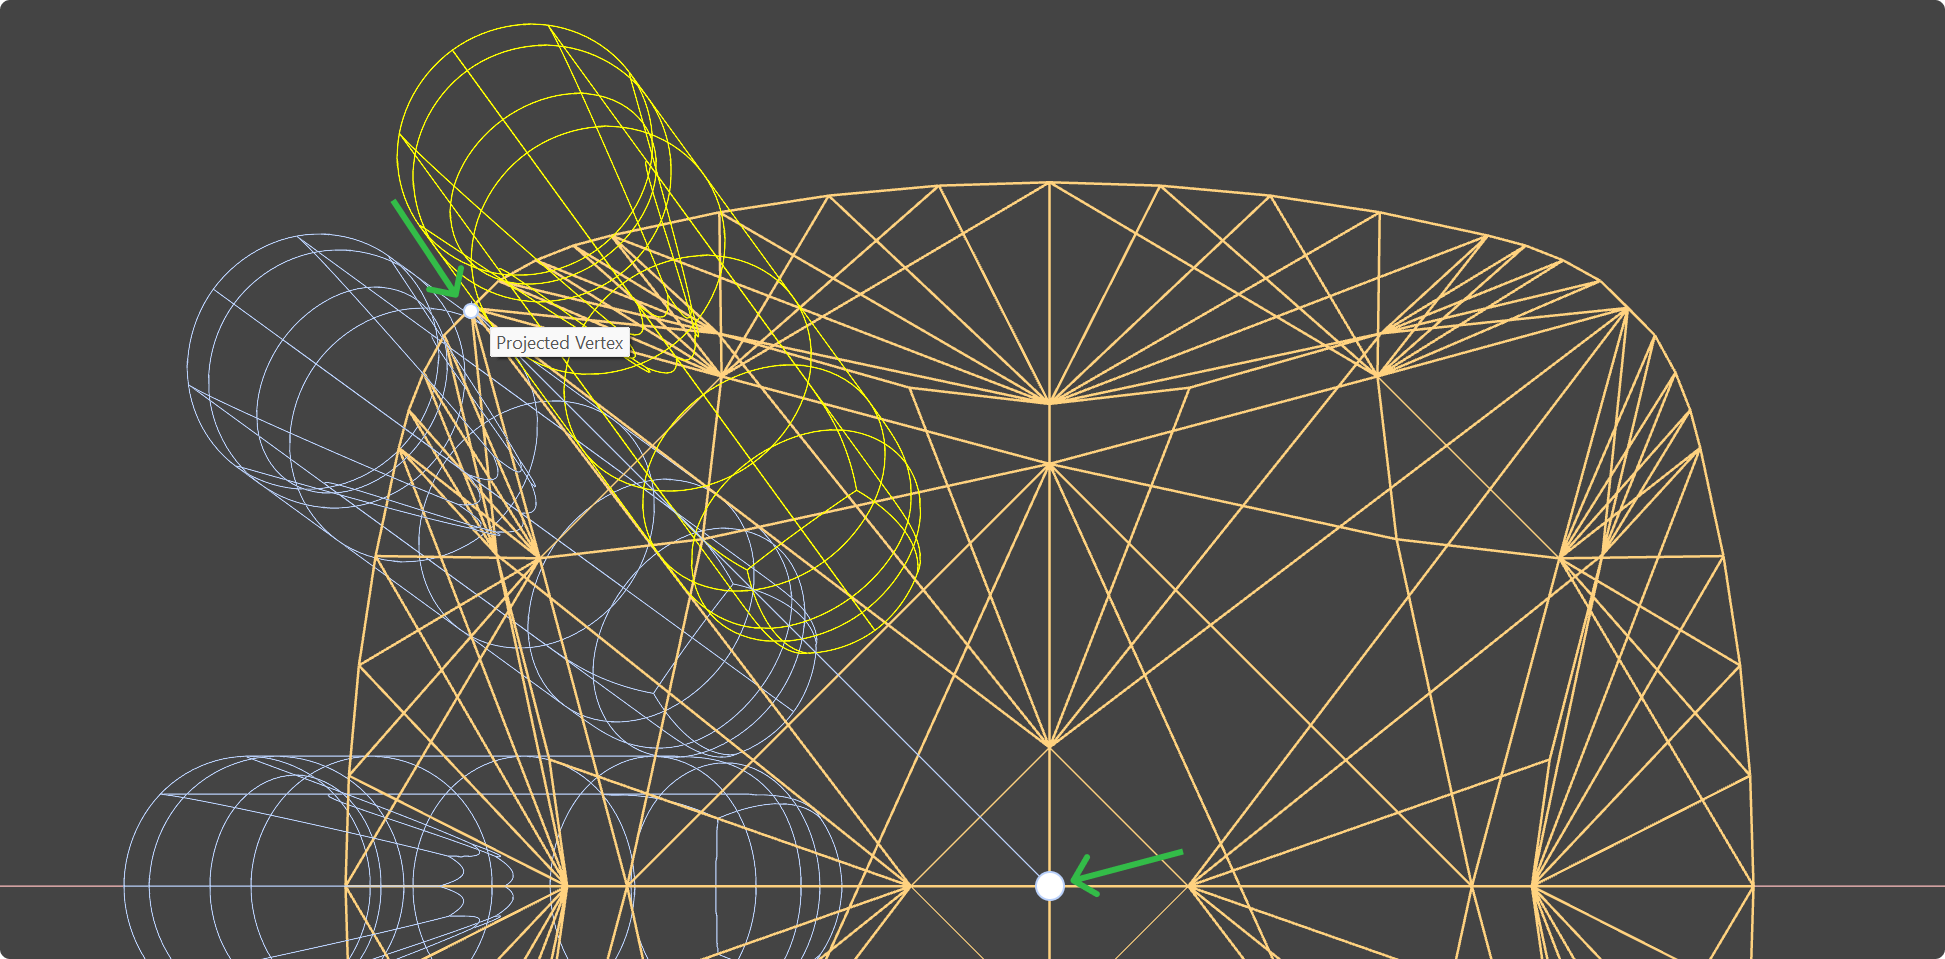
- Double-click Osnap to activate the Project option. Ensure Record History is activated to see changes in real-time.

- Position the prong using the Top, Front, Right, and Perspective Views. Use the reference image to guide alignment.
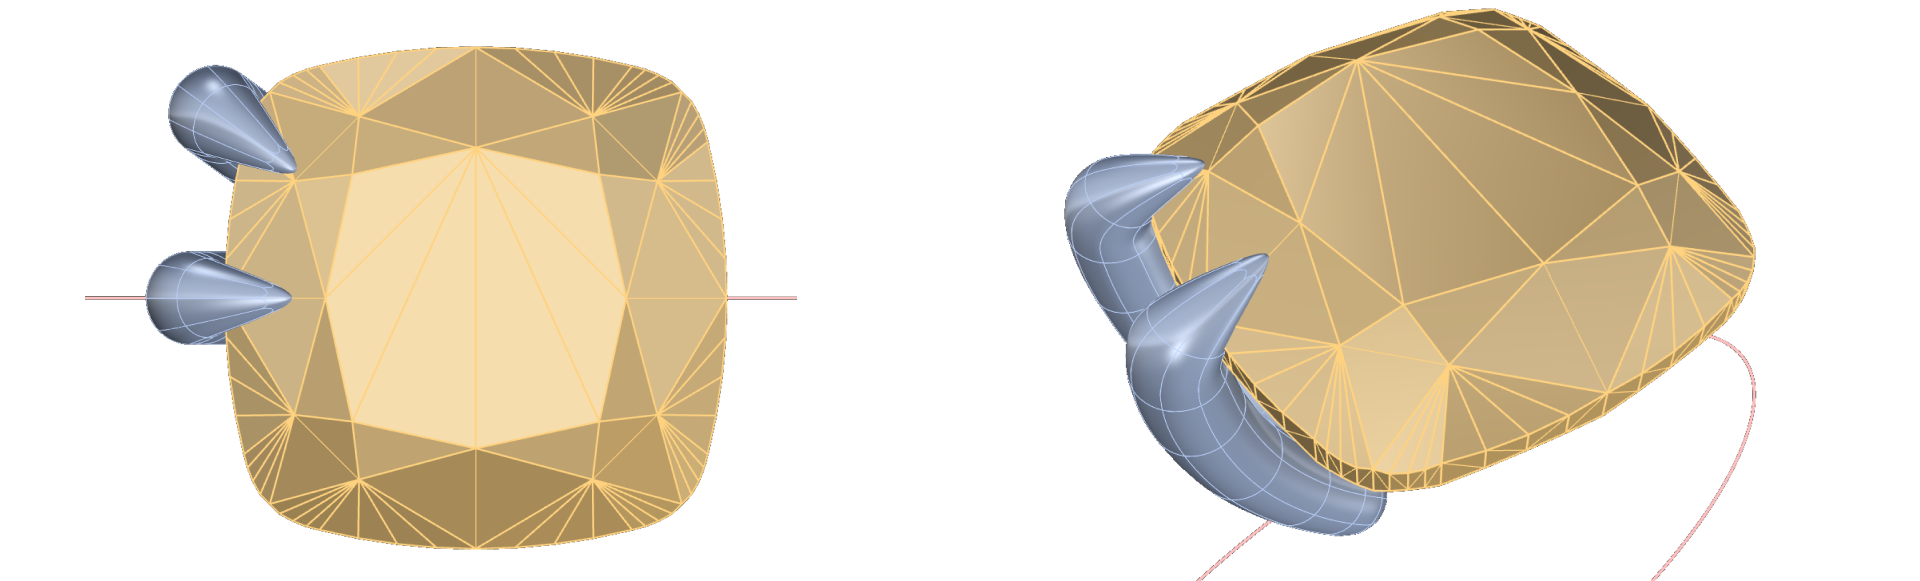
Mirror the Prong
- Go to the Transform tab (1) and use the Mirror command (2) to create a symmetrical prong.

- Select the prong and type 0 in the command prompt, press enter to set this point as the starting point (1) for rotation.
- Use the nearest vertex (2) on the duplicated prong as the final rotation point.
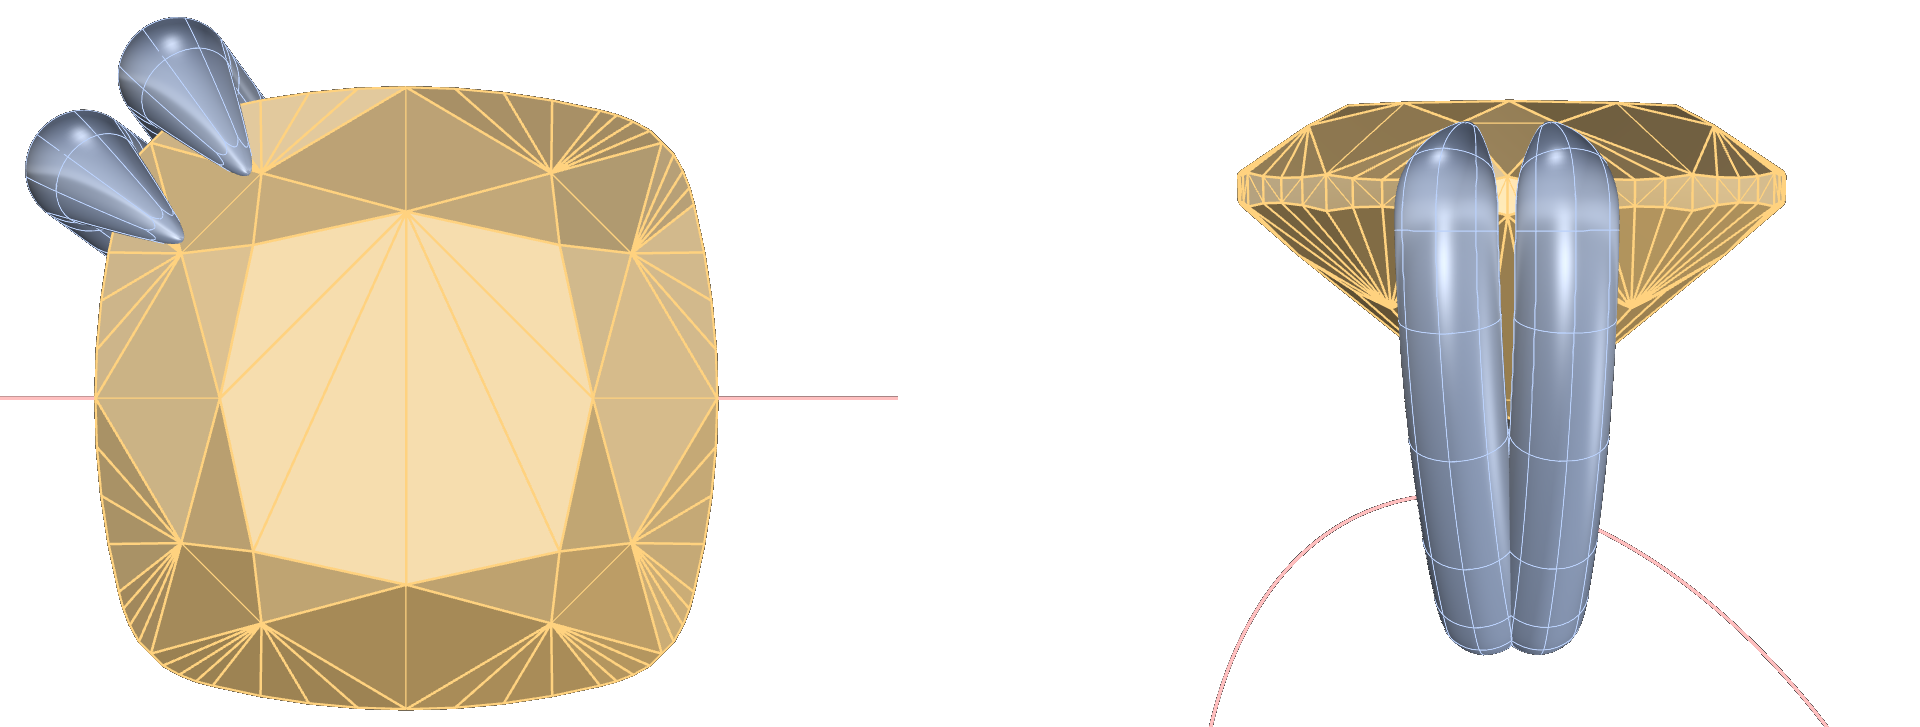
Adjust and Align
- Fine-tune the positions using the Gumball tool, ensuring the prongs slightly overlap for a solid and secure connection.
- Verify alignment in multiple views to ensure precision.
Video Lesson
Next Step
Connect the prongs with a bridge.