Second Basket: Round Gem
Lesson 11 of 28
Refine the Prong
Sign in to access this lesson
This lesson is part of Organic SubD Ring Design: Elegance Redefined, which can come bundled with a RhinoArtisan Commercial license subject to current promotions. Log in with your customer account, or get in touch and we'll set you up.
Customers only
Solo para clientes
This lesson is part of Organic SubD Ring Design: Elegance Redefined, which can be included with a RhinoArtisan Commercial license subject to current promotions. If you've already purchased and don't see it in your account, get in touch.
Objective
Smooth and position the prong for the round gem.
Content
Refine the tip:
- Switch to Edge Selection Mode.

- Double-click the last horizontal edge of the prong. Use the Gumball to rotate the edge.
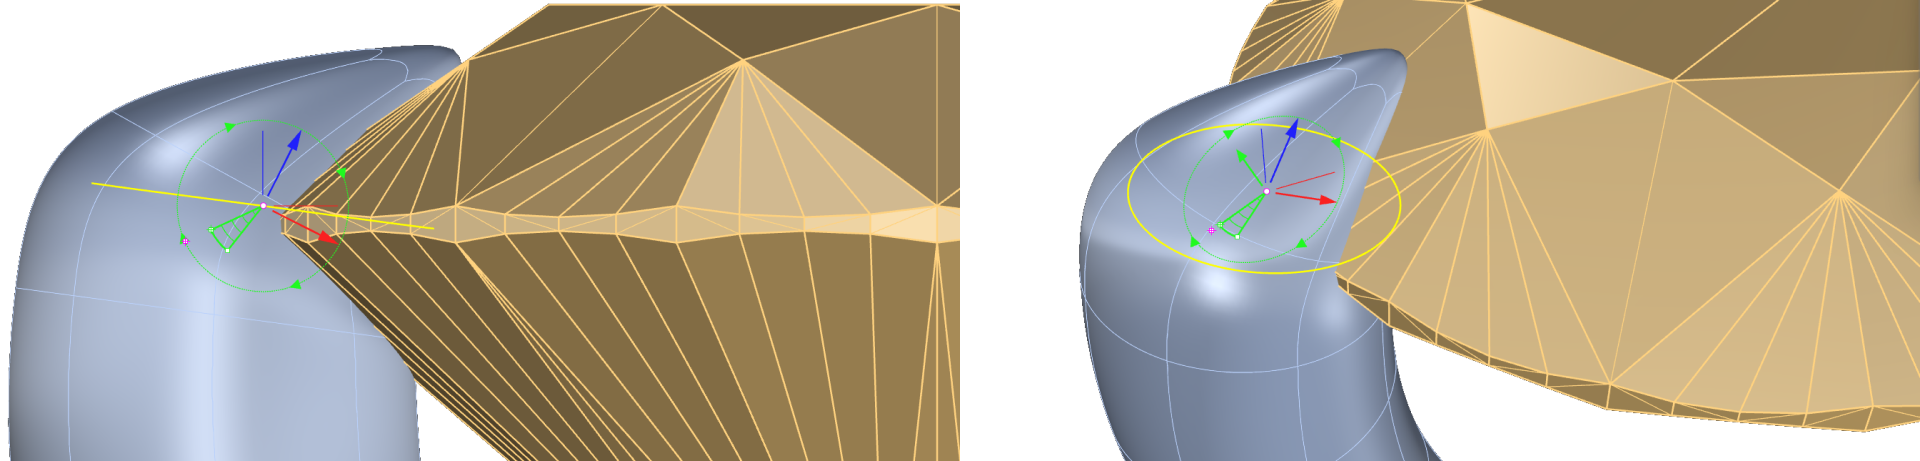
- In this case, since the tip is very small, it looks a bit odd. So, we will reselect the rotated edges and scale them by holding Shift to smooth the mesh.
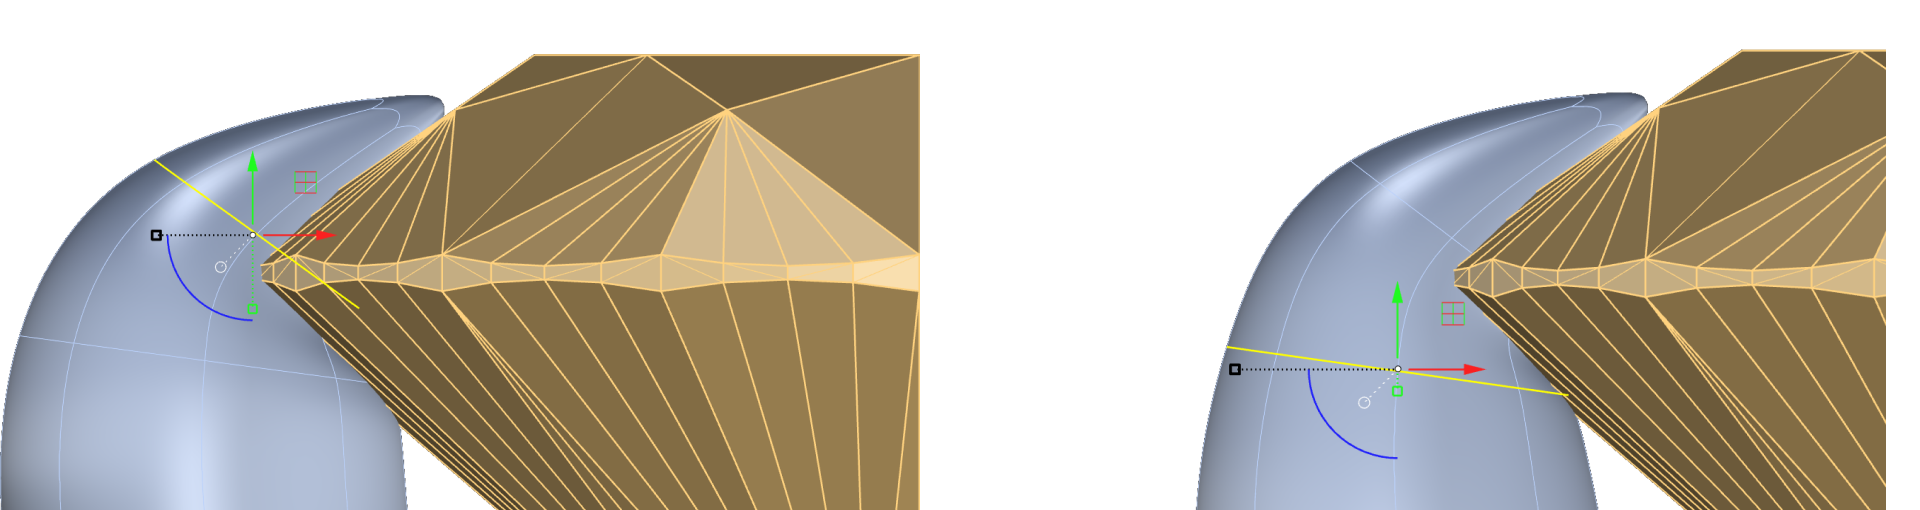
Change to object mode in the SubD tab

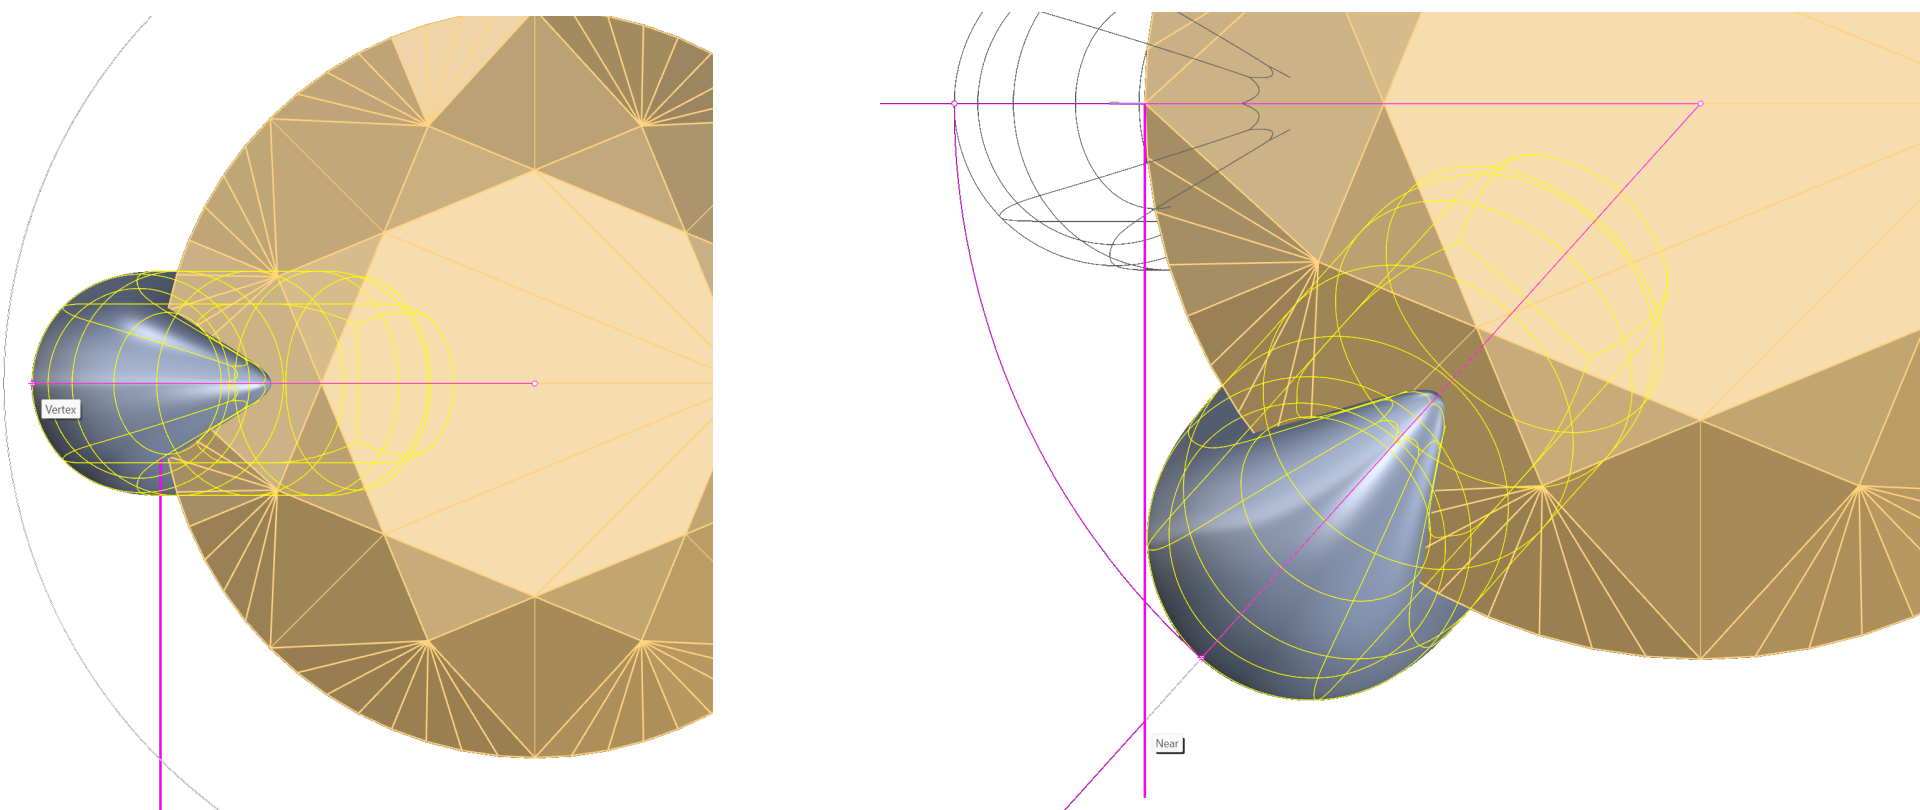
Pose the prong. Use the Top view:
- First we will create a reference line to rotate the prong correctly. Go to the Curve tab (1) and select the Line command (2).

- Then, enable Osnap and select the leftmost point of the gem.

- From the Top view, create a line going downward.

- Show the Prong again, use “Show” in the command prompt.
- Select the prong, and then, in the Transform tab, use the Rotate command.

- Set 0, in the command prompt, as the pivot point for rotation.
- Select any point now to rotate the prong.
Keep in mind that when assembling the four prongs, they cannot be perfectly positioned along the circle of the gem, as they would touch the prong of the adjacent stone. For this reason, we will place each prong slightly further inward to avoid this issue.
Rotate it so that it does not extend beyond the reference line.
Video Lesson
Next Step
Mirror the prong to create symmetry.