First Basket: Cushion Gem
Lesson 3 of 28
Start the First Prong
Sign in to access this lesson
This lesson is part of Organic SubD Ring Design: Elegance Redefined, which can come bundled with a RhinoArtisan Commercial license subject to current promotions. Log in with your customer account, or get in touch and we'll set you up.
Customers only
Solo para clientes
This lesson is part of Organic SubD Ring Design: Elegance Redefined, which can be included with a RhinoArtisan Commercial license subject to current promotions. If you've already purchased and don't see it in your account, get in touch.
Objective: Design and refine the first prong for the cushion basket using SubD geometry.
Content
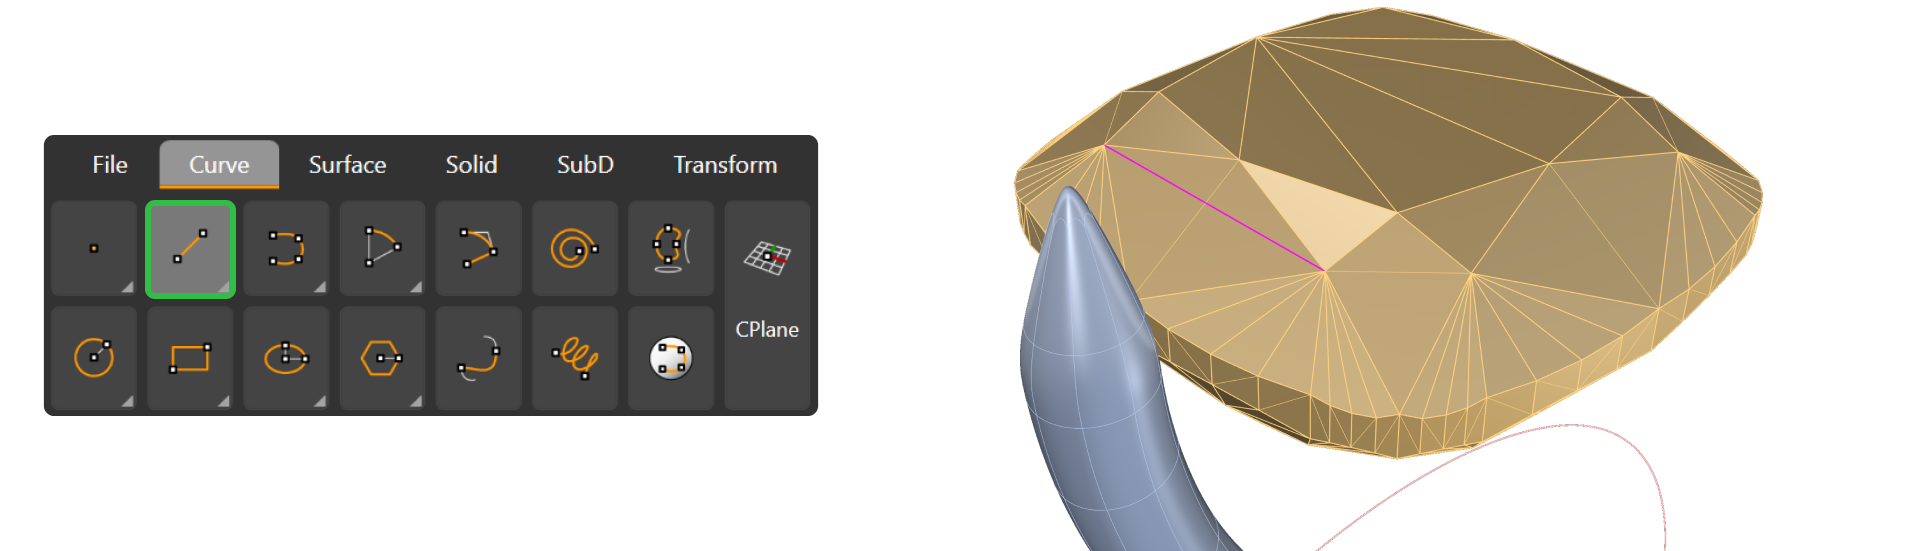
To start, go to the Curve tab and locate the Arc submenu. Use the Start, End, Point on Arc command. 
Create the curve as follows:
- First point: Click slightly to the left of the gem’s fillet.
- Second point: Click a square and a half below the central axis on the bottom side.
- Third point (arc point): Click approximately midway between the first and second points.
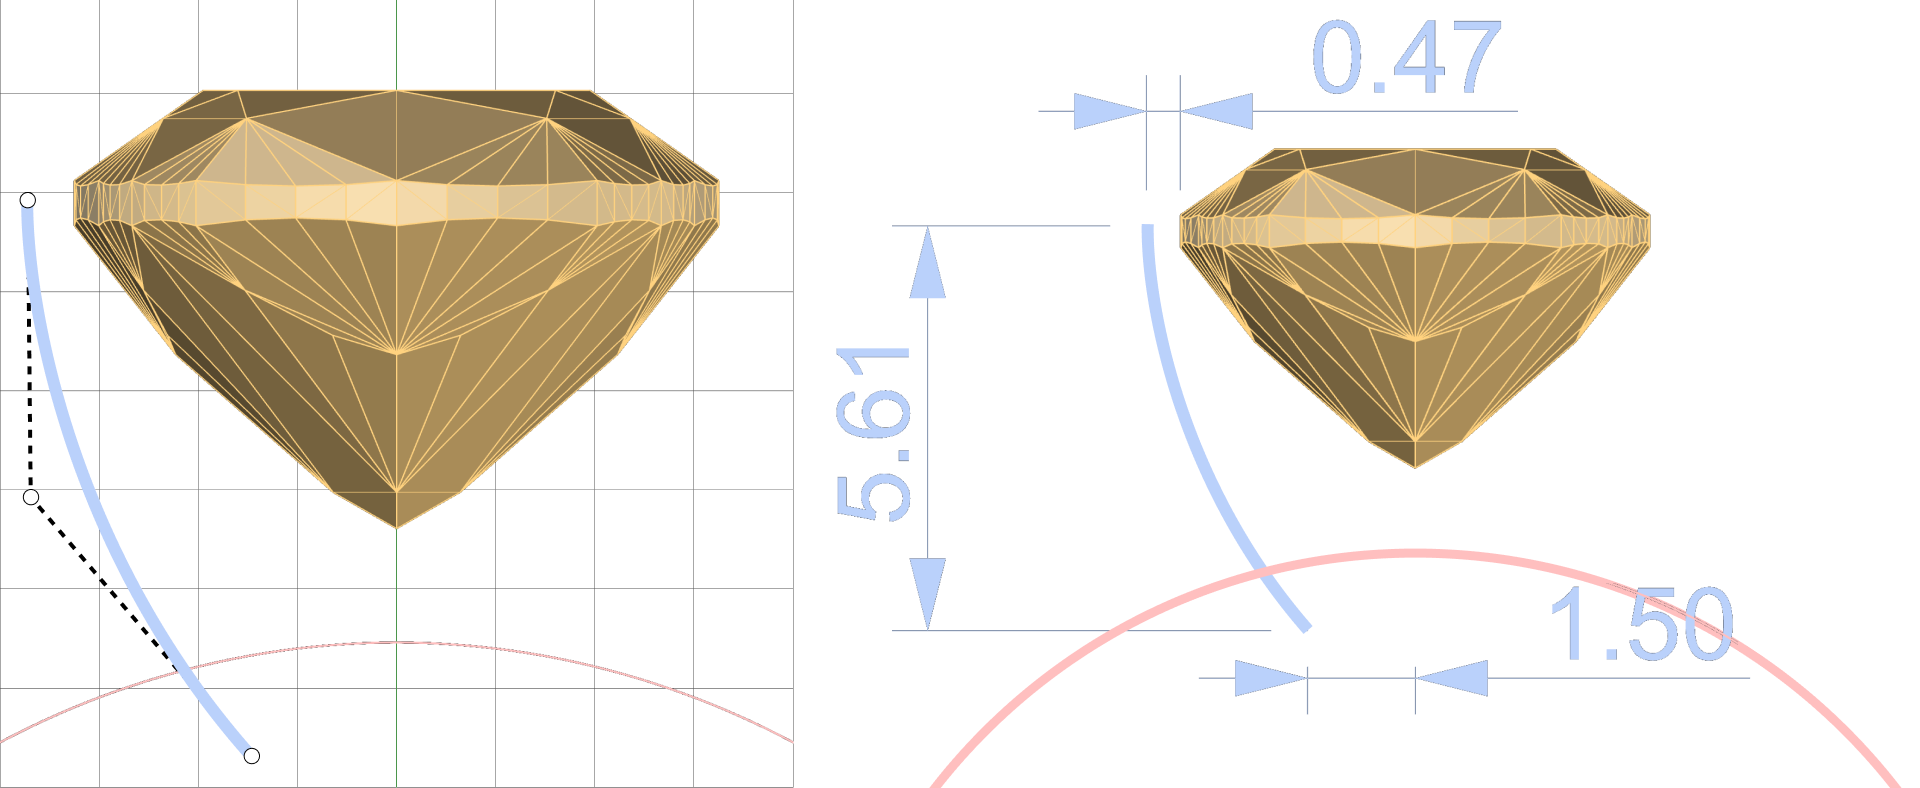
Ensure the middle point is horizontally aligned with the top point, as shown in the reference image.
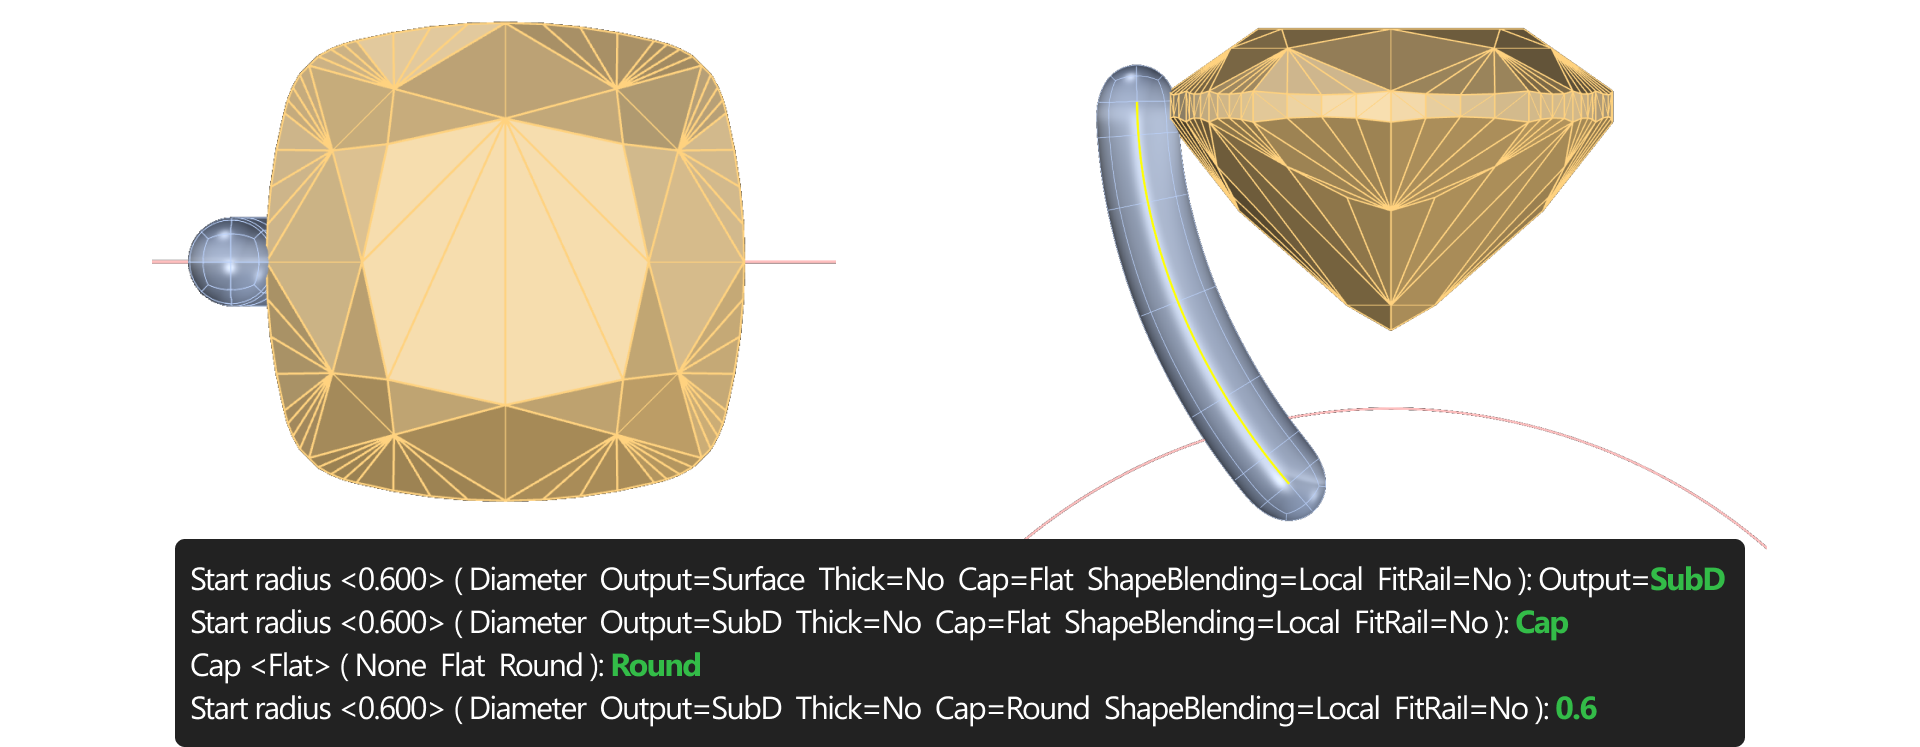
Now, select the arc and go to the Solid tab and select the Pipe command.

In the command prompt:
- Set Output to SubD.
- Choose Cap: Round.
- Enter 0.6 mm for the pipe diameter and press Enter twice.
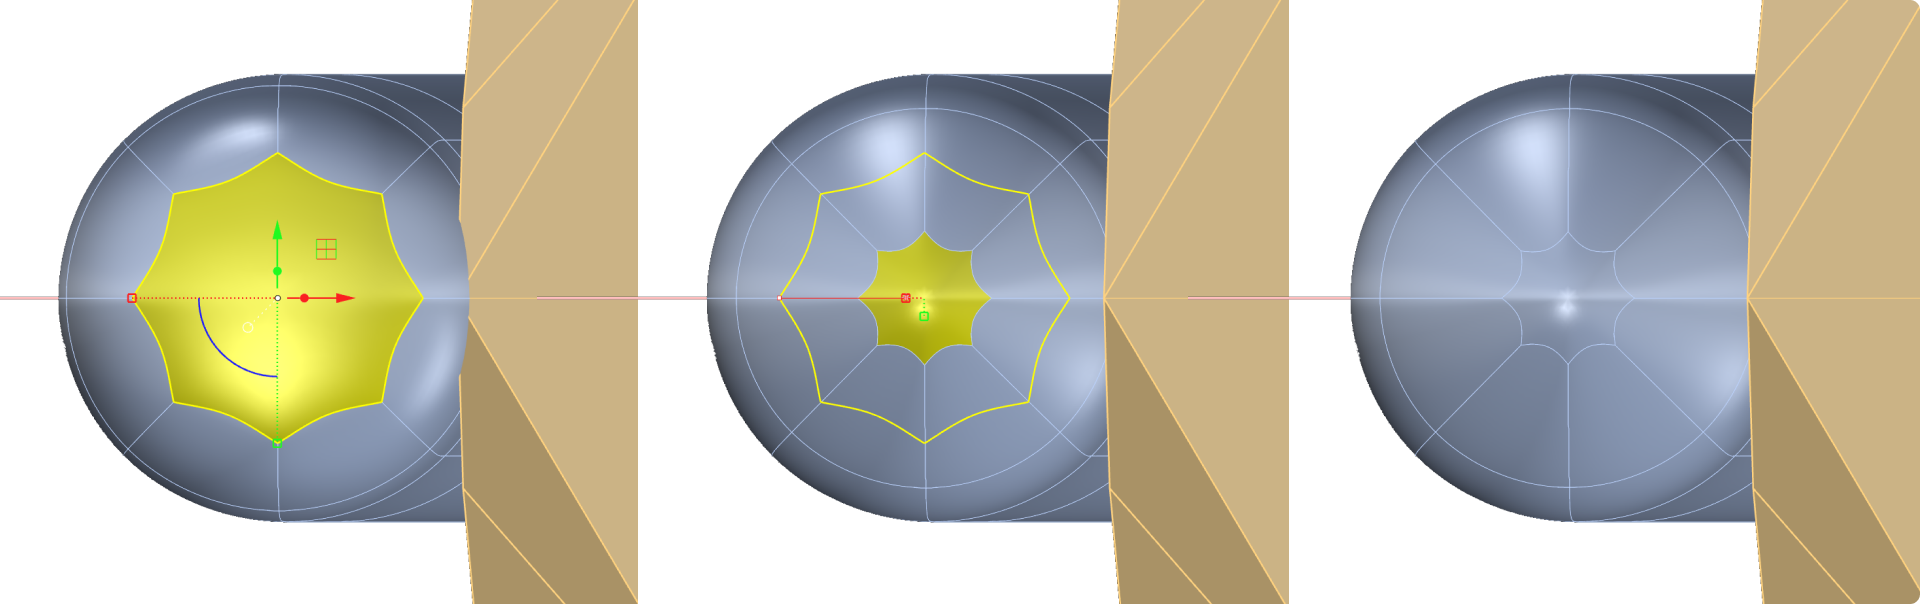
Switch to the SubD tab (1), use Face Selection (2).

- From the Top View, hold Shift and select the four top faces of the prong.
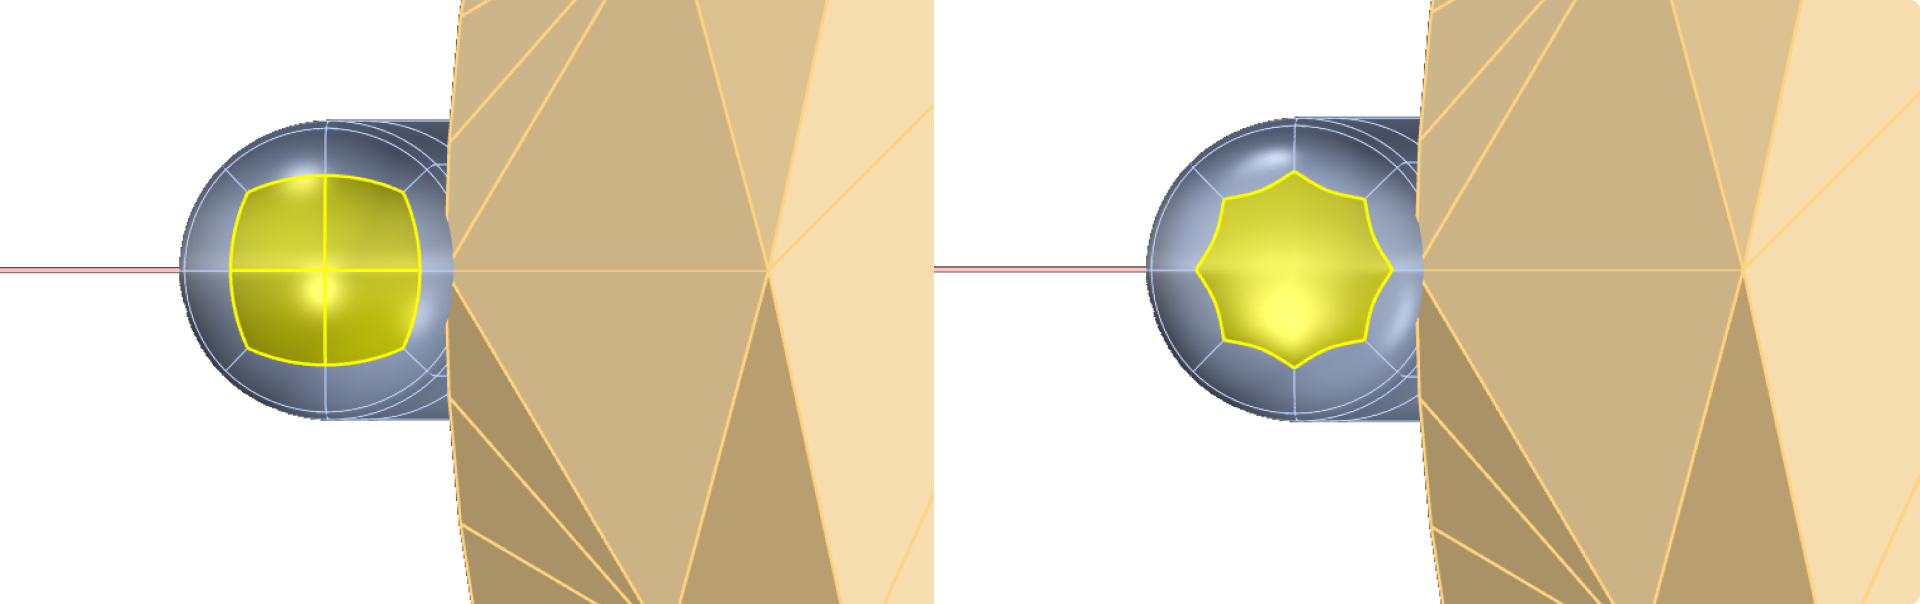
- Click on Merge Faces.

Adjust the prong:
- Use the Gumball tool to proportionally scale down the selection.
- In the Front View, move the selection upward to form a tapered tip.
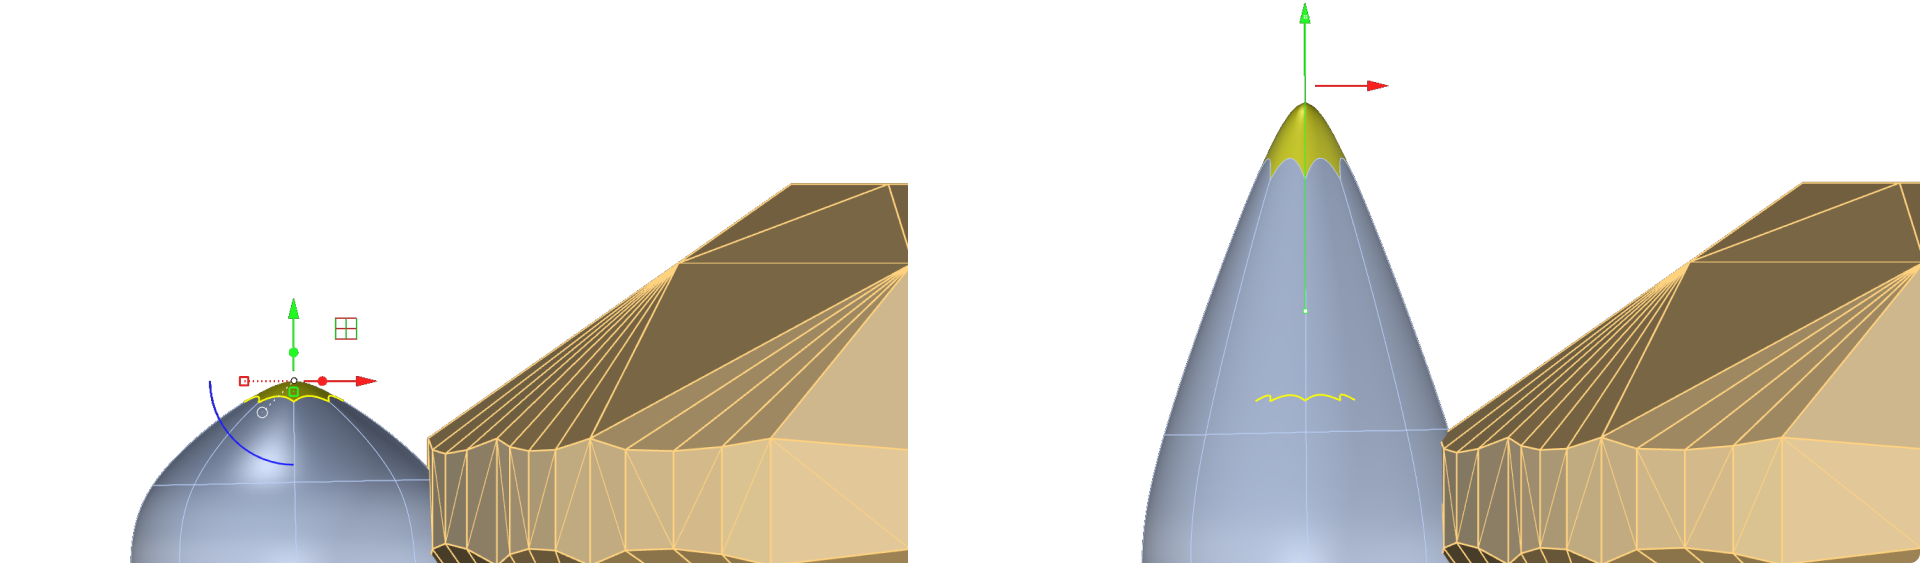
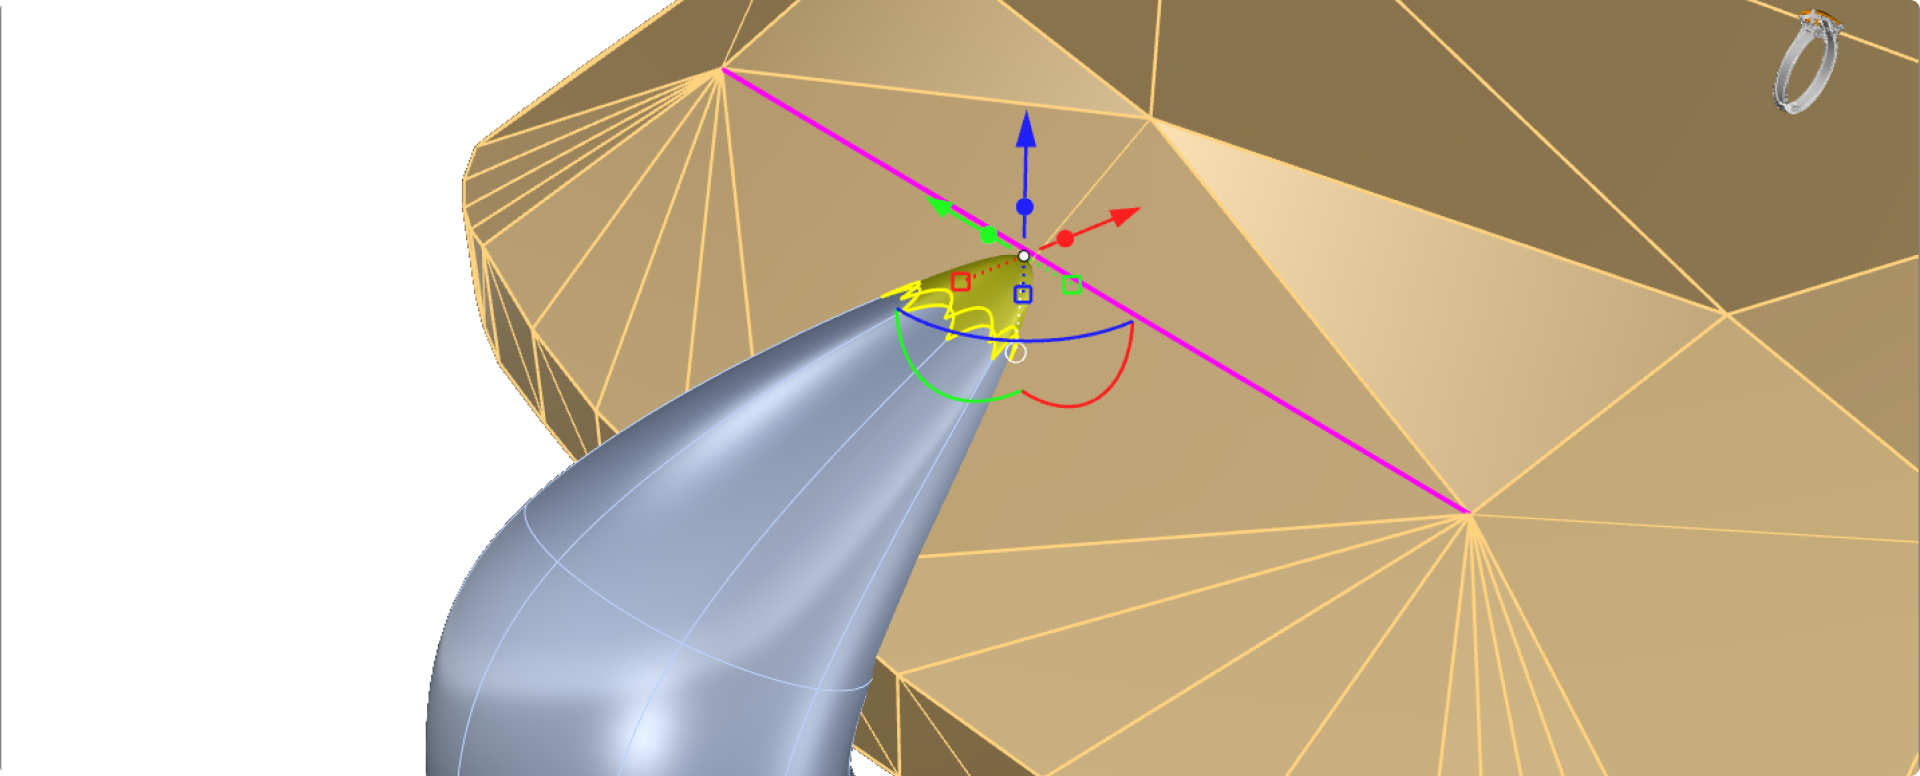
- Position the prong to align with the gem’s crown center.
To position the prong, you can create a line like the one in the image; this will help you have a reference.
Use the gumball in the front view to move only the red and blue arrows to position the tip of the prong. To visualize what you are doing, use the other views, especially the perspective view and the top view. It’s important to move only from the front view to avoid altering the alignment of the prong.
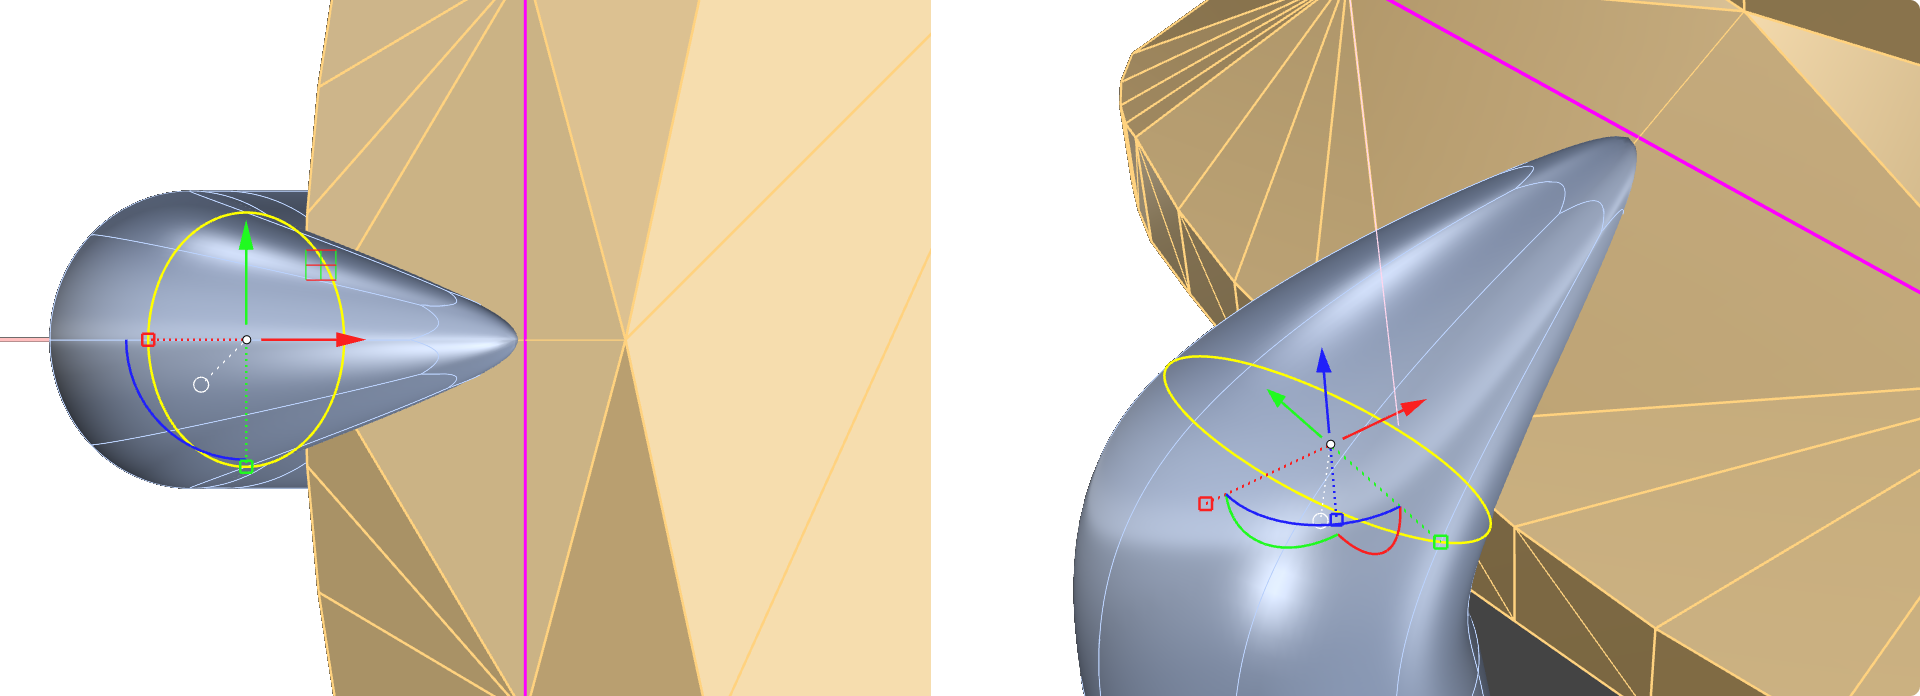
Top View
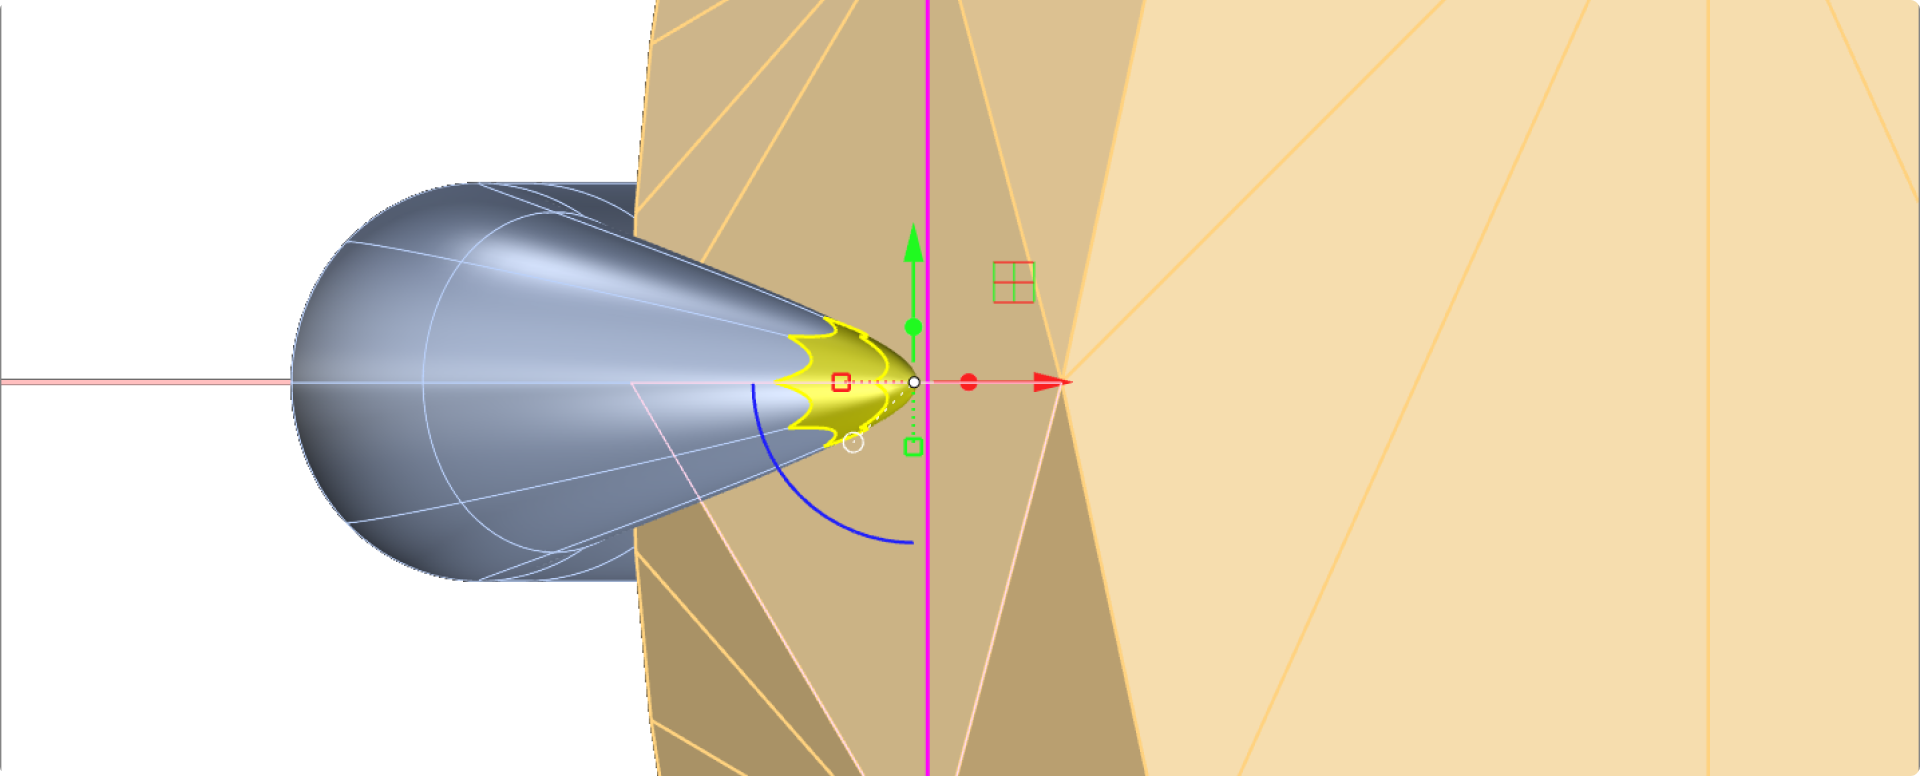
Front View
Perspective View
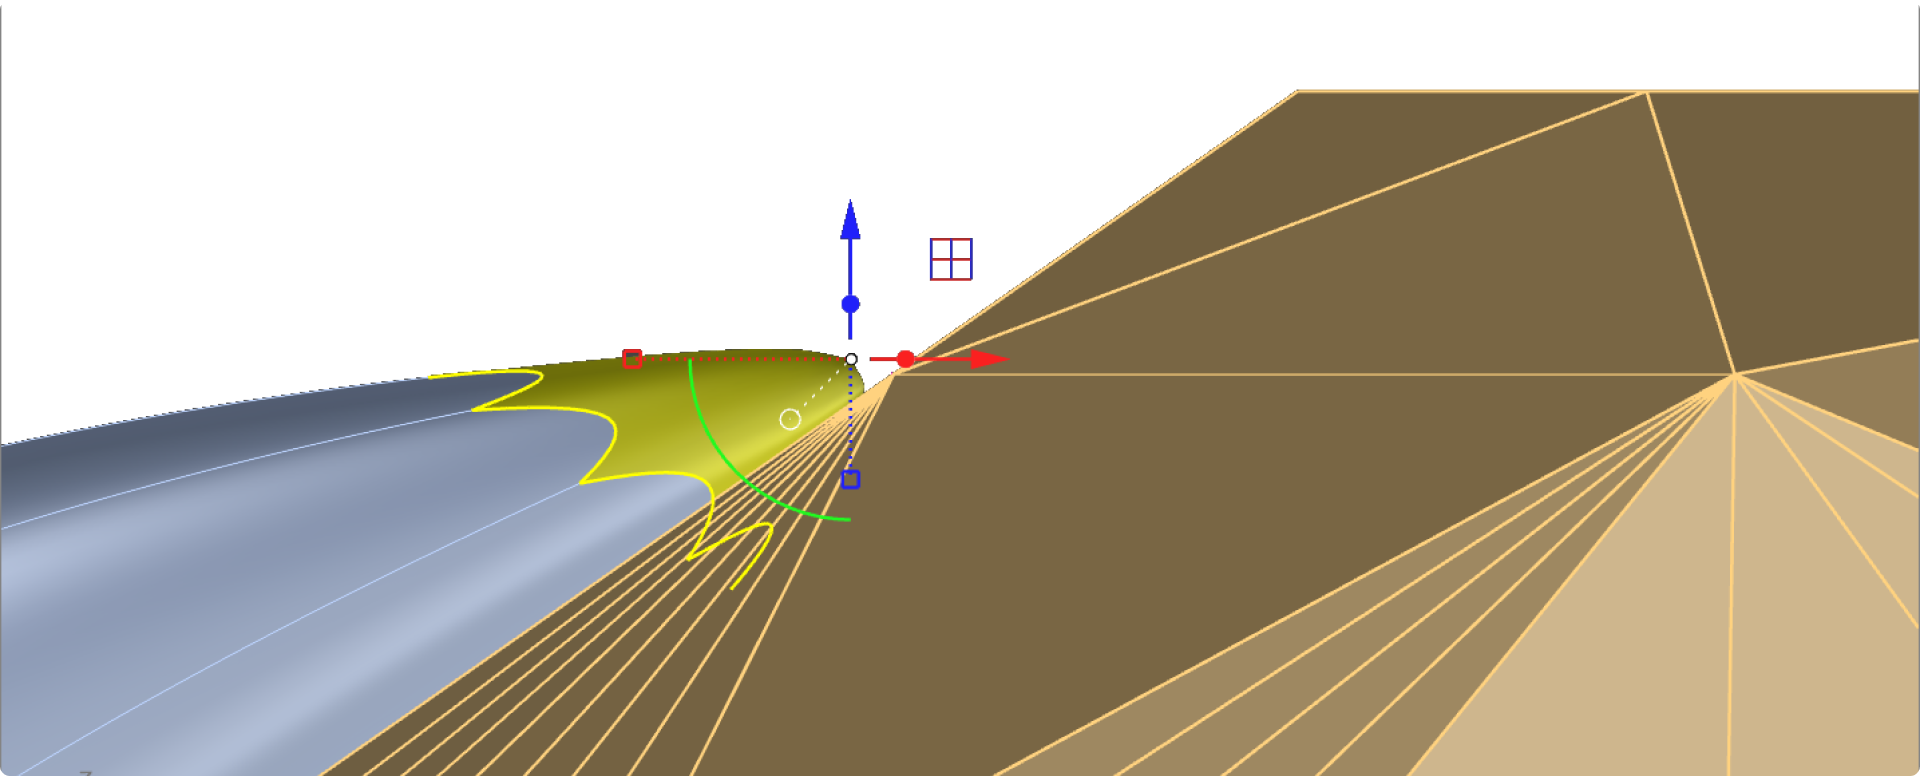
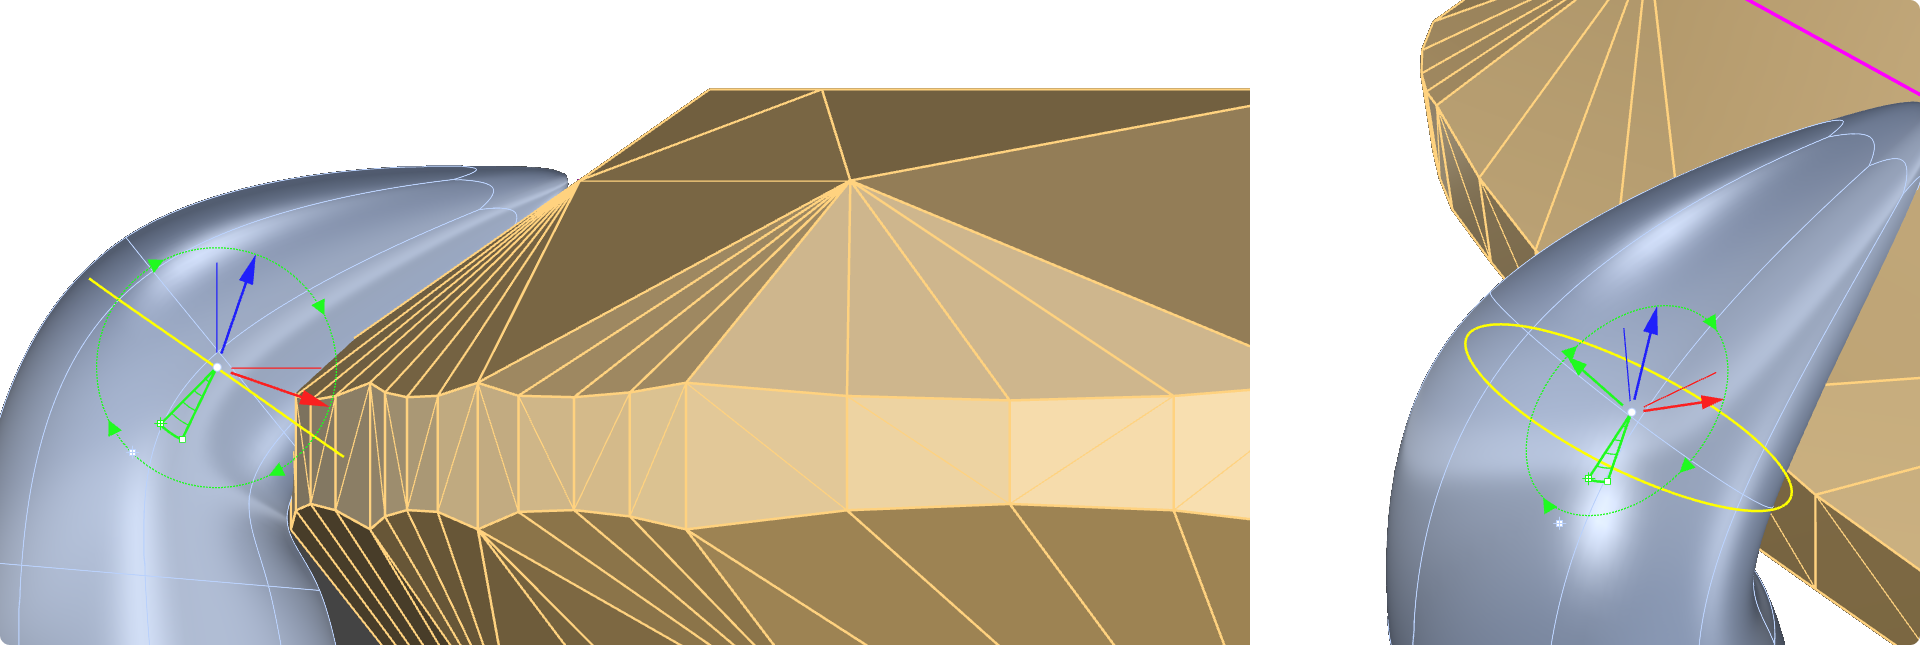
Refine the prong edges:
- Switch to Edge Selection Mode.

- Double-click the last horizontal edge of the prong.
- Rotate whith the green circle and smooth the edge using the Gumball tool.
Video Lesson
Next Step
Position the prong around the gem and prepare to mirror it.