Floating Diamond Ring
Lesson 24 of 43
Gemstones
Sign in to access this lesson
This lesson is part of Kickstart: From idea to Creation, which can come bundled with a RhinoArtisan Commercial license subject to current promotions. Log in with your customer account, or get in touch and we'll set you up.
Customers only
Solo para clientes
This lesson is part of Kickstart: From idea to Creation, which can be included with a RhinoArtisan Commercial license subject to current promotions. If you've already purchased and don't see it in your account, get in touch.
Objective: Learn how to add and position gemstones in your ring design.
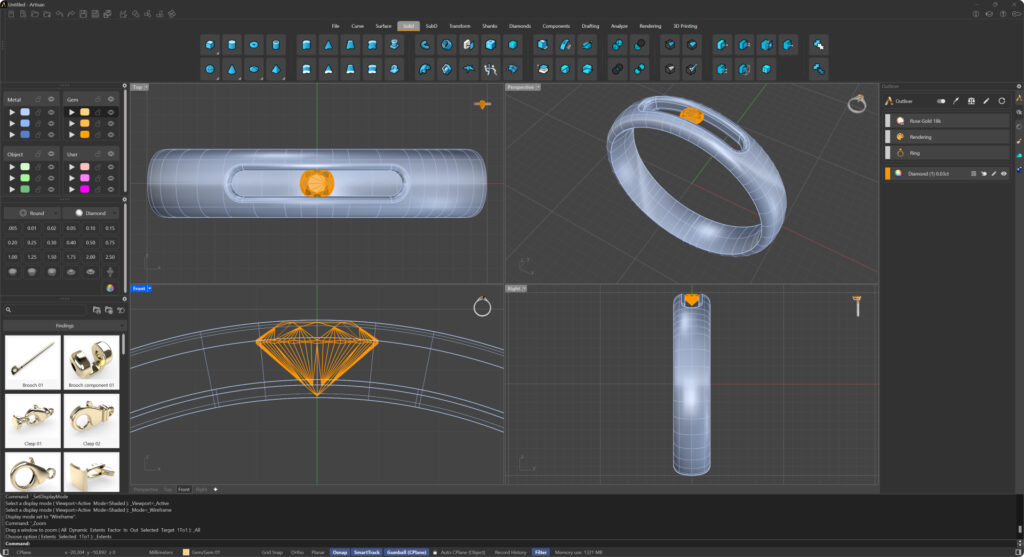
In this lesson, we are going to work with a round diamond of 2 mm of diameter. RhinoArtisan provides several methods to add gemstones to your design. Let’s explore the options available for selecting and positioning your diamond.
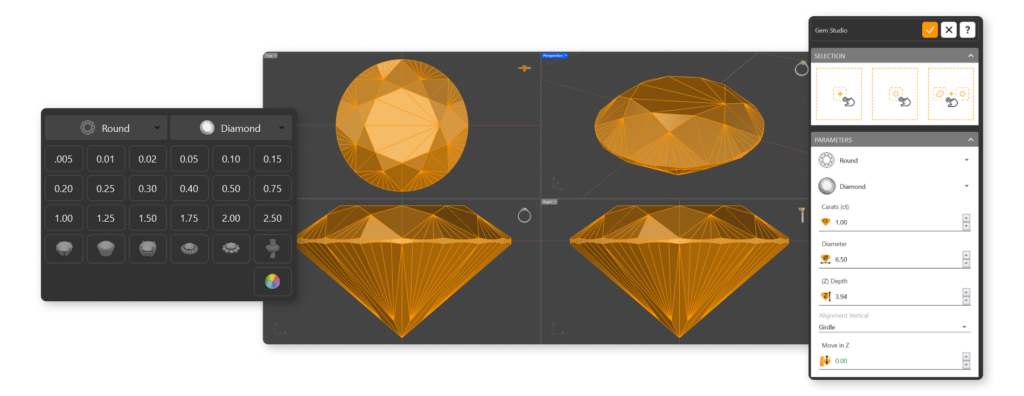
Option 1: Using the Diamonds Tab
- In the “Diamonds” tab (1), select the “Gem Studio” command (2). This will open a panel where you can customize various parameters of your diamond.

- Set the parameters according to your design needs. (3)

-
Add to Center (4): The diamond will be added to the center of the viewport.
-
Add to a Specific Point (5): Select a point in the viewport, and the diamond will be positioned at that exact location.
-
Add to a Surface Point (6): Select a surface, and then click on specific points on that surface to position the diamond precisely.
Option 2: Quick Gems Panel
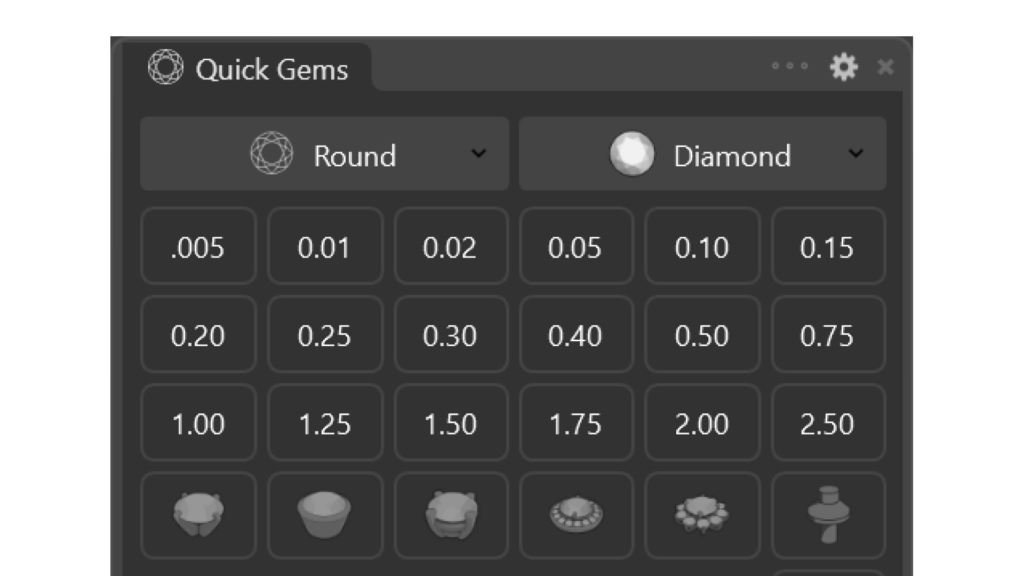
Create your Gem
Set the gemstone diameter to 2 millimeters and add it to the model.
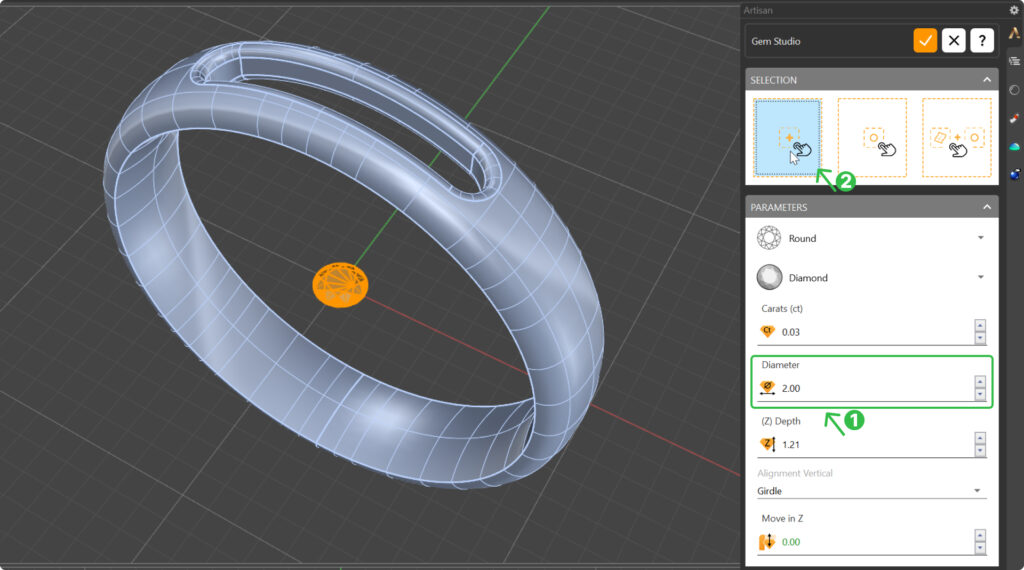
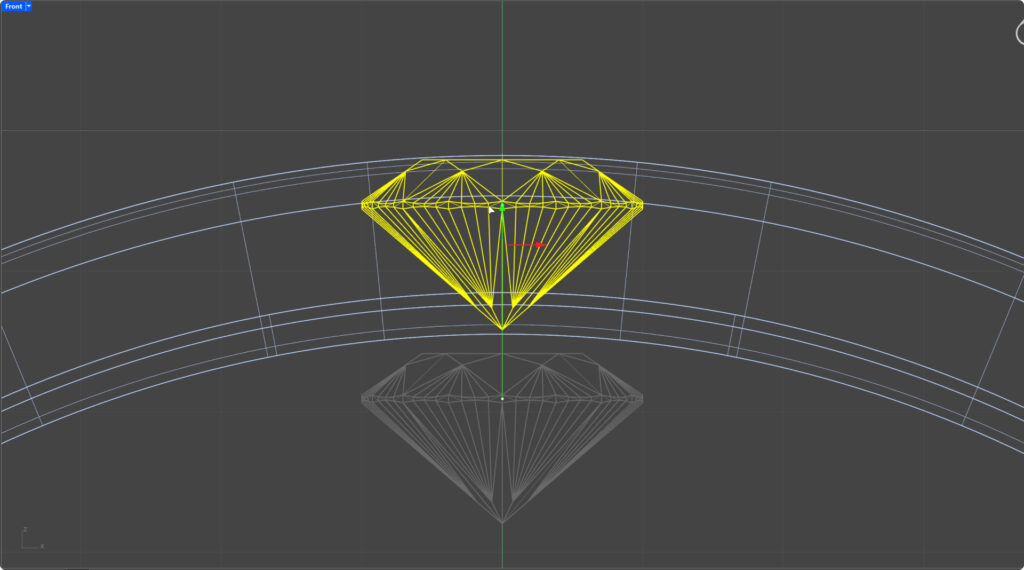
Pose
Use the gumball tool in the “Front” view to move the gemstone upwards, ensuring it doesn’t surpass the top part of the shank, change to wireframe mode for better visualization.
Now that the gemstone is in place, we will prepare the cutter for the setting.
Video Lesson
Next Steps
In the next lesson, we will prepare the cutter for the setting and use it to refine the socket.