Hoop Earrings
Lesson 6 of 62
Gems on Curve, Prongs and Cutters
Sign in to access this lesson
This lesson is part of Precision & Detail Design, which can come bundled with a RhinoArtisan Commercial license subject to current promotions. Log in with your customer account, or get in touch and we'll set you up.
Customers only
Solo para clientes
This lesson is part of Precision & Detail Design, which can be included with a RhinoArtisan Commercial license subject to current promotions. If you've already purchased and don't see it in your account, get in touch.
Objective: Learn how to populate both channels with gemstones and how to generate their prongs and cutters automatically.
Gems on Curve
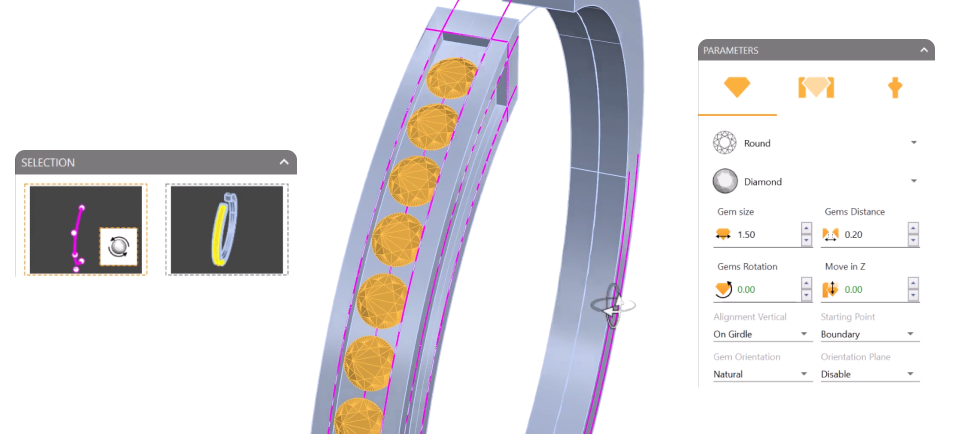
Select the top curve, go to the “Diamond” tab and click on the “Gems on Curve” command.

Then select the solid as the reference surface for the orientation. The gemstones position themselves automatically along the channel.
Prongs
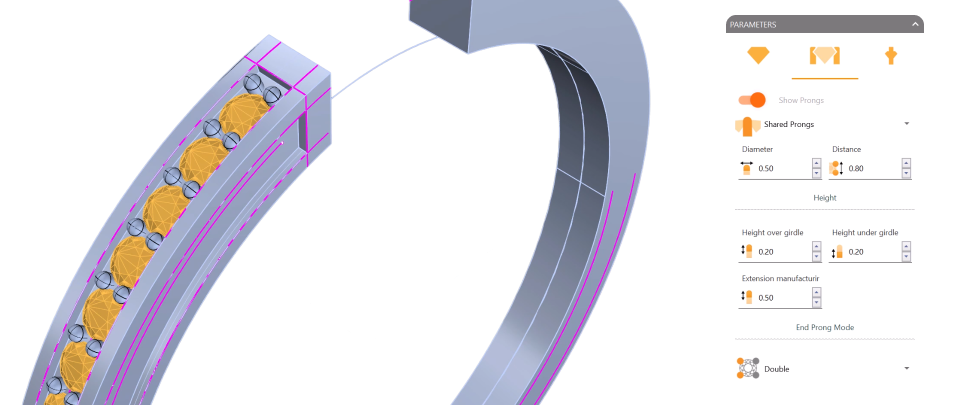
Go to the “Prongs” tab and activate it. Adjust the parameters so the prongs don’t stick out of the solid.
- Set the height under girdle to
0.2 mm. - Select a different metal layer so the prongs stay distinguishable.
Cutters
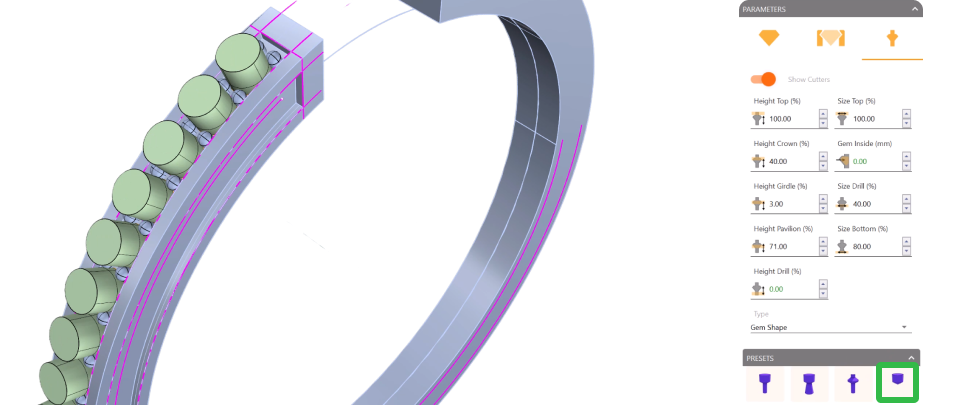
Activate the cutters using the fourth preset, then confirm the command.
Repeat on the Lateral Side
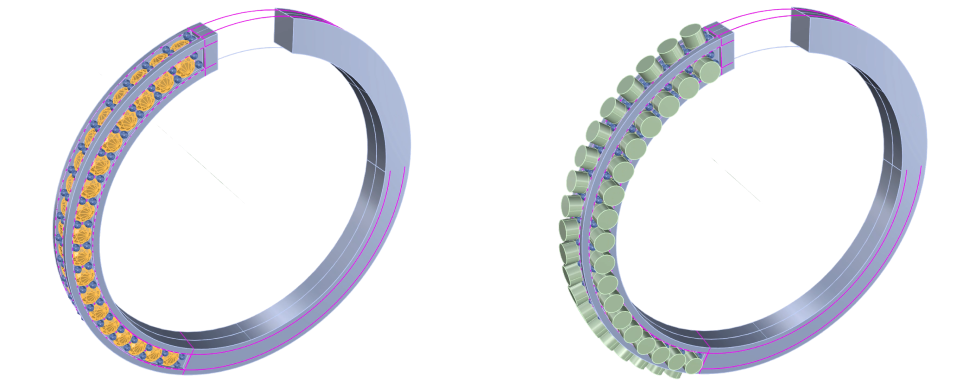
Select the lateral curve and run “Gems on Curve” again, selecting the solid as reference.
- Activate the prongs.
- Set the height under girdle to
0.1 mm. - Activate the cutters with the fourth preset and confirm.
Every element now sits on its own layer, which makes the following steps much easier.
Video Lesson
Next Step
Next, we’ll model the arms that will hold the earring clasp.
Almost there — you still have some lessons to complete. Jump to the next one →
Impersonating — progress and reviews are disabled.
Course completed
You've completed Precision & Detail Design 🎉
Great work. Get your certificate of completion and, if you have a minute, let other jewelers know what you thought of the course.