Infinity Pendant
Lesson 27 of 62
Edit the Curve Points
Sign in to access this lesson
This lesson is part of Precision & Detail Design, which can come bundled with a RhinoArtisan Commercial license subject to current promotions. Log in with your customer account, or get in touch and we'll set you up.
Customers only
Solo para clientes
This lesson is part of Precision & Detail Design, which can be included with a RhinoArtisan Commercial license subject to current promotions. If you've already purchased and don't see it in your account, get in touch.
Objective: Learn how to edit the control points to turn a flat outline into a three-dimensional infinity.
Select the Central Points
Select the curve and then select the four central points one by one. Starting from the top, follow the dashed yellow line of points to know which point comes next. Hold Shift to select more than one point.

Raise Them 1 mm
With the four points selected, activate the grid snap option from the right view and, using the gumball, move the points up one square, which is 1 mm.
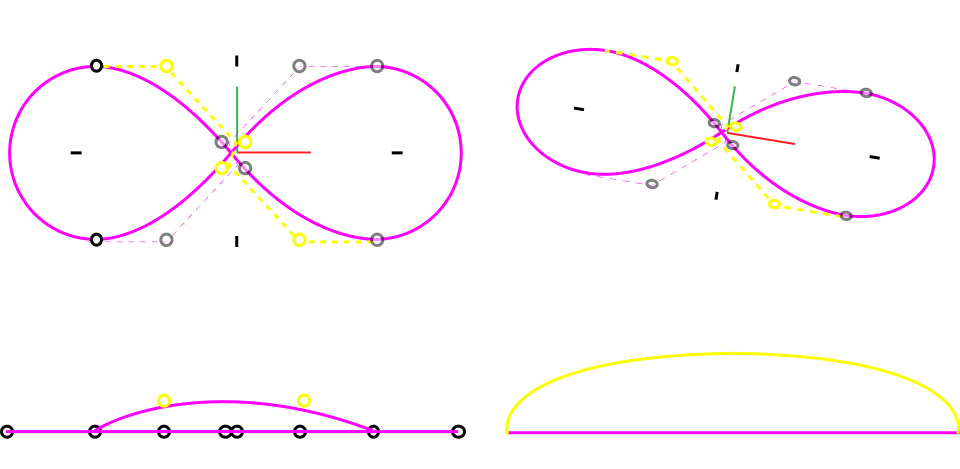
Lower the Ends
Select the two ends, deactivate grid snap and move them down using the gumball.
Then select the other two points and move them up from the right view using the gumball, until the curve flows smoothly.
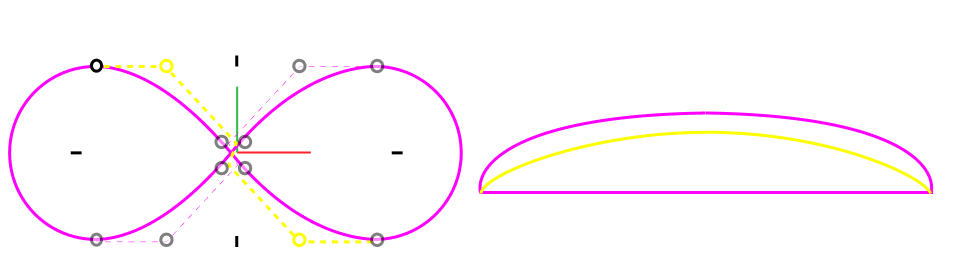
Final Adjustment from the Front
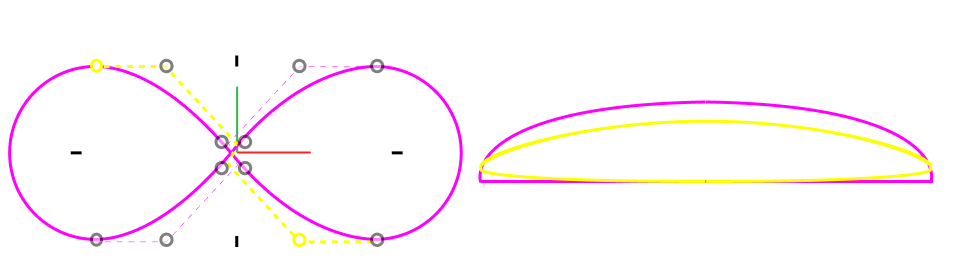
To finish editing, go to the front view and select all the points on the top.
Move them up until the highest point is 1 mm above the axis, using the grid squares as reference. Then adjust the points until you obtain a smooth curve.
Video Lesson
Next Step
The curve is finished. Next, we’ll offset it to build the rails of the pendant.
Almost there — you still have some lessons to complete. Jump to the next one →
Impersonating — progress and reviews are disabled.
Course completed
You've completed Precision & Detail Design 🎉
Great work. Get your certificate of completion and, if you have a minute, let other jewelers know what you thought of the course.