Bezel Set - Pendant
Lesson 36 of 58
Bail
Sign in to access this lesson
This lesson is part of Iconic Fashion Pieces, which can come bundled with a RhinoArtisan Commercial license subject to current promotions. Log in with your customer account, or get in touch and we'll set you up.
Customers only
Solo para clientes
This lesson is part of Iconic Fashion Pieces, which can be included with a RhinoArtisan Commercial license subject to current promotions. If you've already purchased and don't see it in your account, get in touch.
Objective: Add and customize a bail for the pendant.
Step 1: In the Components tab, use the Bail command.

Step 2: Select the BL03 model and disable the O-Ring.

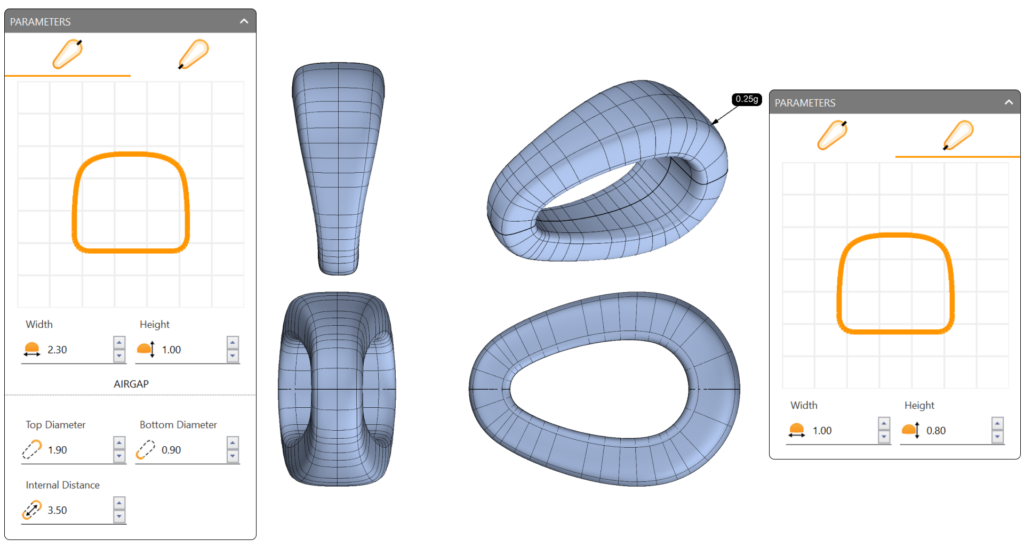
Step 3: Adjust the parameters as follows:
First Curve
- Width: 2.3 mm
- Height: 1.0 mm
Second Curve
- Width: 1.0 mm
- Height: 0.8 mm
Airgap
- Top Diameter: 1.9 mm
- Bottom Diameter: 0.9 mm
- Internal Distance: 3.5 mm
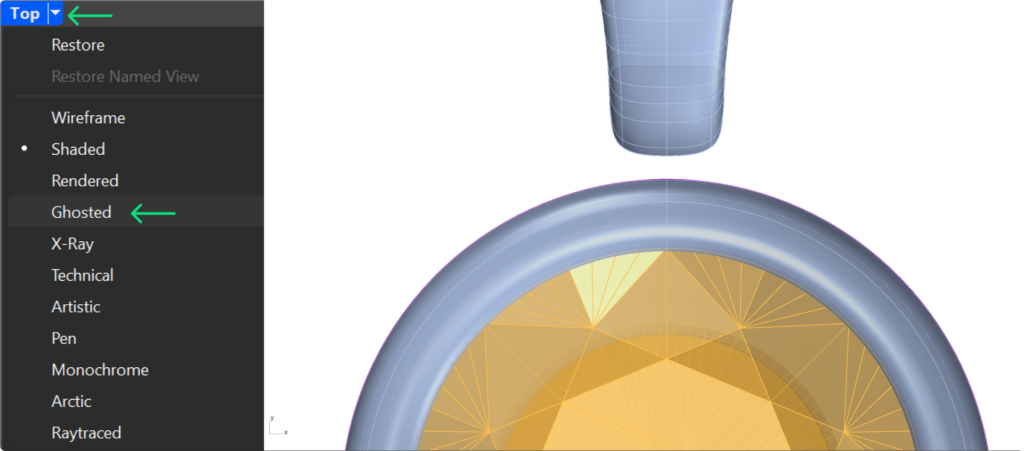
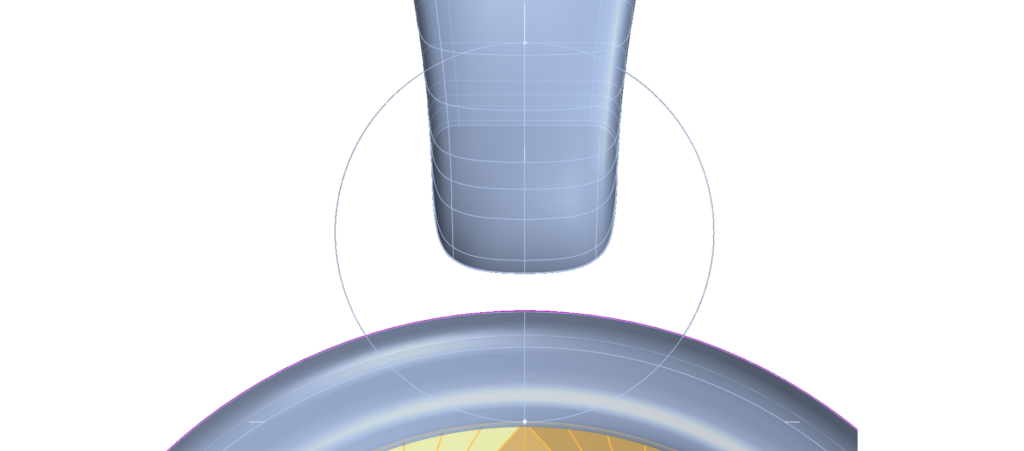
Step 4: Switch to Ghosted visualization mode to view the inside of the bezel.
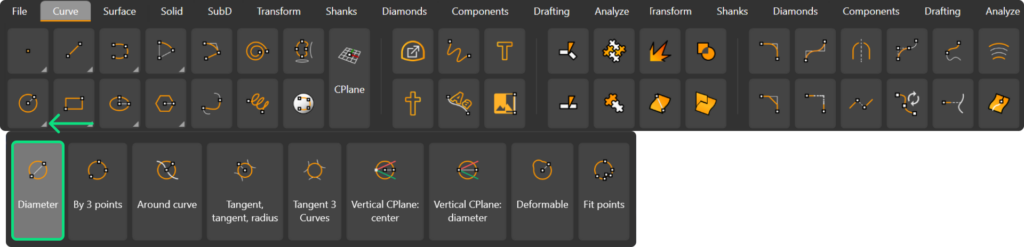
Step 5: In the Curve tab, use the Diameter command.
Step 6: As the first point, select the inner curve of the bezel.
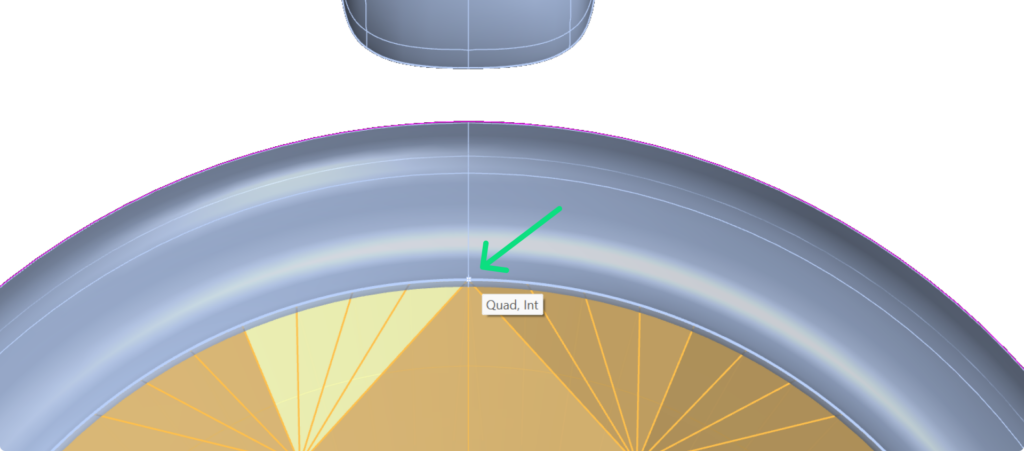
Step 7: Type 2.05 millimeters and select a point on the Y-axis at the Bail’s location.
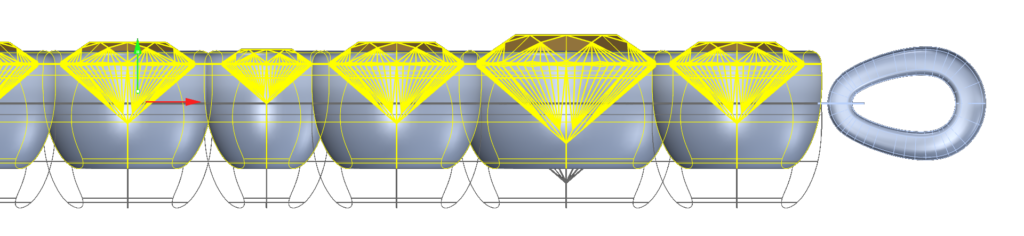
Step 8: In the Right view, select all bezels and gems, and adjust the height to align approximately at the center of the bezel using the curve created.
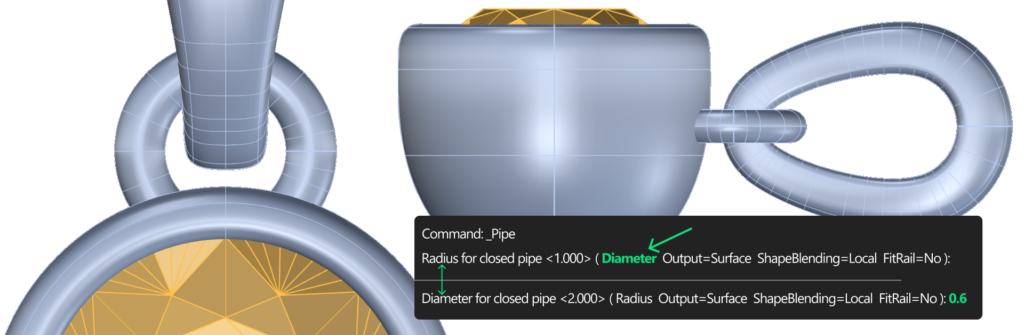
Step 9: In the Solid tab, use the Pipe command.

Step 10: Ensure Diameter mode is selected, type 0.6 millimeters for the diameter, and press Enter twice.
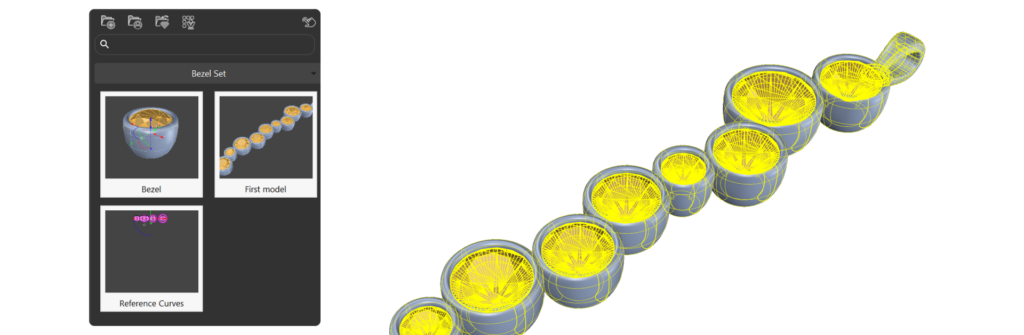
Step 11: Select everything and save it in the Curator panel.
Video Lesson
Next Step: Start with the second model.