Fashion Ring
Lesson 6 of 58
Profile command: Create the shank
Sign in to access this lesson
This lesson is part of Iconic Fashion Pieces, which can come bundled with a RhinoArtisan Commercial license subject to current promotions. Log in with your customer account, or get in touch and we'll set you up.
Customers only
Solo para clientes
This lesson is part of Iconic Fashion Pieces, which can be included with a RhinoArtisan Commercial license subject to current promotions. If you've already purchased and don't see it in your account, get in touch.
Objective: Refine the design by creating the shank with the profile command.
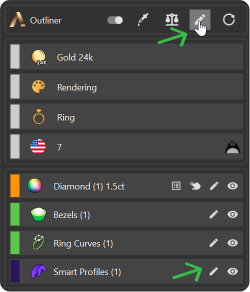
Step 1: In the “Components tab”, find the “Profile command”.

Step 2: Without selecting any model, click on Edit.
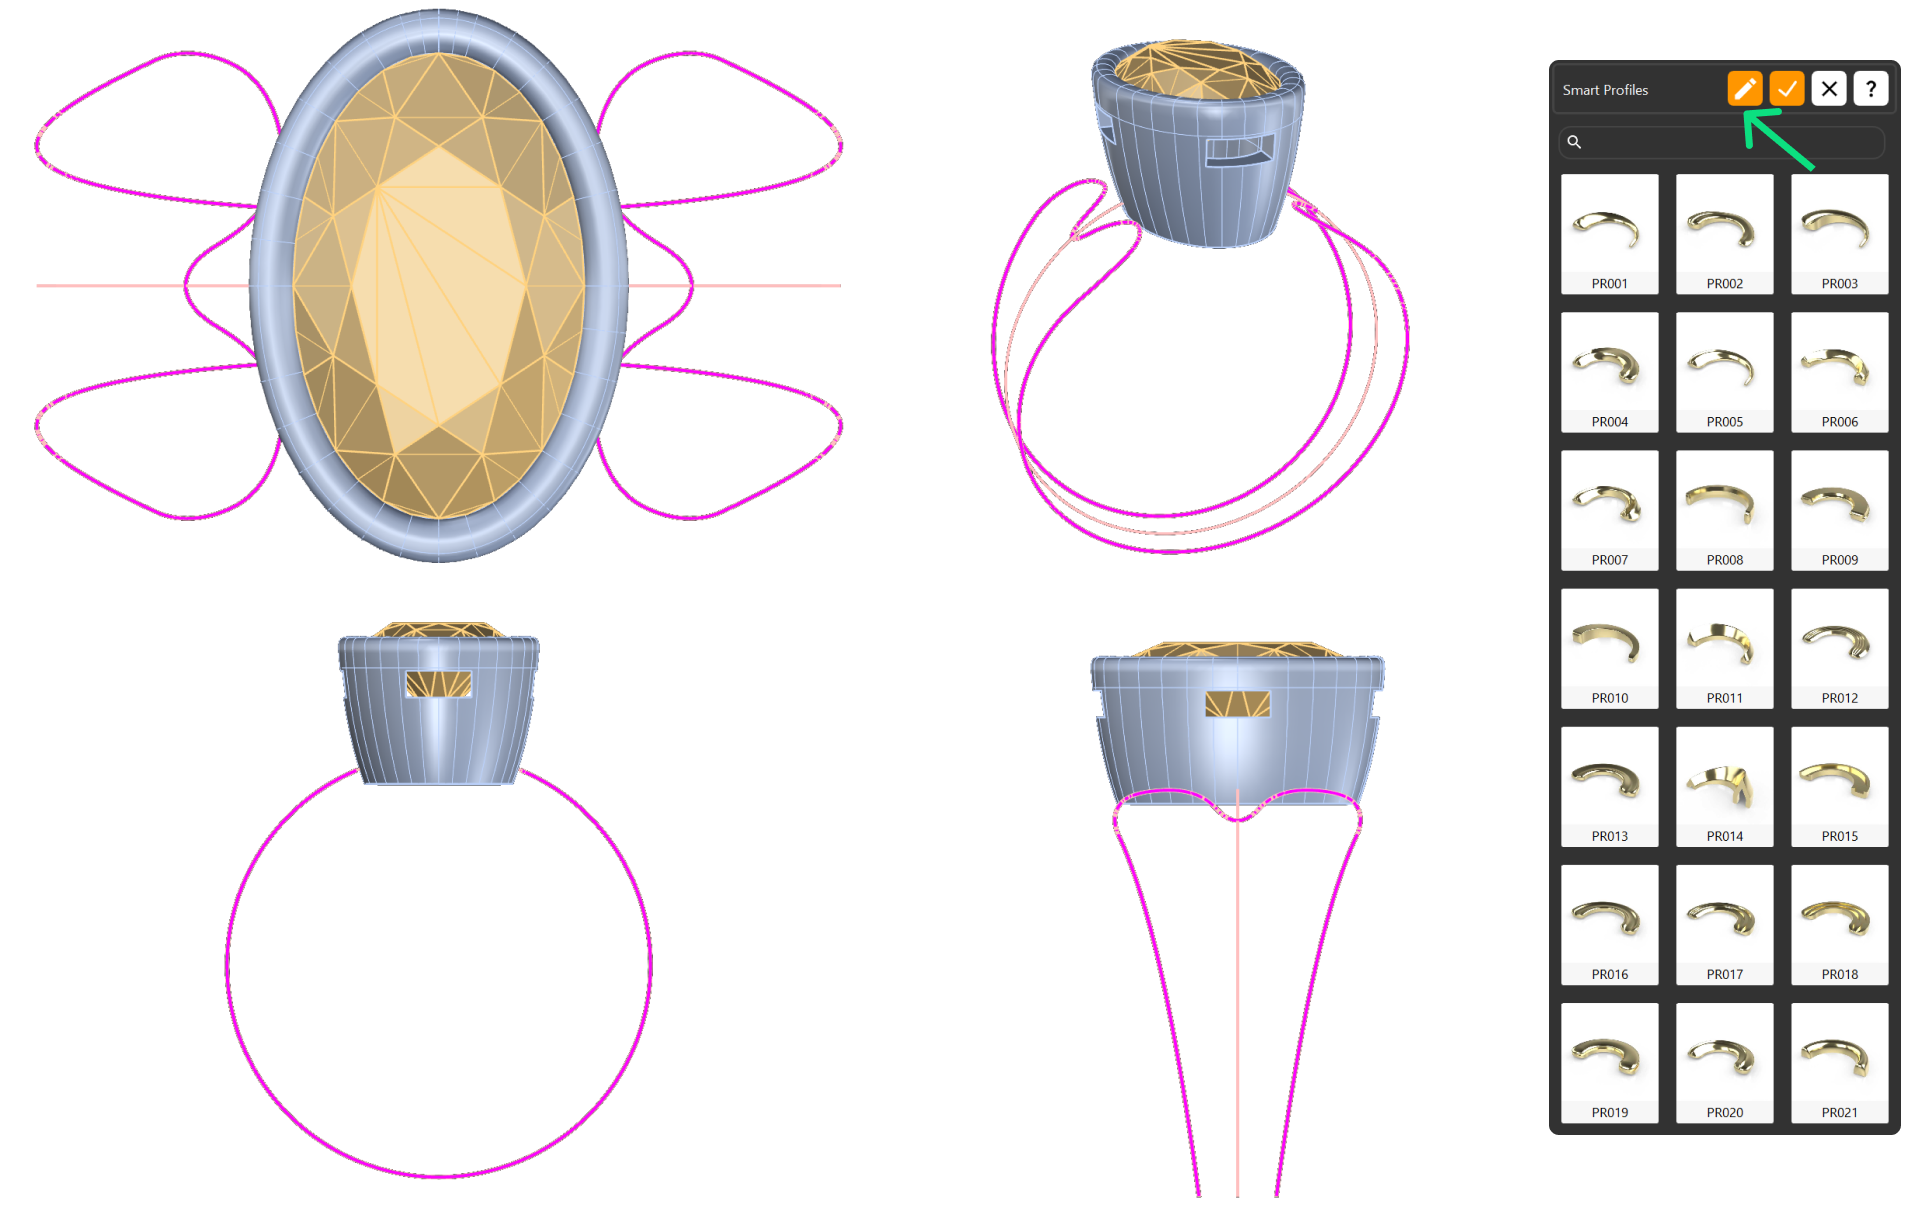
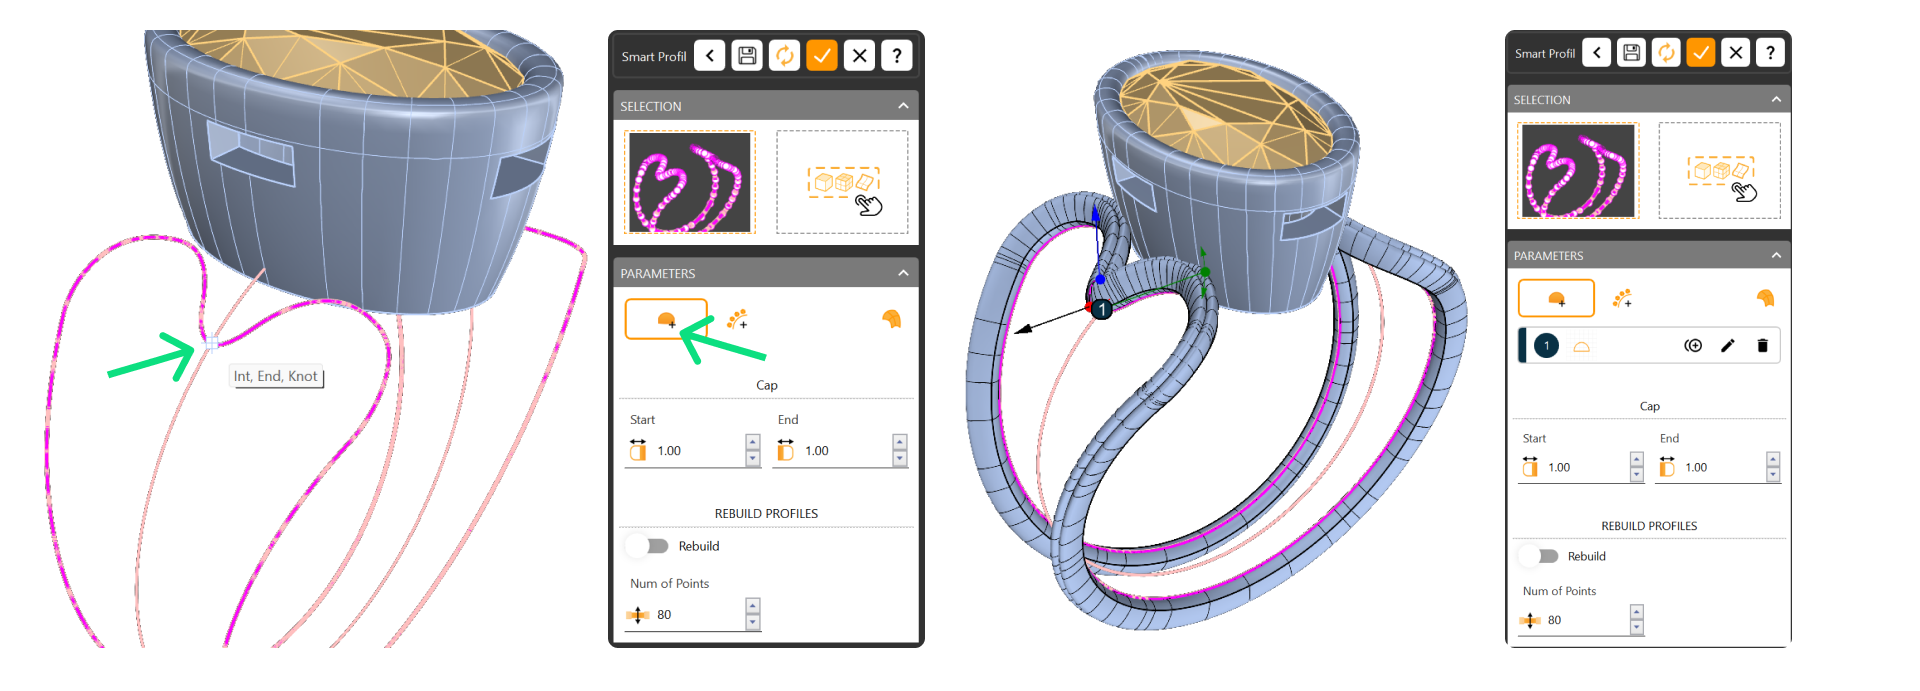
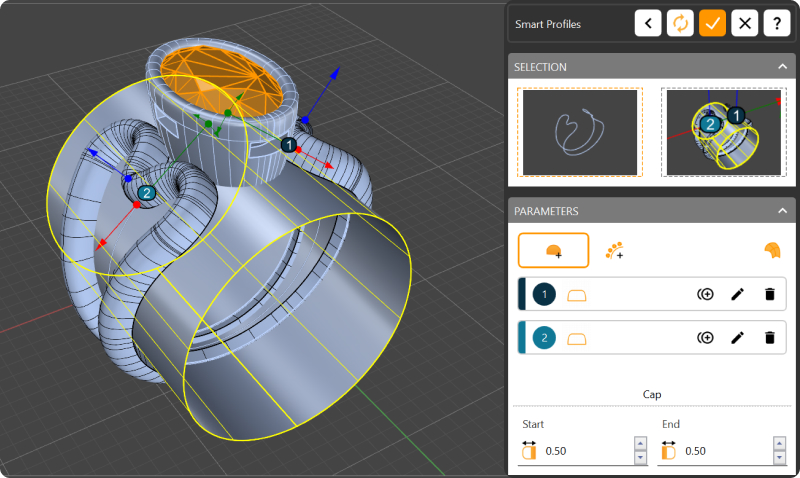
Step 3: Press the Add button to add a new profile. It’s important to have osnap enabled, as it will help us position the profiles correctly. Click on the inner part of the upper curve, and the osnap assist will show “End, Int, Knot.” Click to add the profile.
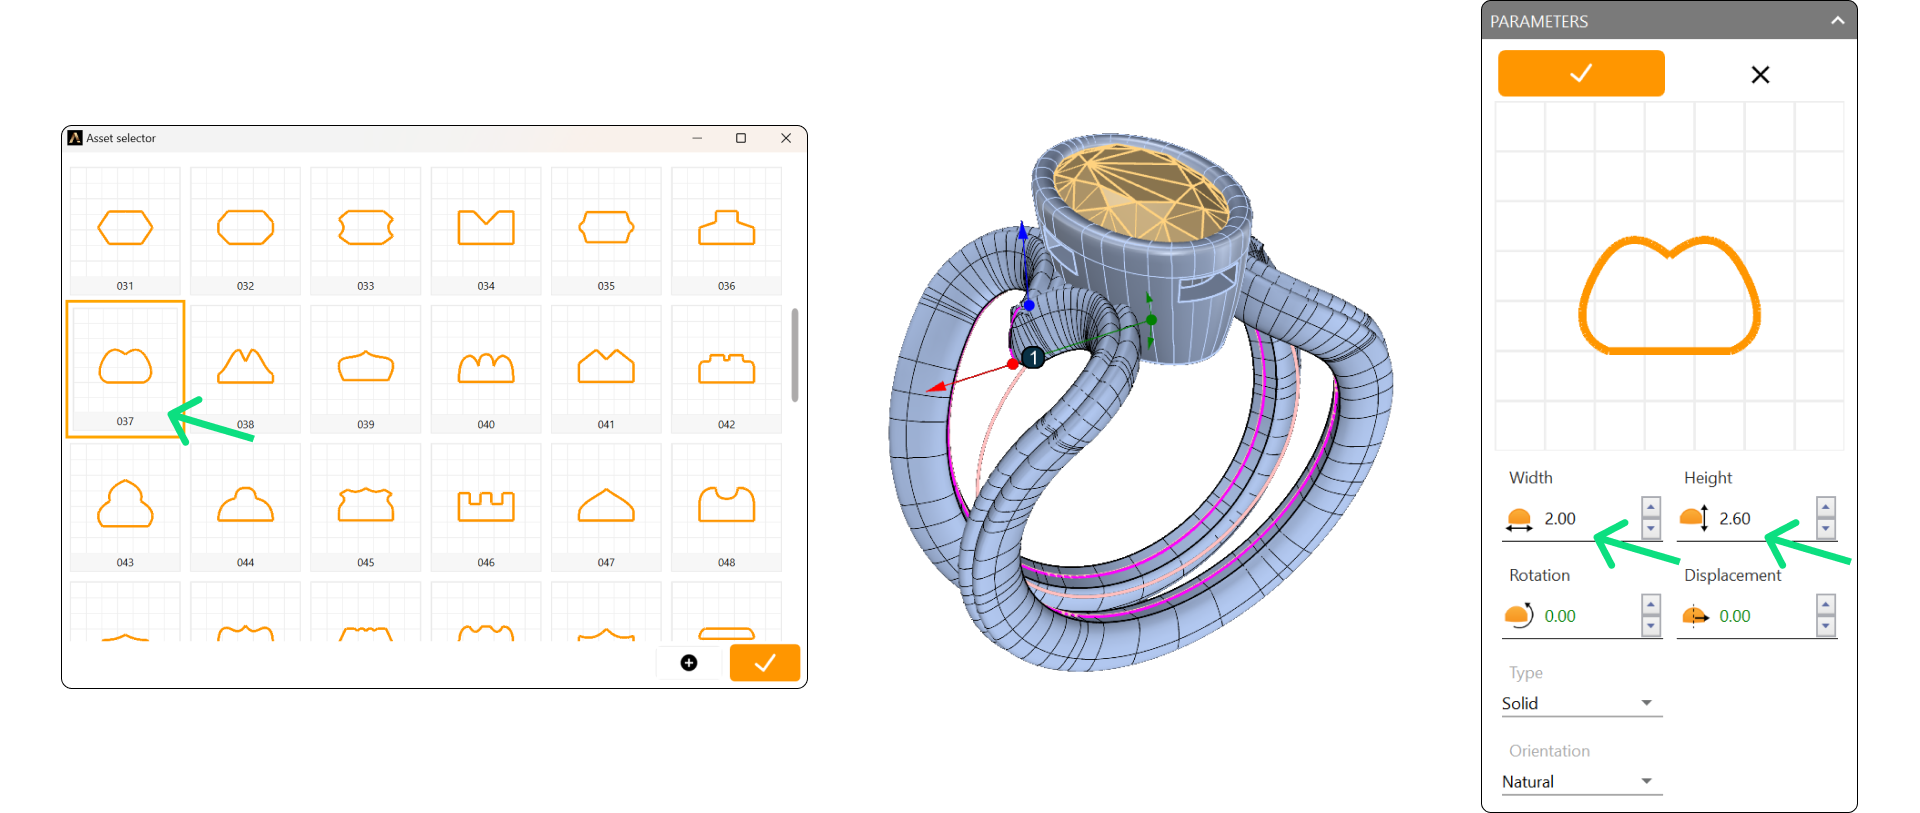
Step 4: Now, edit the profile curve and change it to asset 037. Also, adjust the width to 2 mm and the height to 2.6 mm. Set the type to Solid and click Accept.
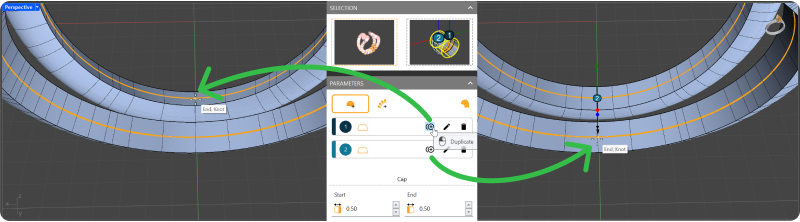
Step 5: Next, duplicate this profile to the other side by clicking Duplicate. To help position it correctly, change the view to see it from below. This way, we will see the reference curve and be able to position it. Click when you see the osnap assist saying “End, Int, Knot.”

Accept the command.
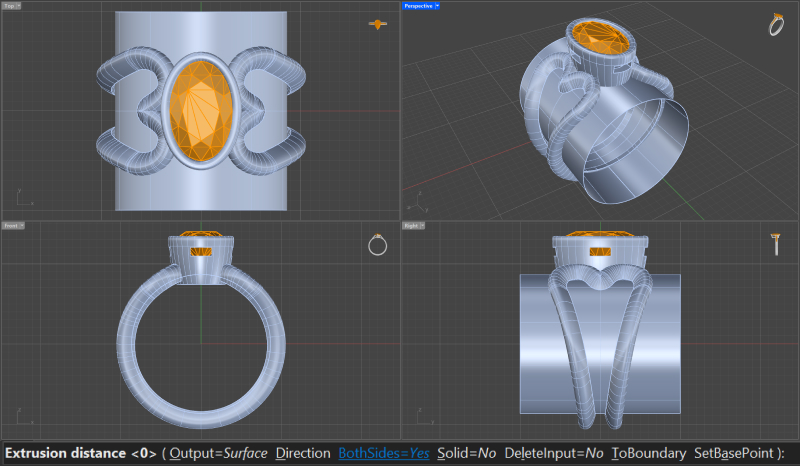
Step 4: We will need a reference surface for the profile. In the Surface tab, select the Extrude command

Step 4: Select the ring curve, ensure the Both Sides option is set to Yes in the command prompt, type 10, and press Enter.
Step 5: Select the profile and click on edit.
Now, select the surface and add it as a reference by clicking in the Profile panel.
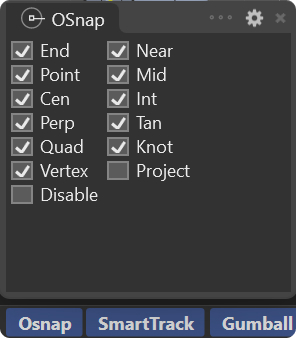
Step 6: To create two different profiles on the bottom, activate all options in the Osnap panel except Project and Disable.
Step 7: Use the + button to duplicate Profile 1 and Profile 2. Click on the bottom of the piece when you see ‘End, Knot.
Step 7: Now we have 4 profiles, and we can edit each one to customize our shank.
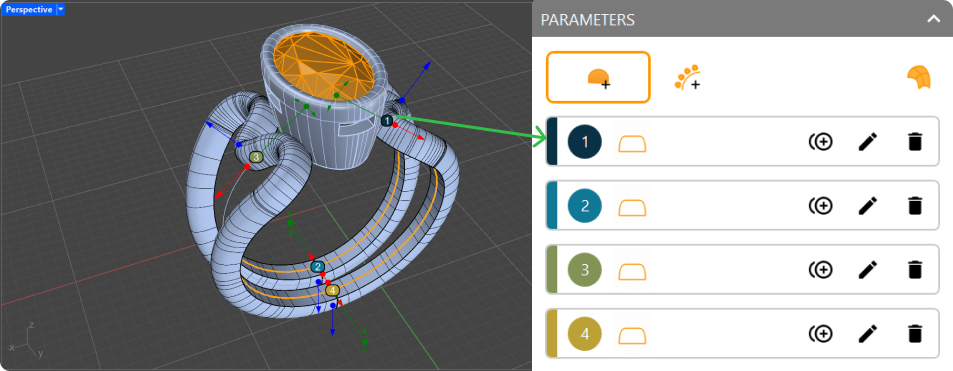
Note that each profile has a different color, matching the color of the gumball for that element. This makes it easier to identify each one.
Video Lesson