Diamonds and Gemstones
Cluster
 Cluster
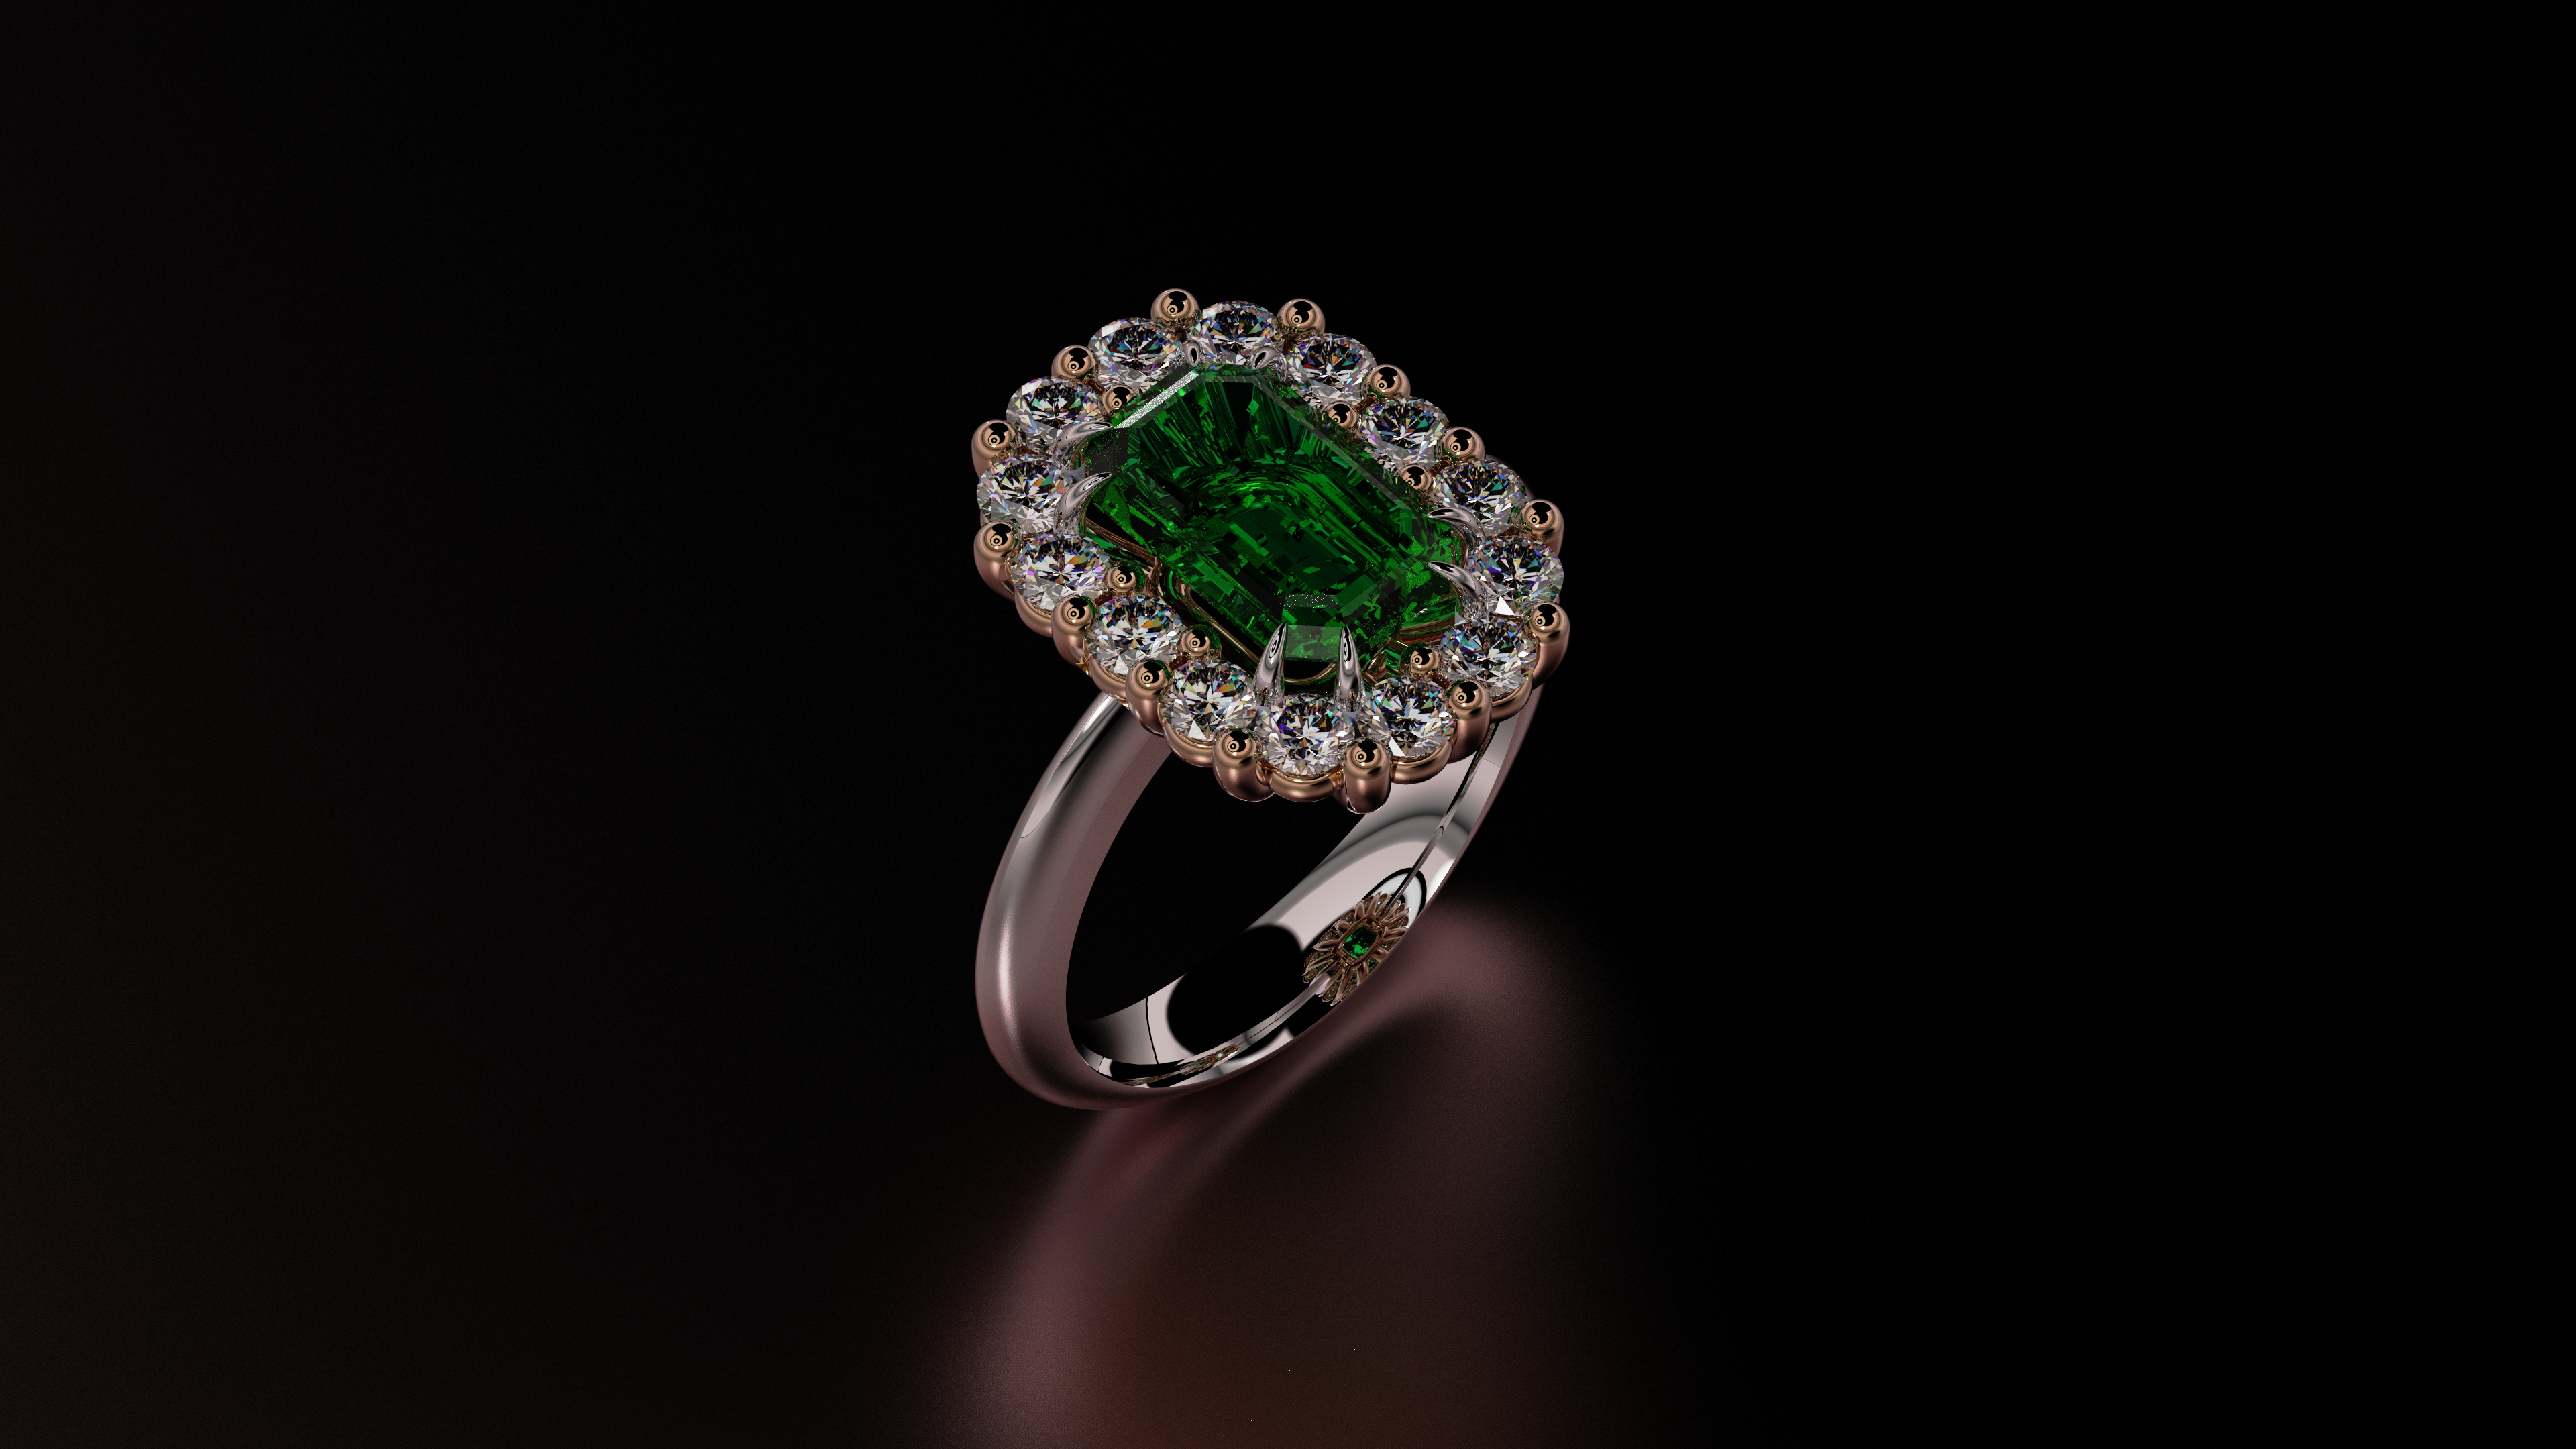
Our Cluster command arranges smaller gemstones around a larger central gem with full customization. It allows precise control over prongs for the central and secondary stones, including prongs built from the base for structural support. In just a few steps, you can create a polished cluster setting, ready for use in rings, earrings, or pendants, delivering a brilliant, sparkling effect with professional-grade precision.
.png)
Once the Cluster command is activated, you’ll first be prompted to select the central stone, around which the cluster will be built.
The cluster can be created for the following gem cuts:
Round, Cushion, Oval, Emerald, Radiant and Asscher.
After the selection, the command panel will open, featuring a single panel divided into three tabs.
 Surrounding Gemstones
The first tab allows you to configure the surrounding gemstones, ensuring they are arranged perfectly around the central stone.
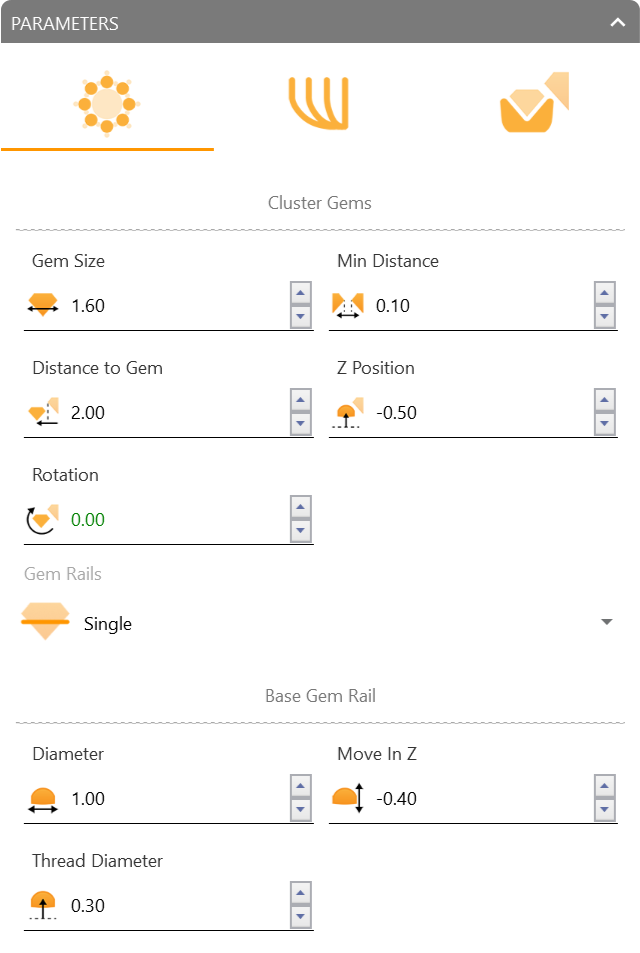
Cluster Gems
- Gem Size: Defines the size of the surrounding gemstones. It is essential to ensure proper proportion between the central gem and the surrounding stones.
- Min Distance: Determines the minimum distance between the surrounding gemstones. It controls how close or far apart the stones are from each other.
- Distance to Gem: Adjusts the distance between the surrounding gemstones and the central stone.
- Z-Position: Controls the height of the surrounding gemstones relative to the vertical axis.
- Rotation: This parameter allows the surrounding gemstones to be rotated.
- Smooth Edges: Adjusts the fillet applied to the surrounding gemstones for a smoother, less angular look.
Gem Rail
Defines the support or rail upon which the surrounding gemstones are mounted. Single or Double rail.
Top Gem Rail
- Diameter: Adjusts the diameter of the rail holding the surrounding stones.
- Move in Z: Allows you to adjust the height of the rail along the Z-axis.
- Thread Diameter: Configures the diameter of the wire or structure holding the surrounding gemstones in place.
Bottom Gem Rail
Available when the Gem Rail mode is set to Double. Adds a second rail below the top one.
- Diameter: Adjusts the diameter of the bottom rail holding the surrounding stones.
- Move in Z: Allows you to adjust the height of the bottom rail along the Z-axis.
- Thread Diameter: Configures the diameter of the wire or structure forming the bottom rail.
 Main Prongs
In the second tab, you’ll find all parameters related to the main prongs that define the cluster. These prongs extend from the base of the piece to the secondary prongs. and adjust settings such as length, diameter, height above and below the girdle, and the gem’s interior portion, among other fine details.
.png)
Number of Prongs
Lets you choose between 3, 4, or 5 prongs for the central gemstone.
Internal Prongs
- Diameter: Adjusts the thickness of the internal prongs.
- Distance: Controls the distance between the internal prongs and the central gemstone.
- Height Over Girdle: Defines the height of the internal prongs above the girdle line (the widest part of the gemstone).
- Height Under Girdle: Adjusts the length of the prongs below the girdle.
- Move in Z: Allows you to adjust the height of the internal prongs along the Z-axis.
- Extension for Manufacturing: Adds an extension to the prongs to accommodate manufacturing requirements or final adjustments.
External Prong
- Diameter: Adjusts the thickness of the external prongs.
- Distance: Controls the distance between the external prongs and the central gemstone.
- Height Over Girdle: Defines the height of the external prongs above the girdle line (the widest part of the gemstone).
- Extension for Manufacturing: Adds an extension to the prongs to accommodate manufacturing requirements or final adjustments.
- Move in Z: Allows you to adjust the height of the external prongs along the Z-axis.
Central External Prong
- Diameter: Adjusts the thickness of the central external prong.
- Gem Inside: Adjusts how much the prong sits inside the central gemstone.
- Height Over Girdle: Defines the height of the central external prong above the girdle line.
- Extension for Manufacturing: Adds an extension to the prong to accommodate manufacturing requirements or final adjustments.
- Move in Z: Allows you to adjust the height of the central external prong along the Z-axis.
Prong Orientation
Sets how the prongs are oriented: Tangent to Curve or Tangent to Center.
Center Stone Prongs
The prongs above hold the centre stone together with the cluster stones they share. The Center stone prongs tab adds prongs of the centre stone’s own, the same ones as the Halo. It is off by default, so clusters made before keep their geometry; turn on Center stone prongs to build them.
- Mode: Circle, Double, Triple, Claw, Double Claw or Custom, as on the Basket.
- Diameter, Gem Inside, Height over Girdle, Move in Z, Rotation and Extension for Manufacturing: The usual prong controls.
- Cap Bump (round prongs) or the claw controls (Gem Inside, Height, Tip direction, Smoothness).
- Overlap (Double, Triple and Double Claw): how much the prongs of a pair cross; 0 makes them just touch.
- Bridge Mode: The prongs run straight down to halfway to the main gem rail and then join it, Curved or Straight.
 Main Gem Rail
The third tab contains the parameters for the secondary gems’ rail, allowing further customization of the overall design.
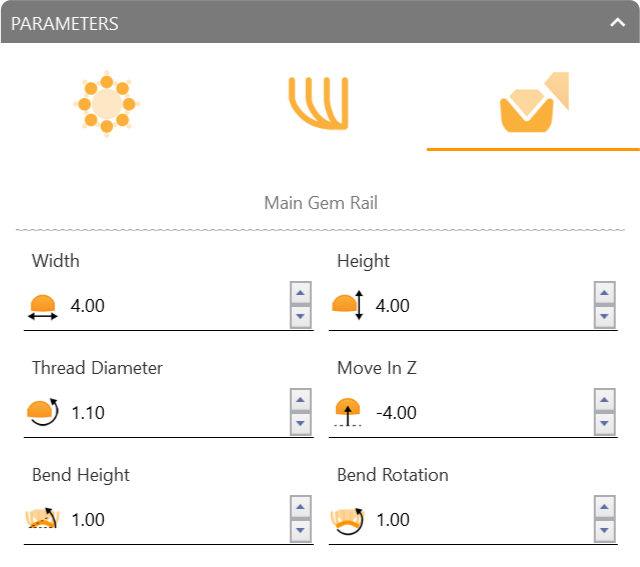
- Width: Configures the width of the rail that supports the gemstones. This parameter is critical for determining how sturdy the rail structure will be.
- Height: Adjusts the height of the main gem rail, affecting how the gems are raised above the base of the piece.
- Thread Diameter: Defines the diameter of the thread forming part of the rail, influencing both the appearance and the functionality of the structure.
- Move in Z: Controls the position of the rail along the Z-axis, allowing adjustments to the elevation of the gemstones.
- Bend Height: Adjusts the height of the curve or bend in the main gem rail. This parameter allows the rail to curve upwards or downwards.
- Bend Rotation: Controls the angle of rotation of the bend in the rail, enabling fine adjustments to the layout of the gemstones.