User Interface
Layers
You never file your work into layers by hand: as you design, RhinoArtisan drops every gem, element and curve into its layer automatically. The panel organises them in four groups — Metal, Gem, Object and User — so however big the piece gets, everything has its place. And when you want a different arrangement, just reassign things: the structure is yours to change.
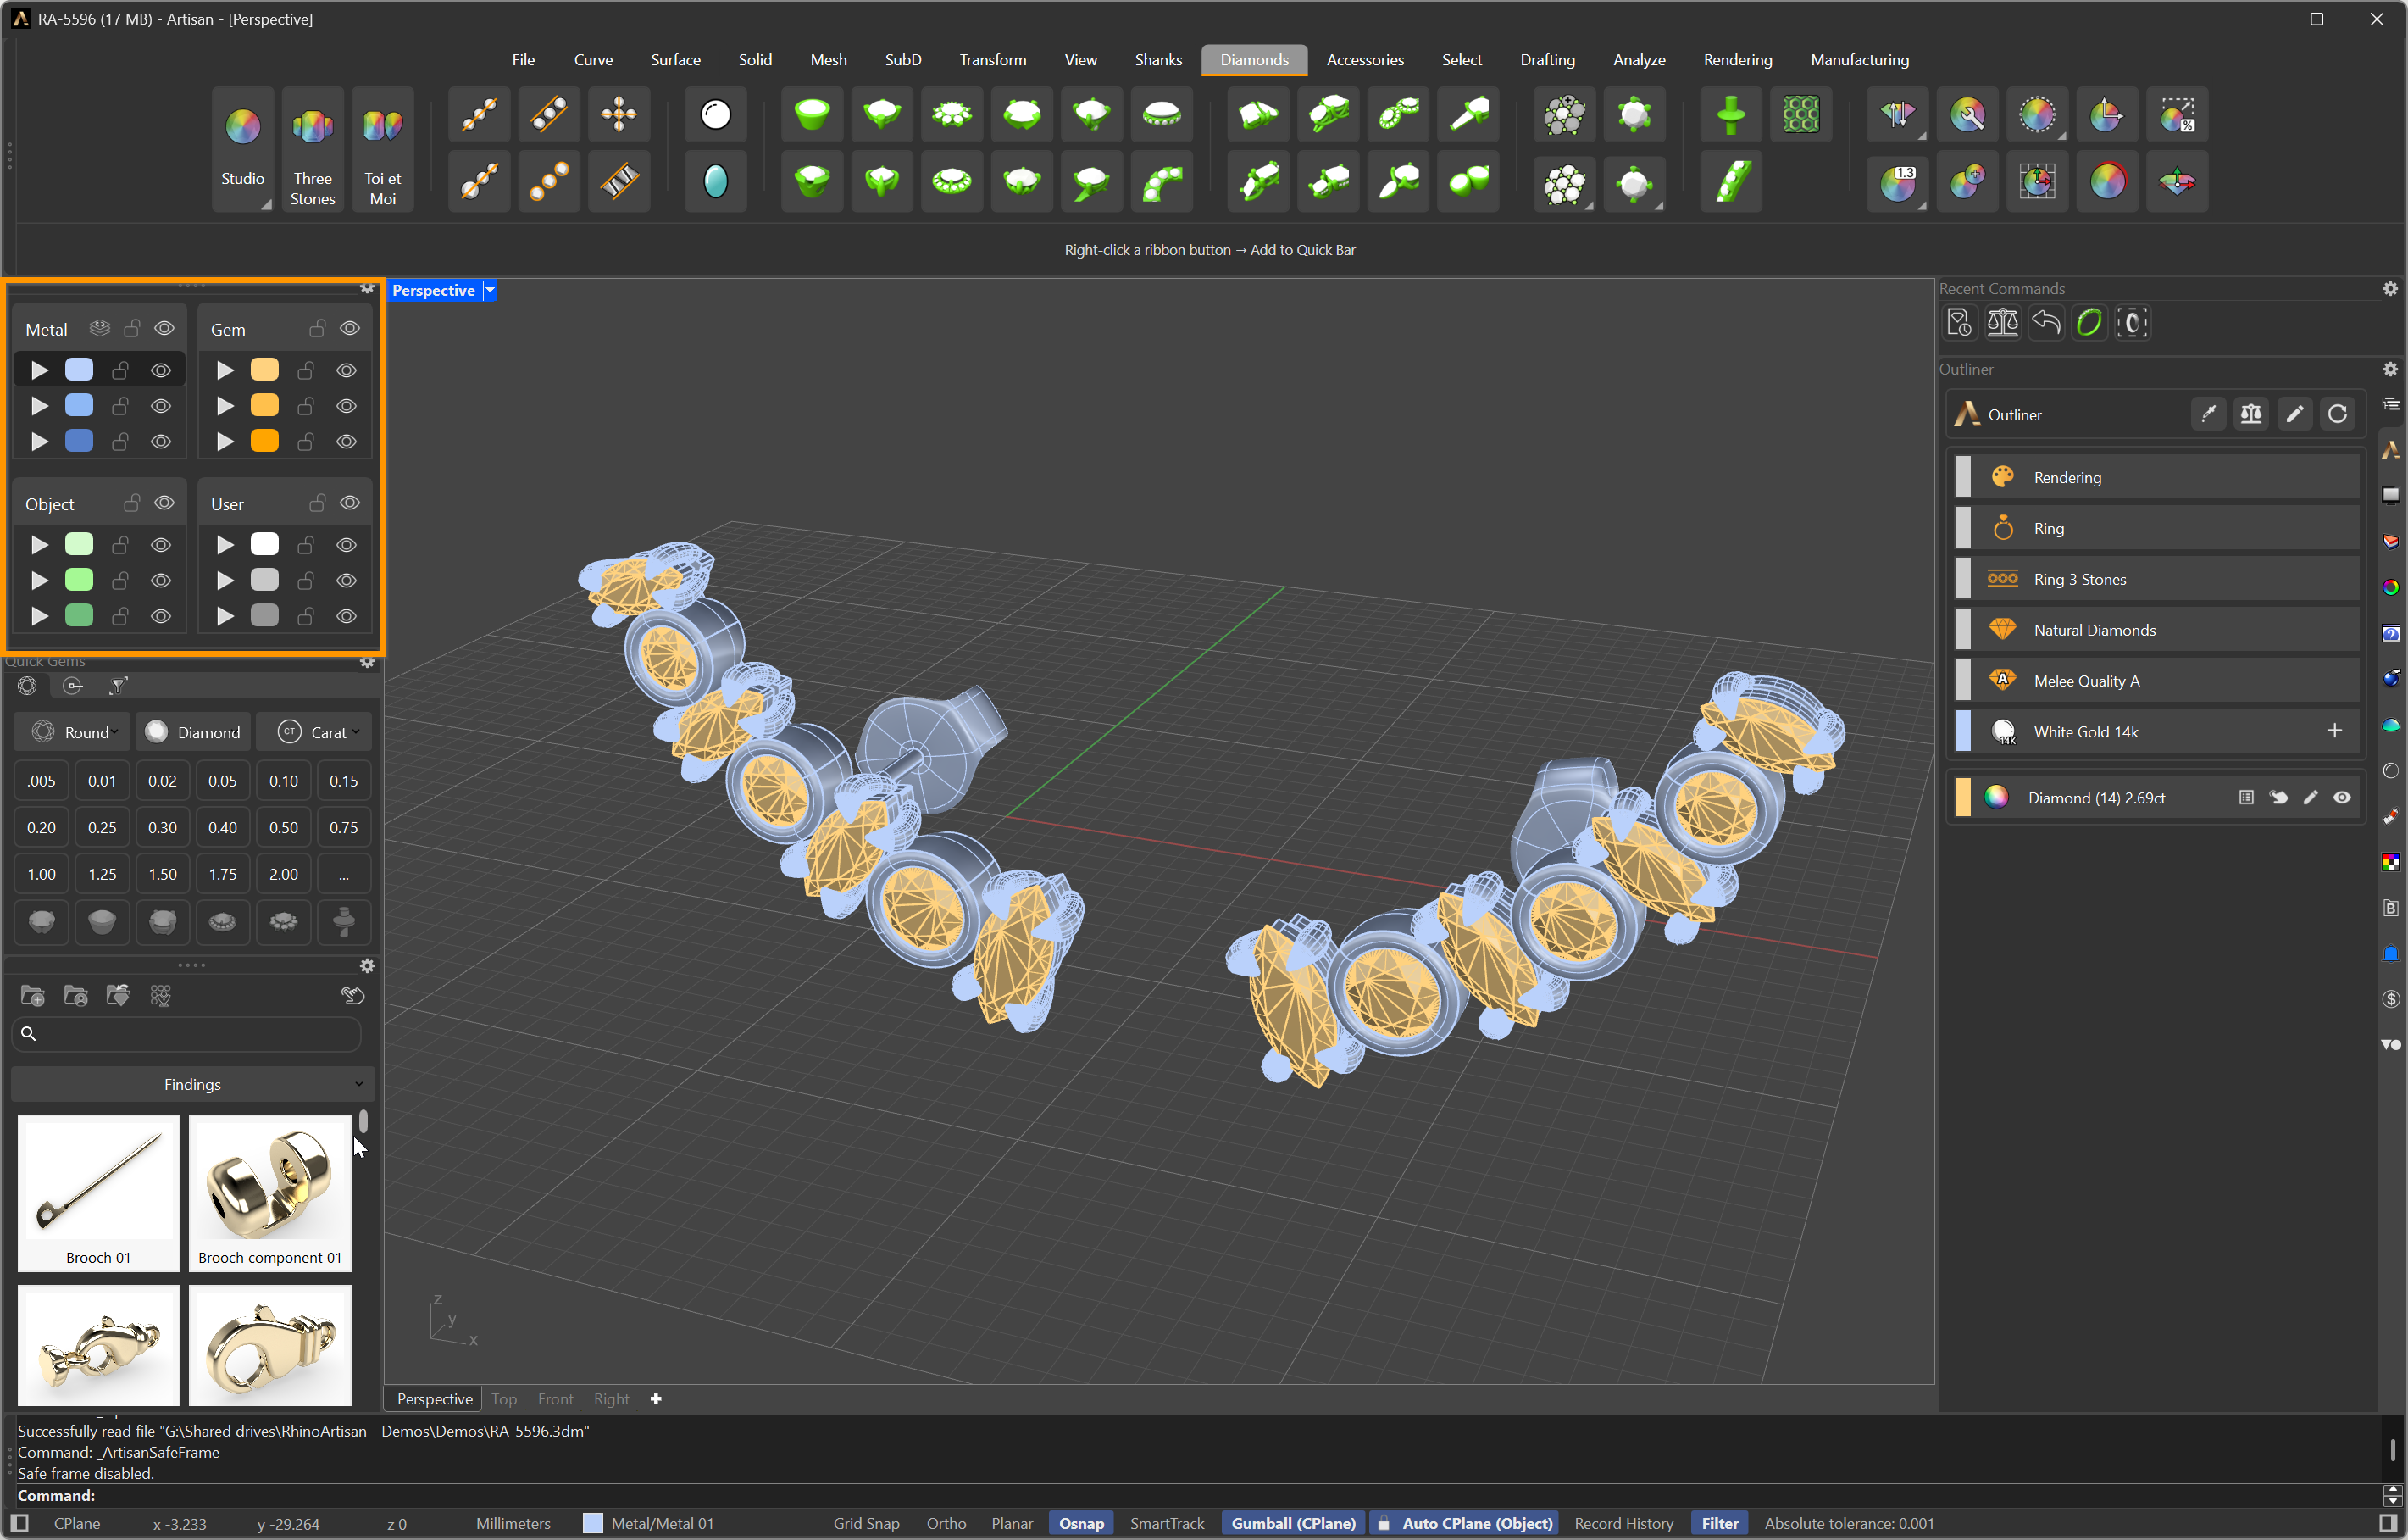
The Layers panel — Metal, Gem, Object and User groups
One row, four icons
Every layer works the same way. From left to right:
- Play — assigns the layer to whatever you have selected in the viewport.
- Colour — left-click to make it the active layer; right-click to select everything on it.
- Padlock — locks or unlocks the layer’s items.
- Eye — shows or hides them.
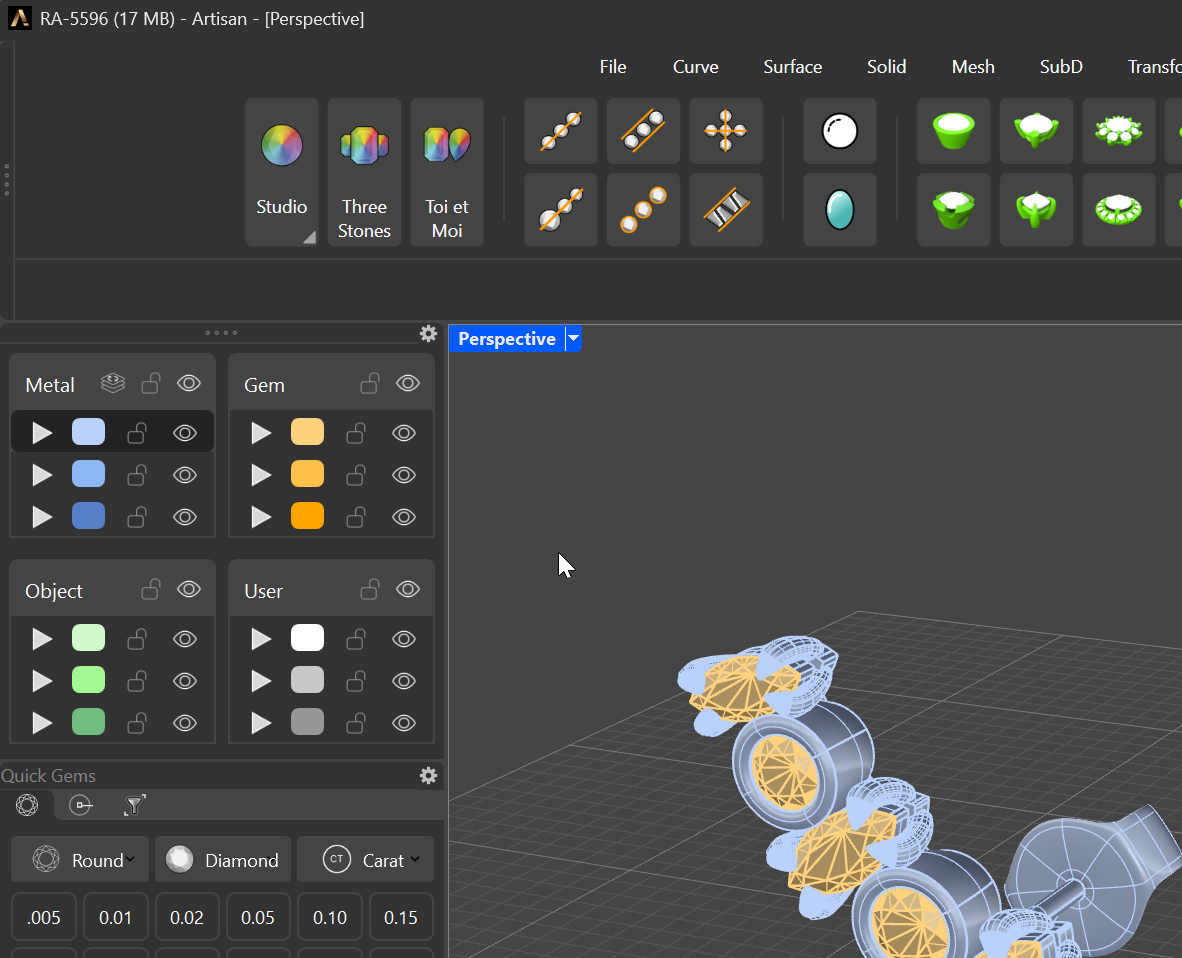
Each layer row: play, colour, padlock and eye
Next to the Metal group title there’s one more button: Refresh Layer Structure, which resets the RhinoArtisan layer system back to its default properties whenever you need a clean start.
Your colours
The layer colours aren’t fixed either. Head to Options > Artisan > Colors and give each layer the colour that makes sense in your studio — the same window also holds the per-size gem colours used in reports and gem maps.
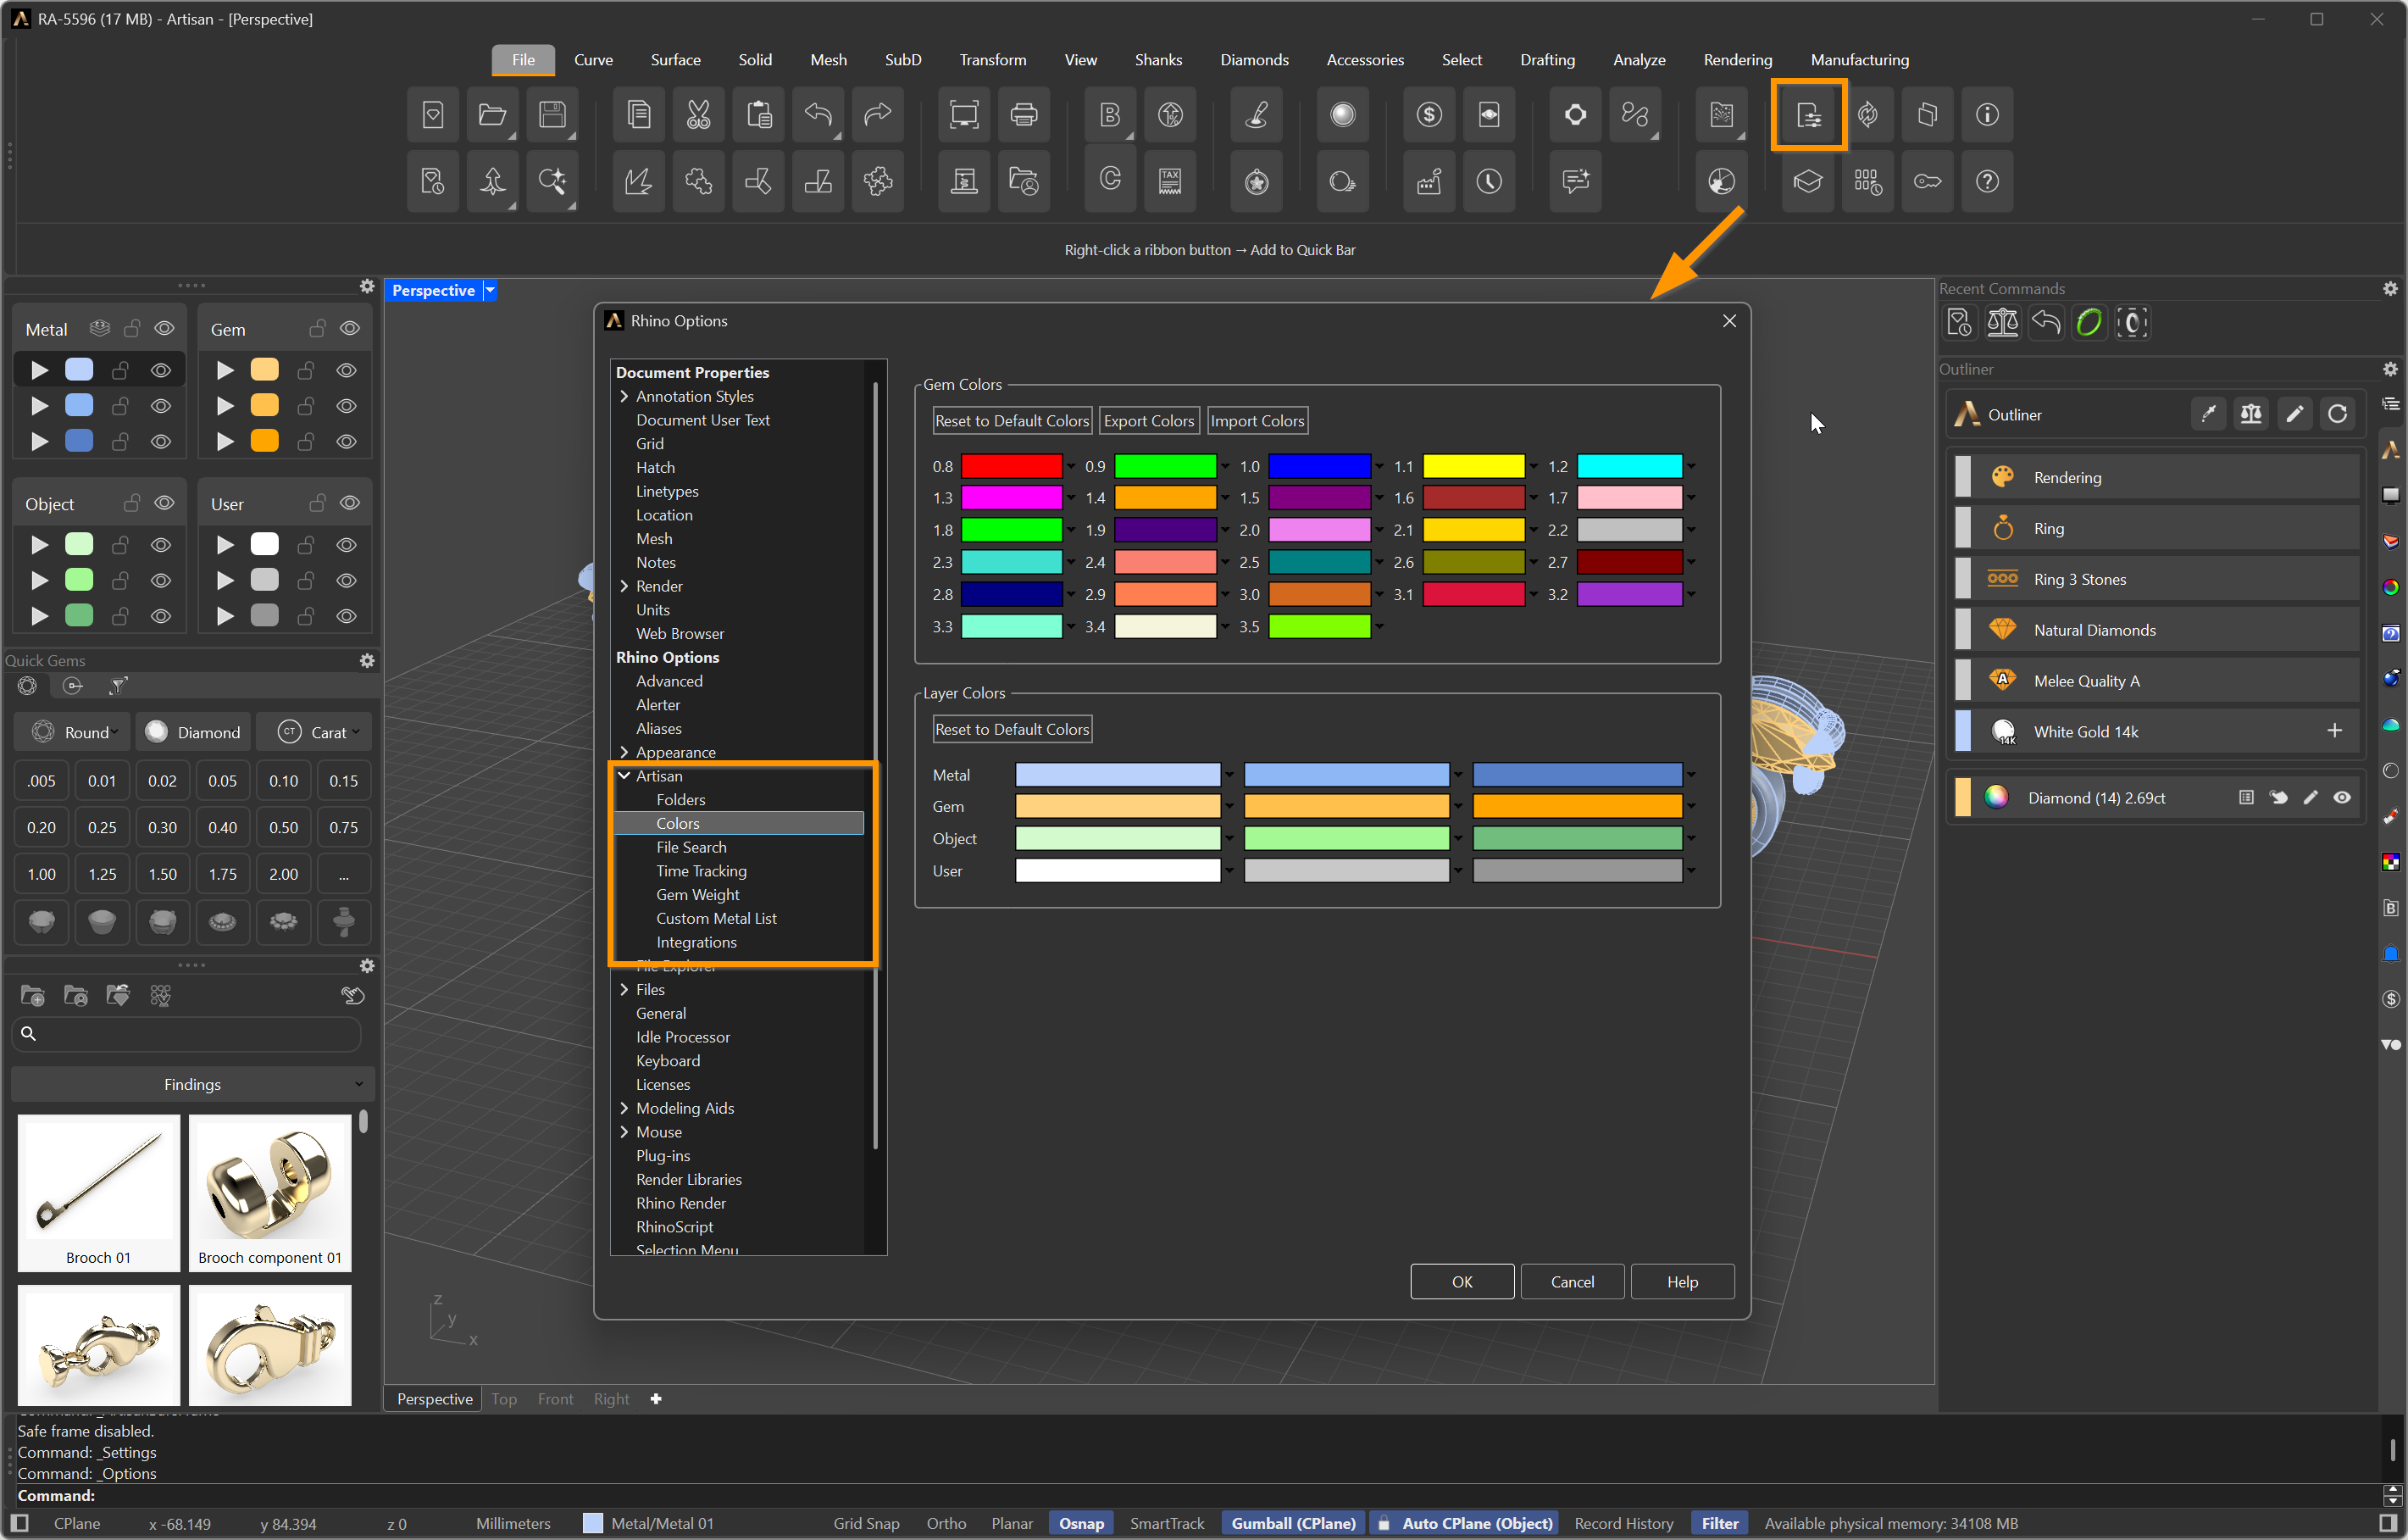
Options > Artisan > Colors — pick your own layer colours
In Rhino mode
In the Rhino interface, this behaviour is controlled by two options in Options > Artisan:
- Organize Objects on Layers — RhinoArtisan files your objects into the layer structure automatically.
- Use Gem Color (not Layer) — gems are displayed in their own gem colour instead of the layer’s.
Prefer to use Rhino’s layer system the way you always have? Just untick both options, and RhinoArtisan will leave your layers alone.
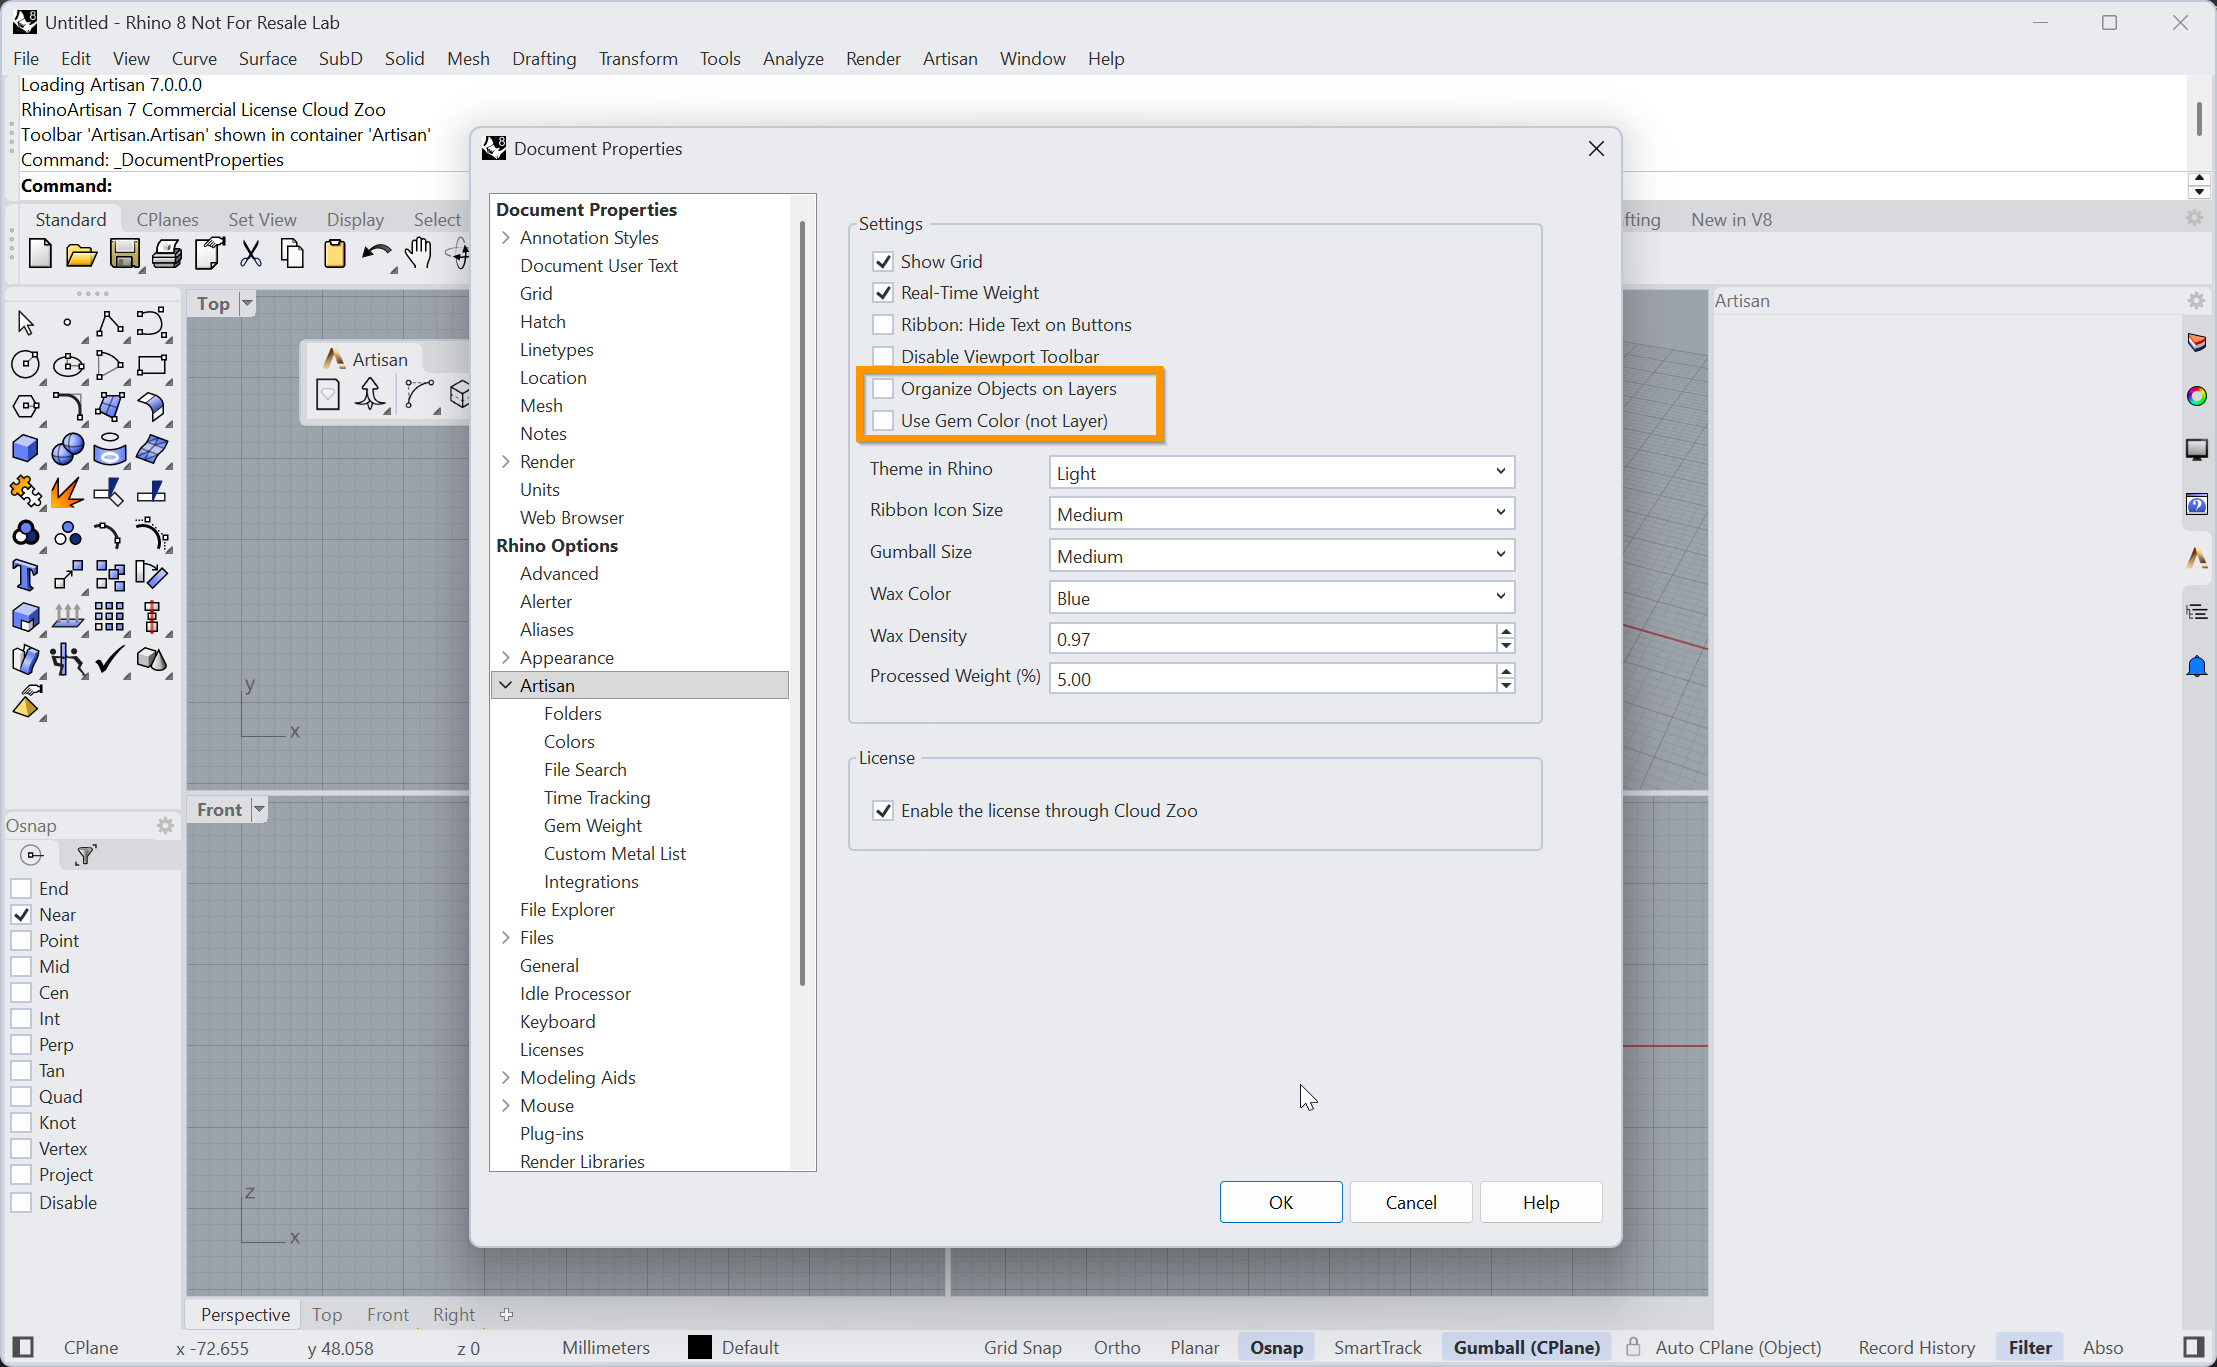
Options > Artisan — untick both to keep Rhino's classic layer behaviour