User Interface
Outliner
The Outliner panel is responsible for organizing the global parameters of your design and all the elements it’s made of.
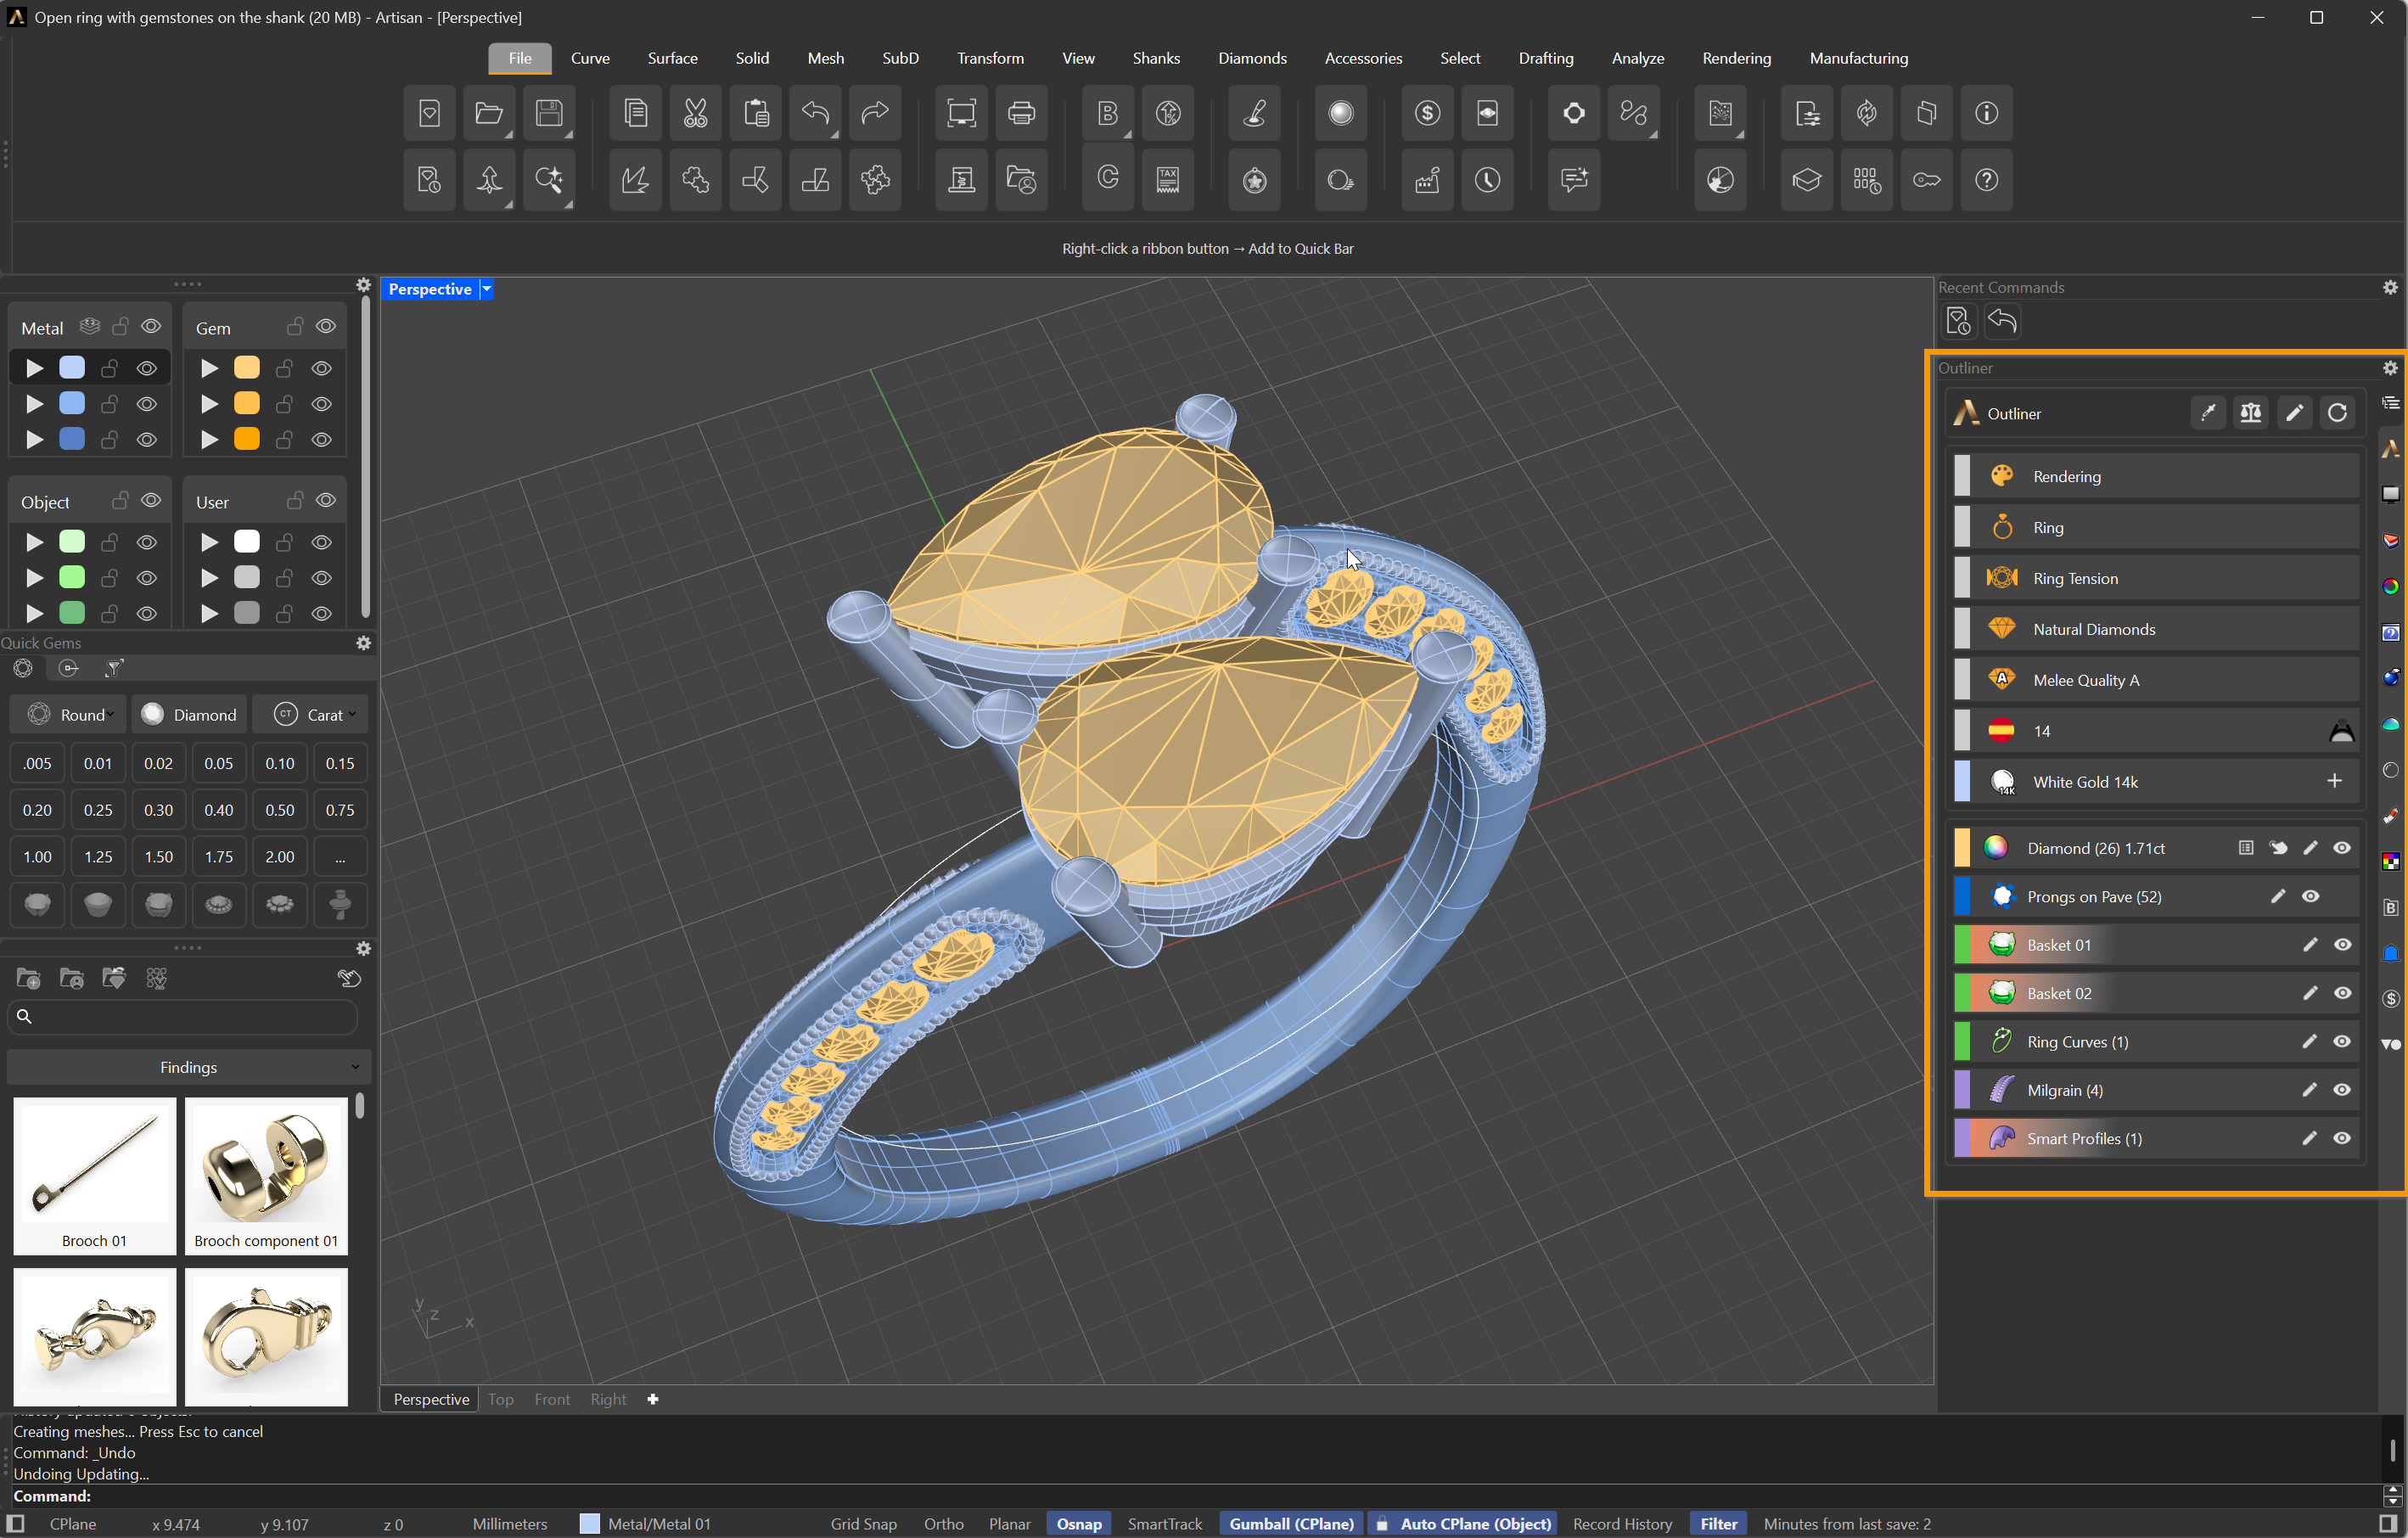
The Outliner panel, docked on the right
Sections
The Outliner consists of three sections: Header, Design and Elements.
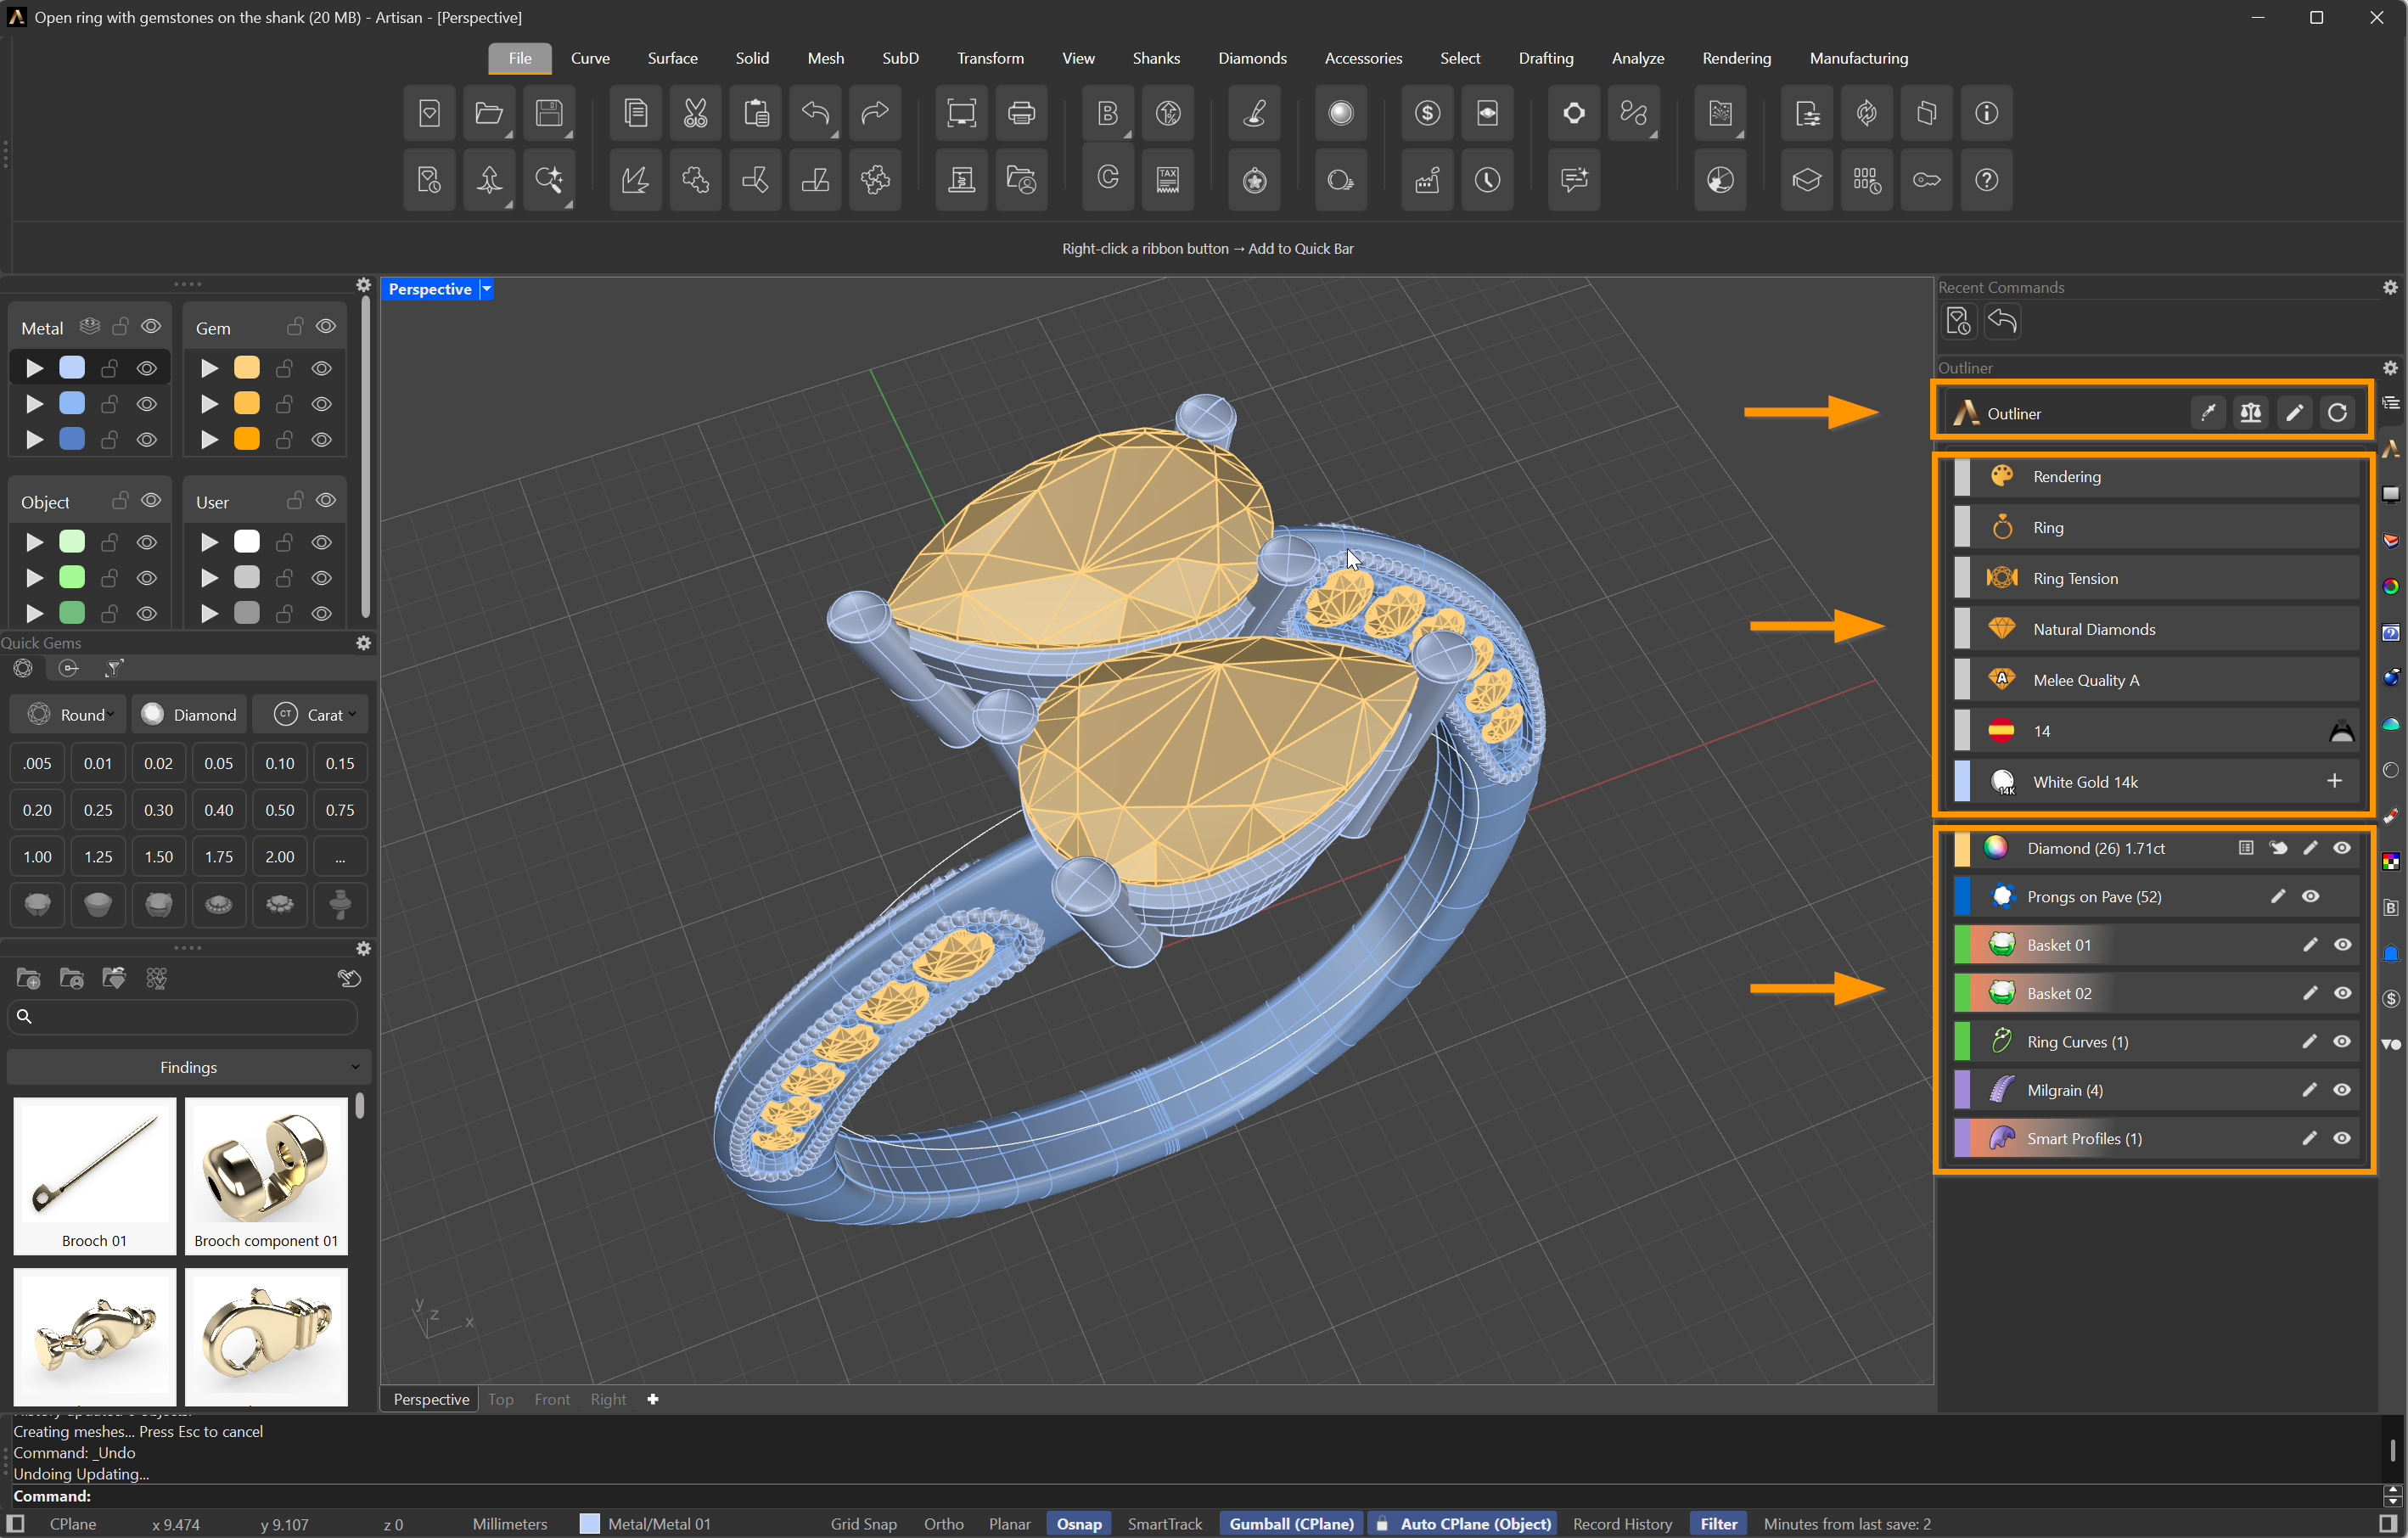
Top to bottom: Header, Design and Elements
Header
It contains four commonly used tools for parametric editing.
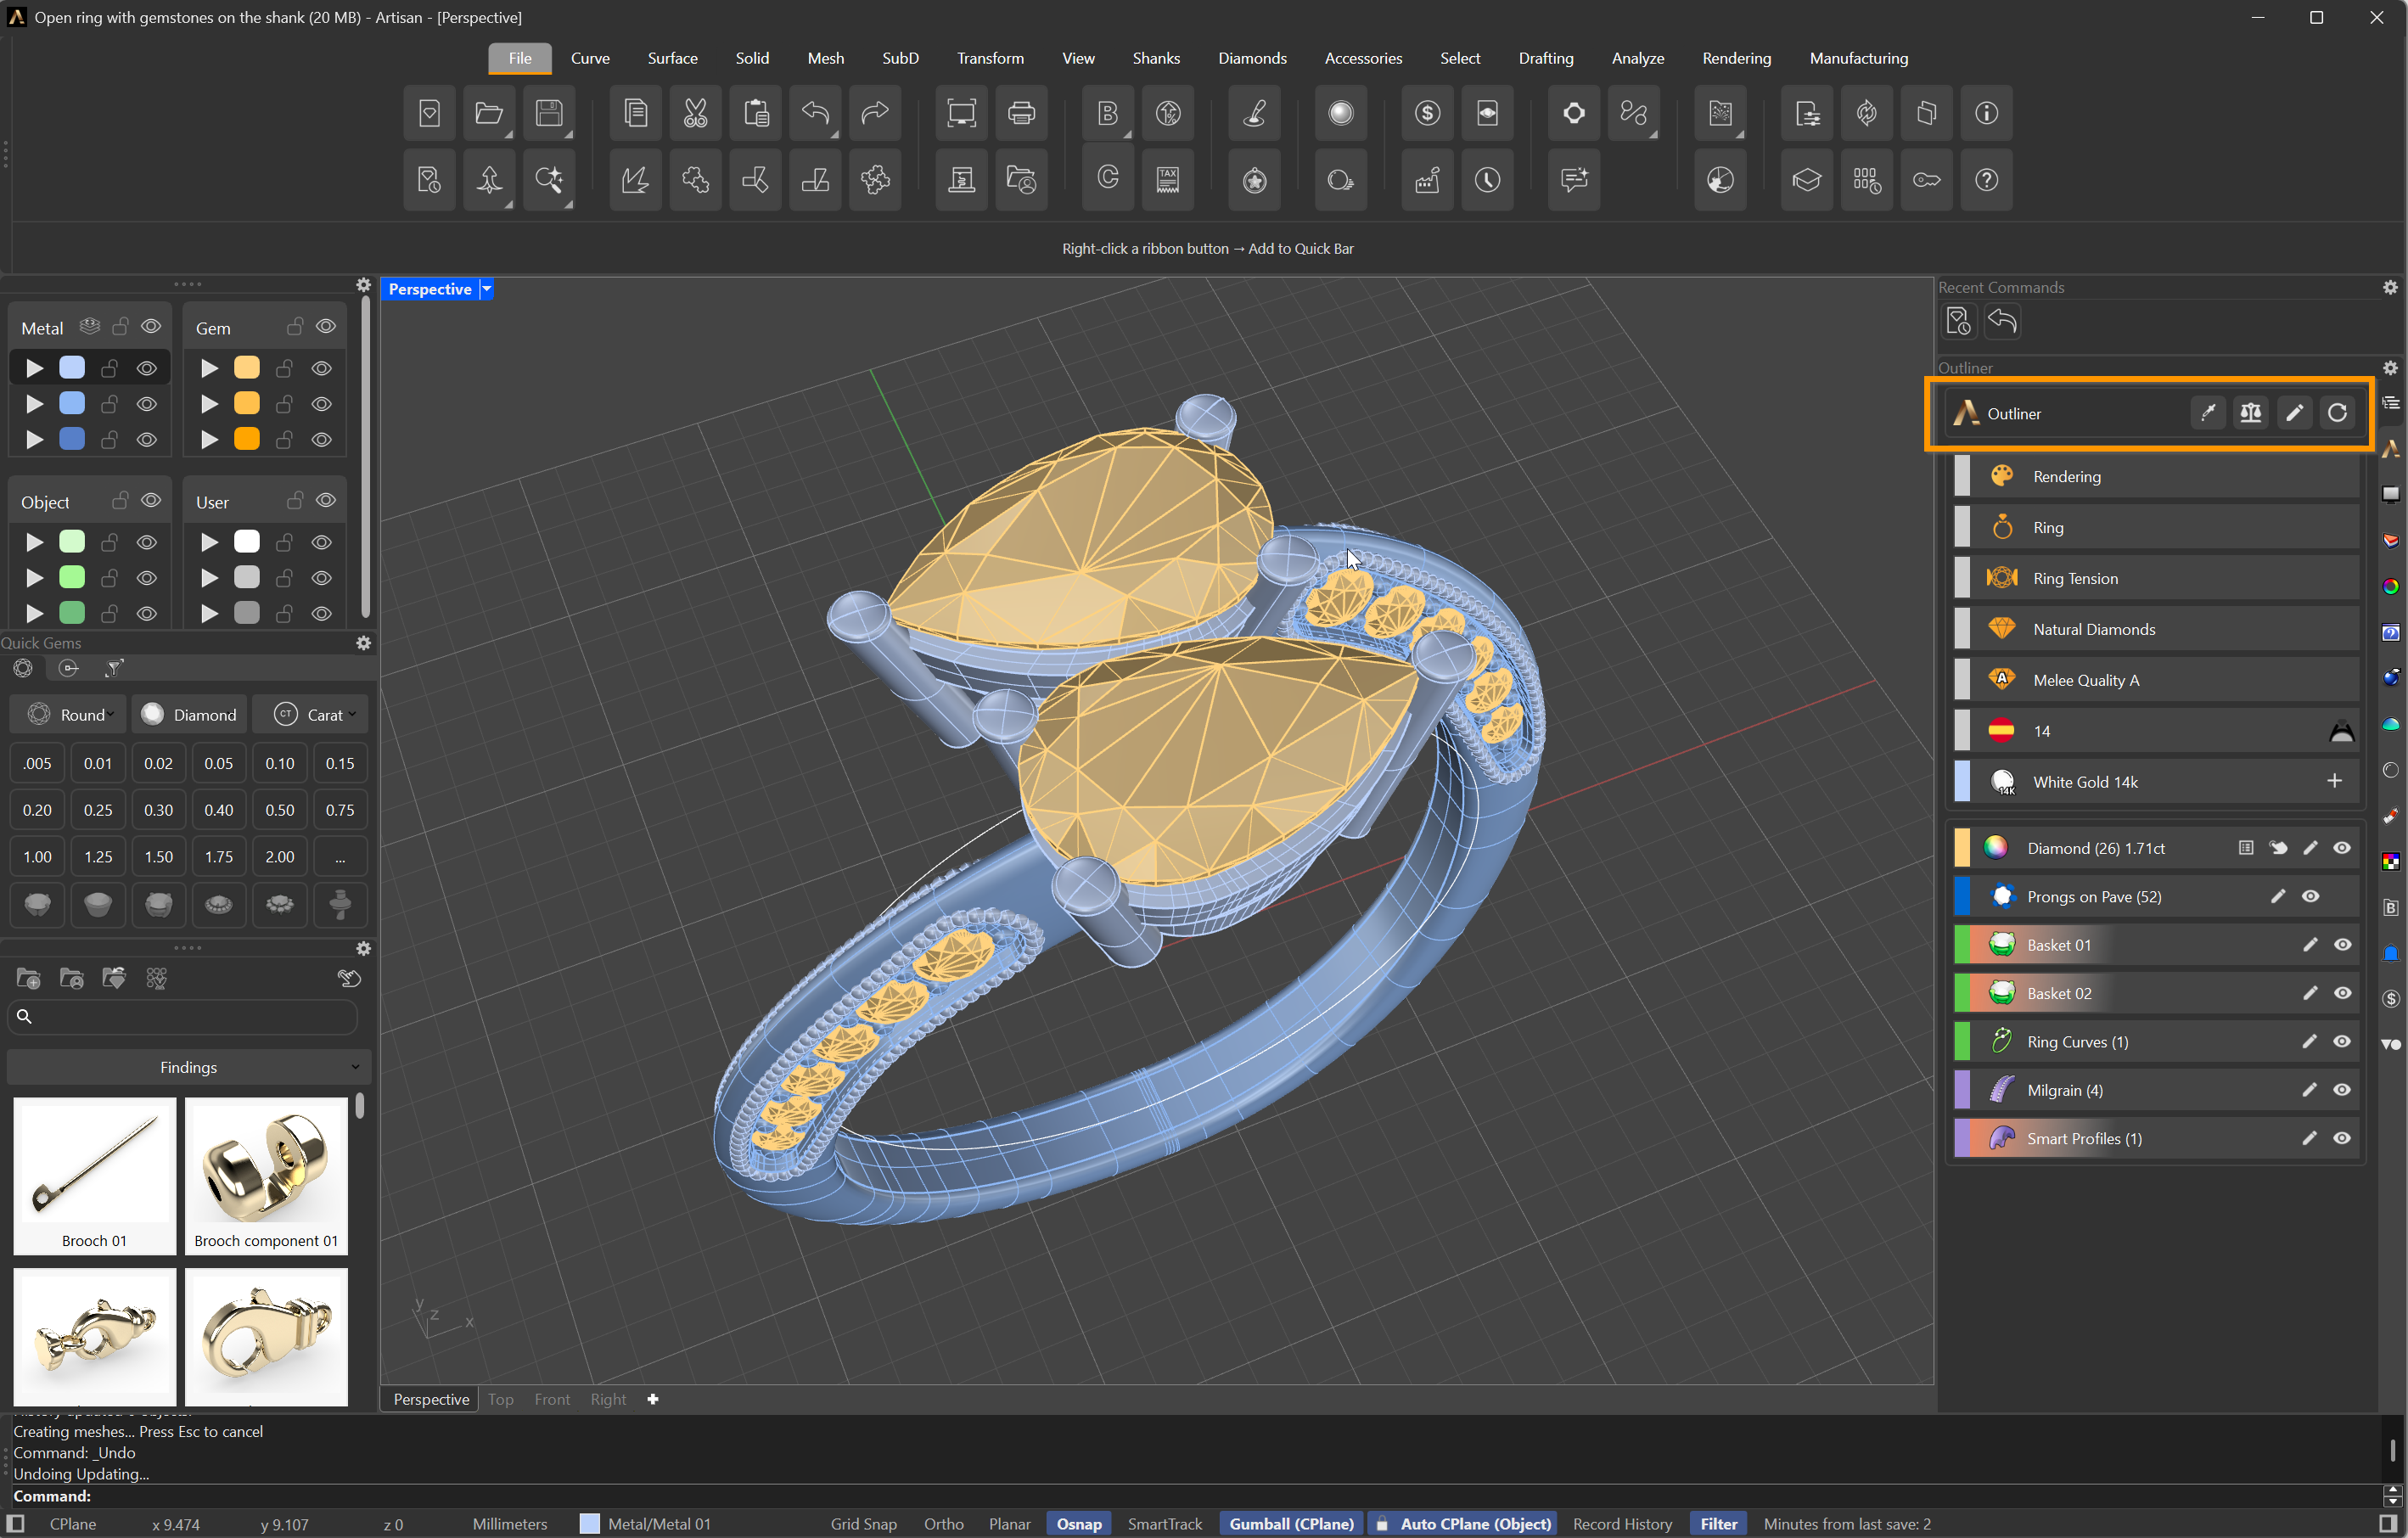
The Outliner header
In addition, this panel has four buttons in the top-left corner:
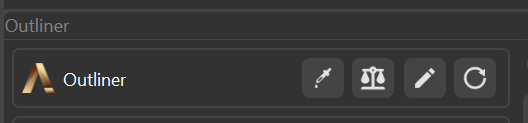
- Apply Style: You can easily copy and paste the parameters of an element for a particular stone to another stone. Select an element as a basket, for instance, click on Apply Style, and then click on another stone. A basket with the same parameters will be applied to that stone. This works with all elements in RhinoArtisan.
- Weight: When clicked on, it opens a window displaying the weight of metals in grams and the carat weight of gems from your design. This data will automatically be stored in your clipboard.
- Edit: You can edit the selected element or elements after clicking this button. To cancel this operation, right-click on your viewport.
- Refresh Design: RhinoArtisan will use this icon to unite stray gems and adapt the design to its new measurements. For example, if you change a shank’s finger size, clicking this button will adjust the design’s element to the new shank size.
Design area
This is where the global parameters of your design live: traits that affect all your design elements at once. Changing a global parameter will update all your elements to match the change.
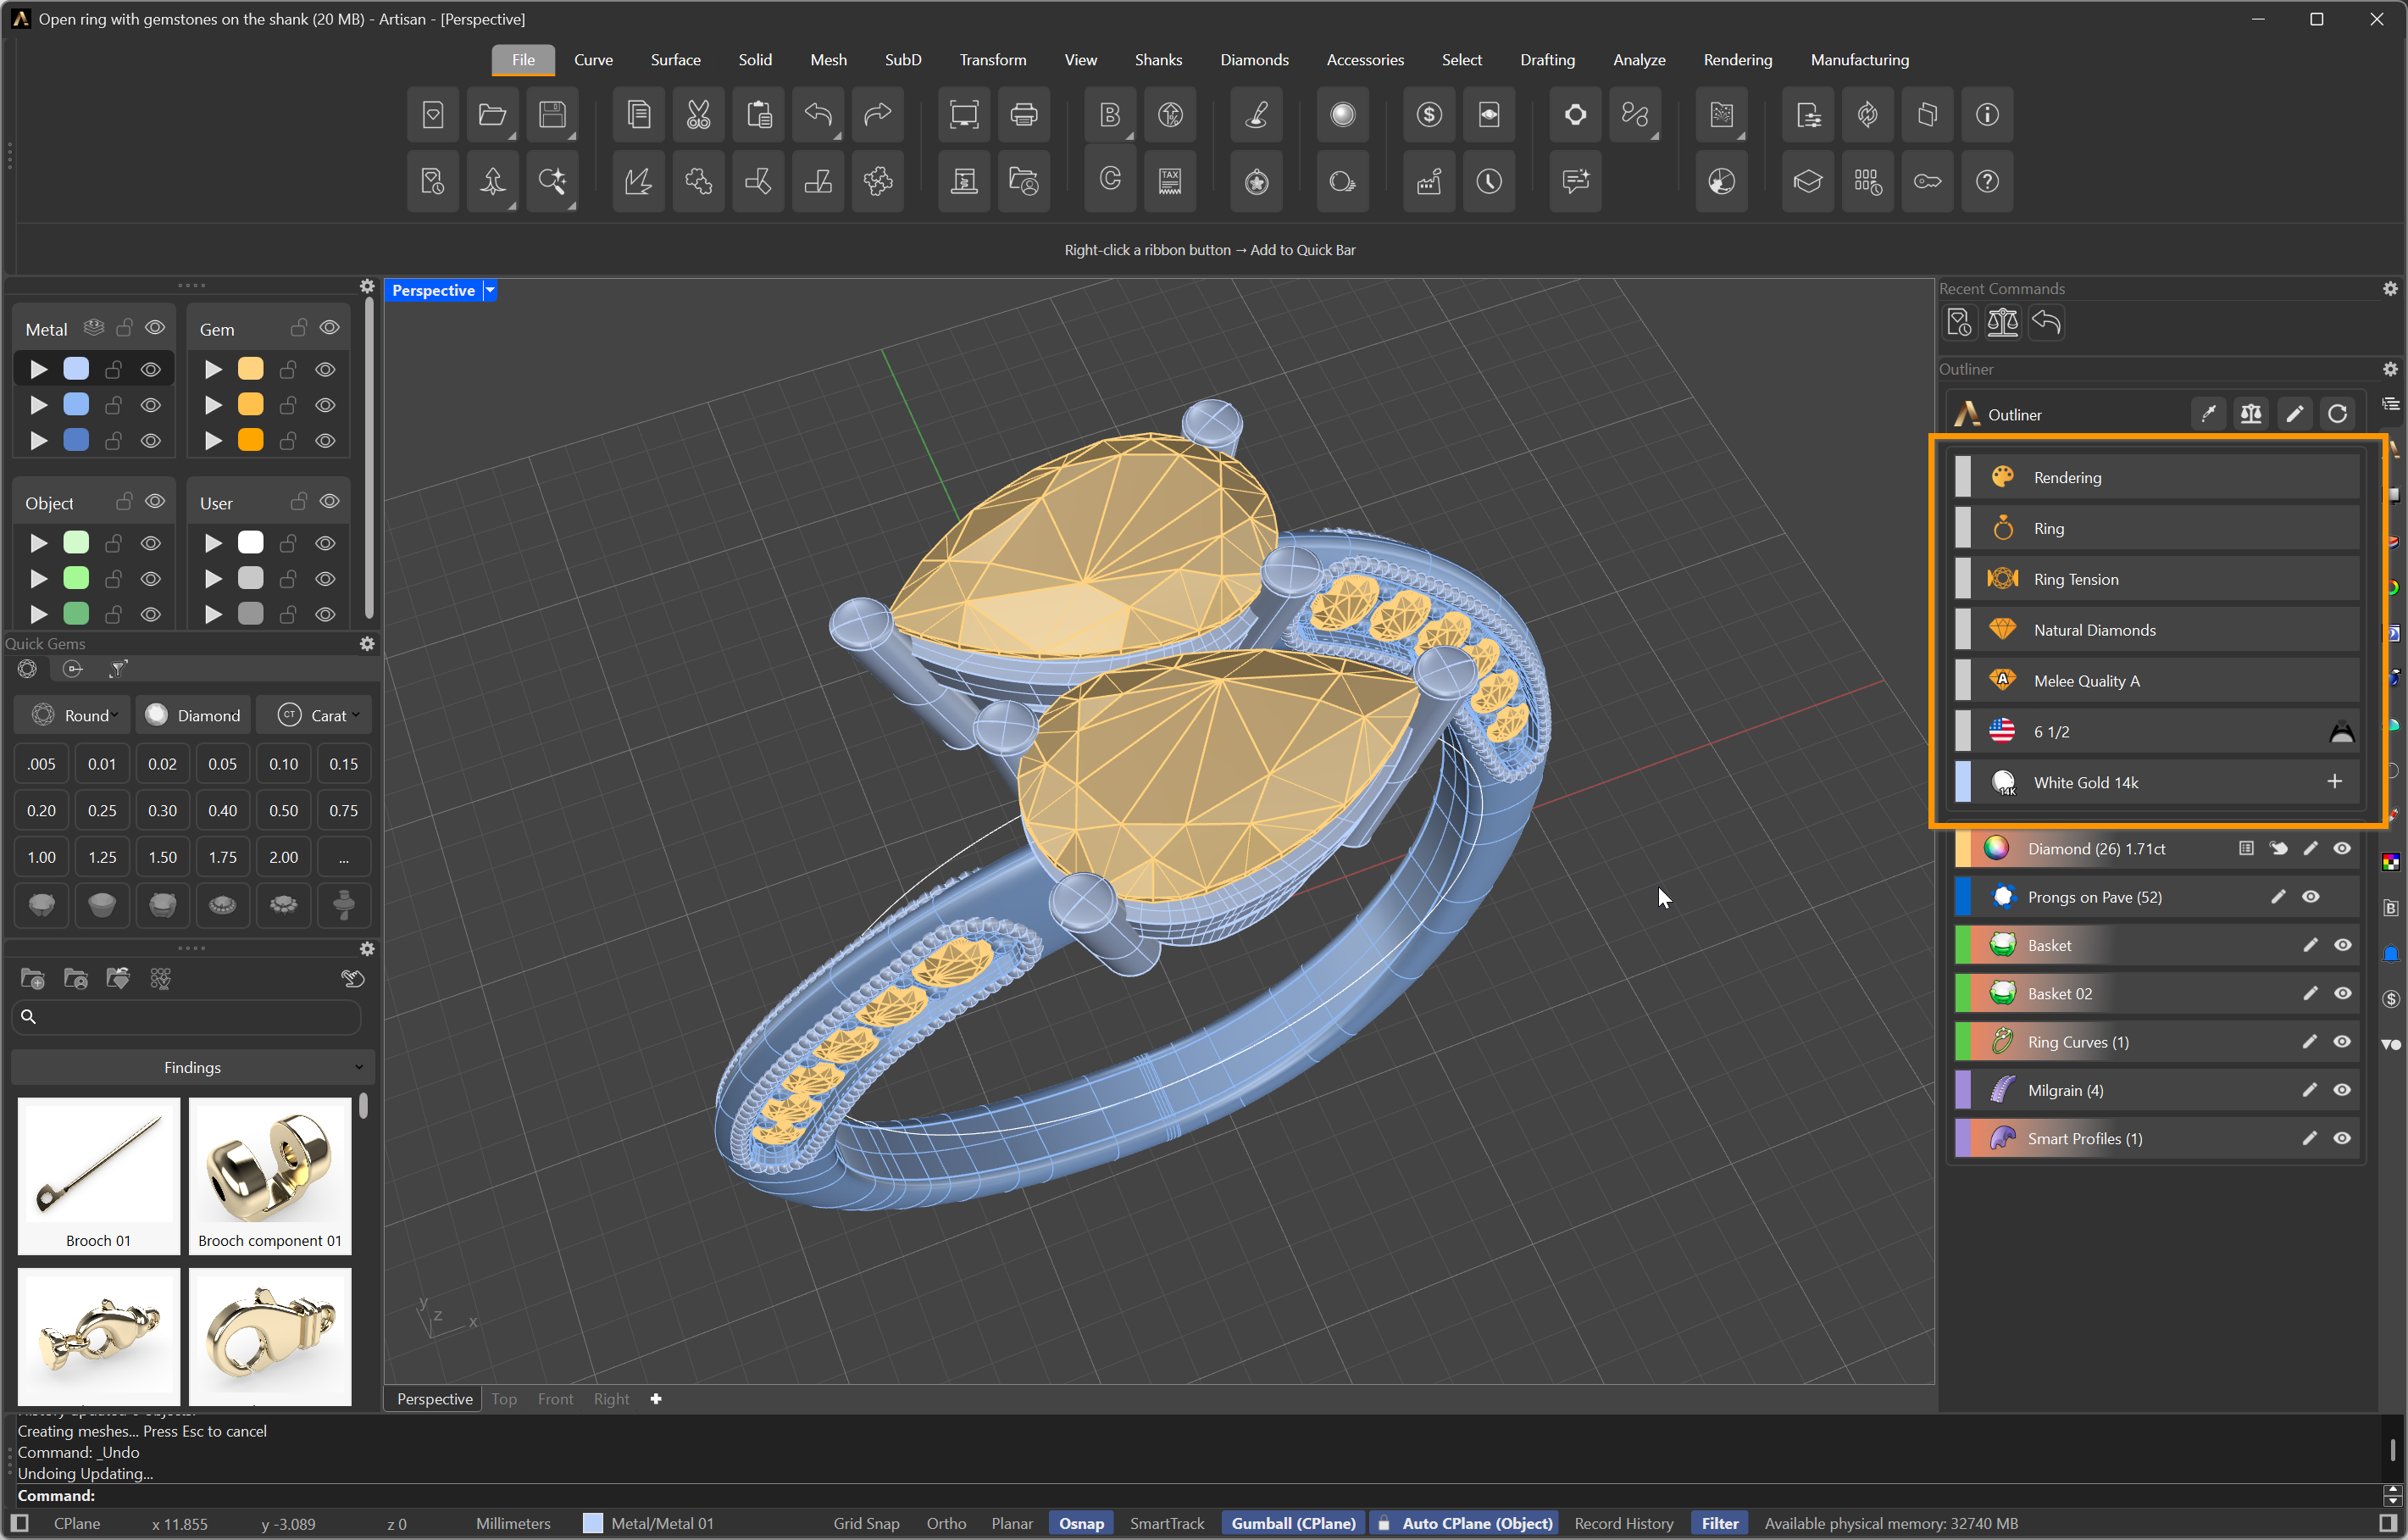
The Design area — the global parameters of your design
These are all the possible Global Parameters:
- Display mode:
- Rendering shows the piece as a finished product with materials and lighting.
- Manufacturing previews how the piece would appear after 3D printing. In this mode, an additional Manufacturing Extension parameter is applied to elements built with commands that include prongs, ensuring they are ready for production.
- Design type: What kind of jewelry piece is your design, this parameter may be automatically set depending on what elements you add to your design.
- Design Subtype: This setting defines the specific type of piece you are creating. While the system automatically detects the general category, such as a ring, you can use the subtype to specify what kind of ring it is: for example, a Halo, Trilogy, Solitaire, Cluster, among many others. Declaring the subtype helps the system better understand the design intent and supports the AI assistant in generating accurate technical descriptions of the piece.
- Diamond Type: Within the Outliner, you can now specify whether the diamonds used in your design are Natural or Lab-Grown. This information is particularly useful when integrated with the Nivoda platform, as it allows the system to search their inventory for certified stones of the selected type. This helps generate a more accurate cost breakdown for production planning and pricing.
- Melee Quality: Sets the quality grade of the melee diamonds — the small accent stones — used in your design. This grade is taken into account when generating the cost breakdown of the piece.
- Finger size and scale: This feature is only present in ring designs. It lets you set the shank’s size and switch between multiple international ring size measurement scales. The button Cut by ring size allows you to cut objects that could be inside the ring curve so they would not intersect with the finger, assuring a perfect ring size.
On the right side, there is an icon of a ring viewed from the front. This icon allows us to execute the Cut by Ring Size command, which will cut any object within the section of the ring where the finger would go.
.png)
-
Metal : In the Outliner, it is possible to define multiple different metals, which are automatically linked to the Metal layers in the layer manager.
If only one metal is defined, it will be assigned to all three metal layers: Metal 01, Metal 02, and Metal 03.
If two metals are defined in the Outliner, the first metal will be assigned to the Metal 01 layer, while the Metal 02 and Metal 03 layers will have the metal listed second in the Outliner.
If three metals are defined, each will be assigned to one of the Metal layers following the order in which they appear in the Outliner.
We recommend clicking the Refresh button in the Outliner once a new metal has been added to the scene to ensure the proper assignment of metals across the different layers.
Elements
Below the global parameters, the Outliner lists every element your design is made of — one row per element.
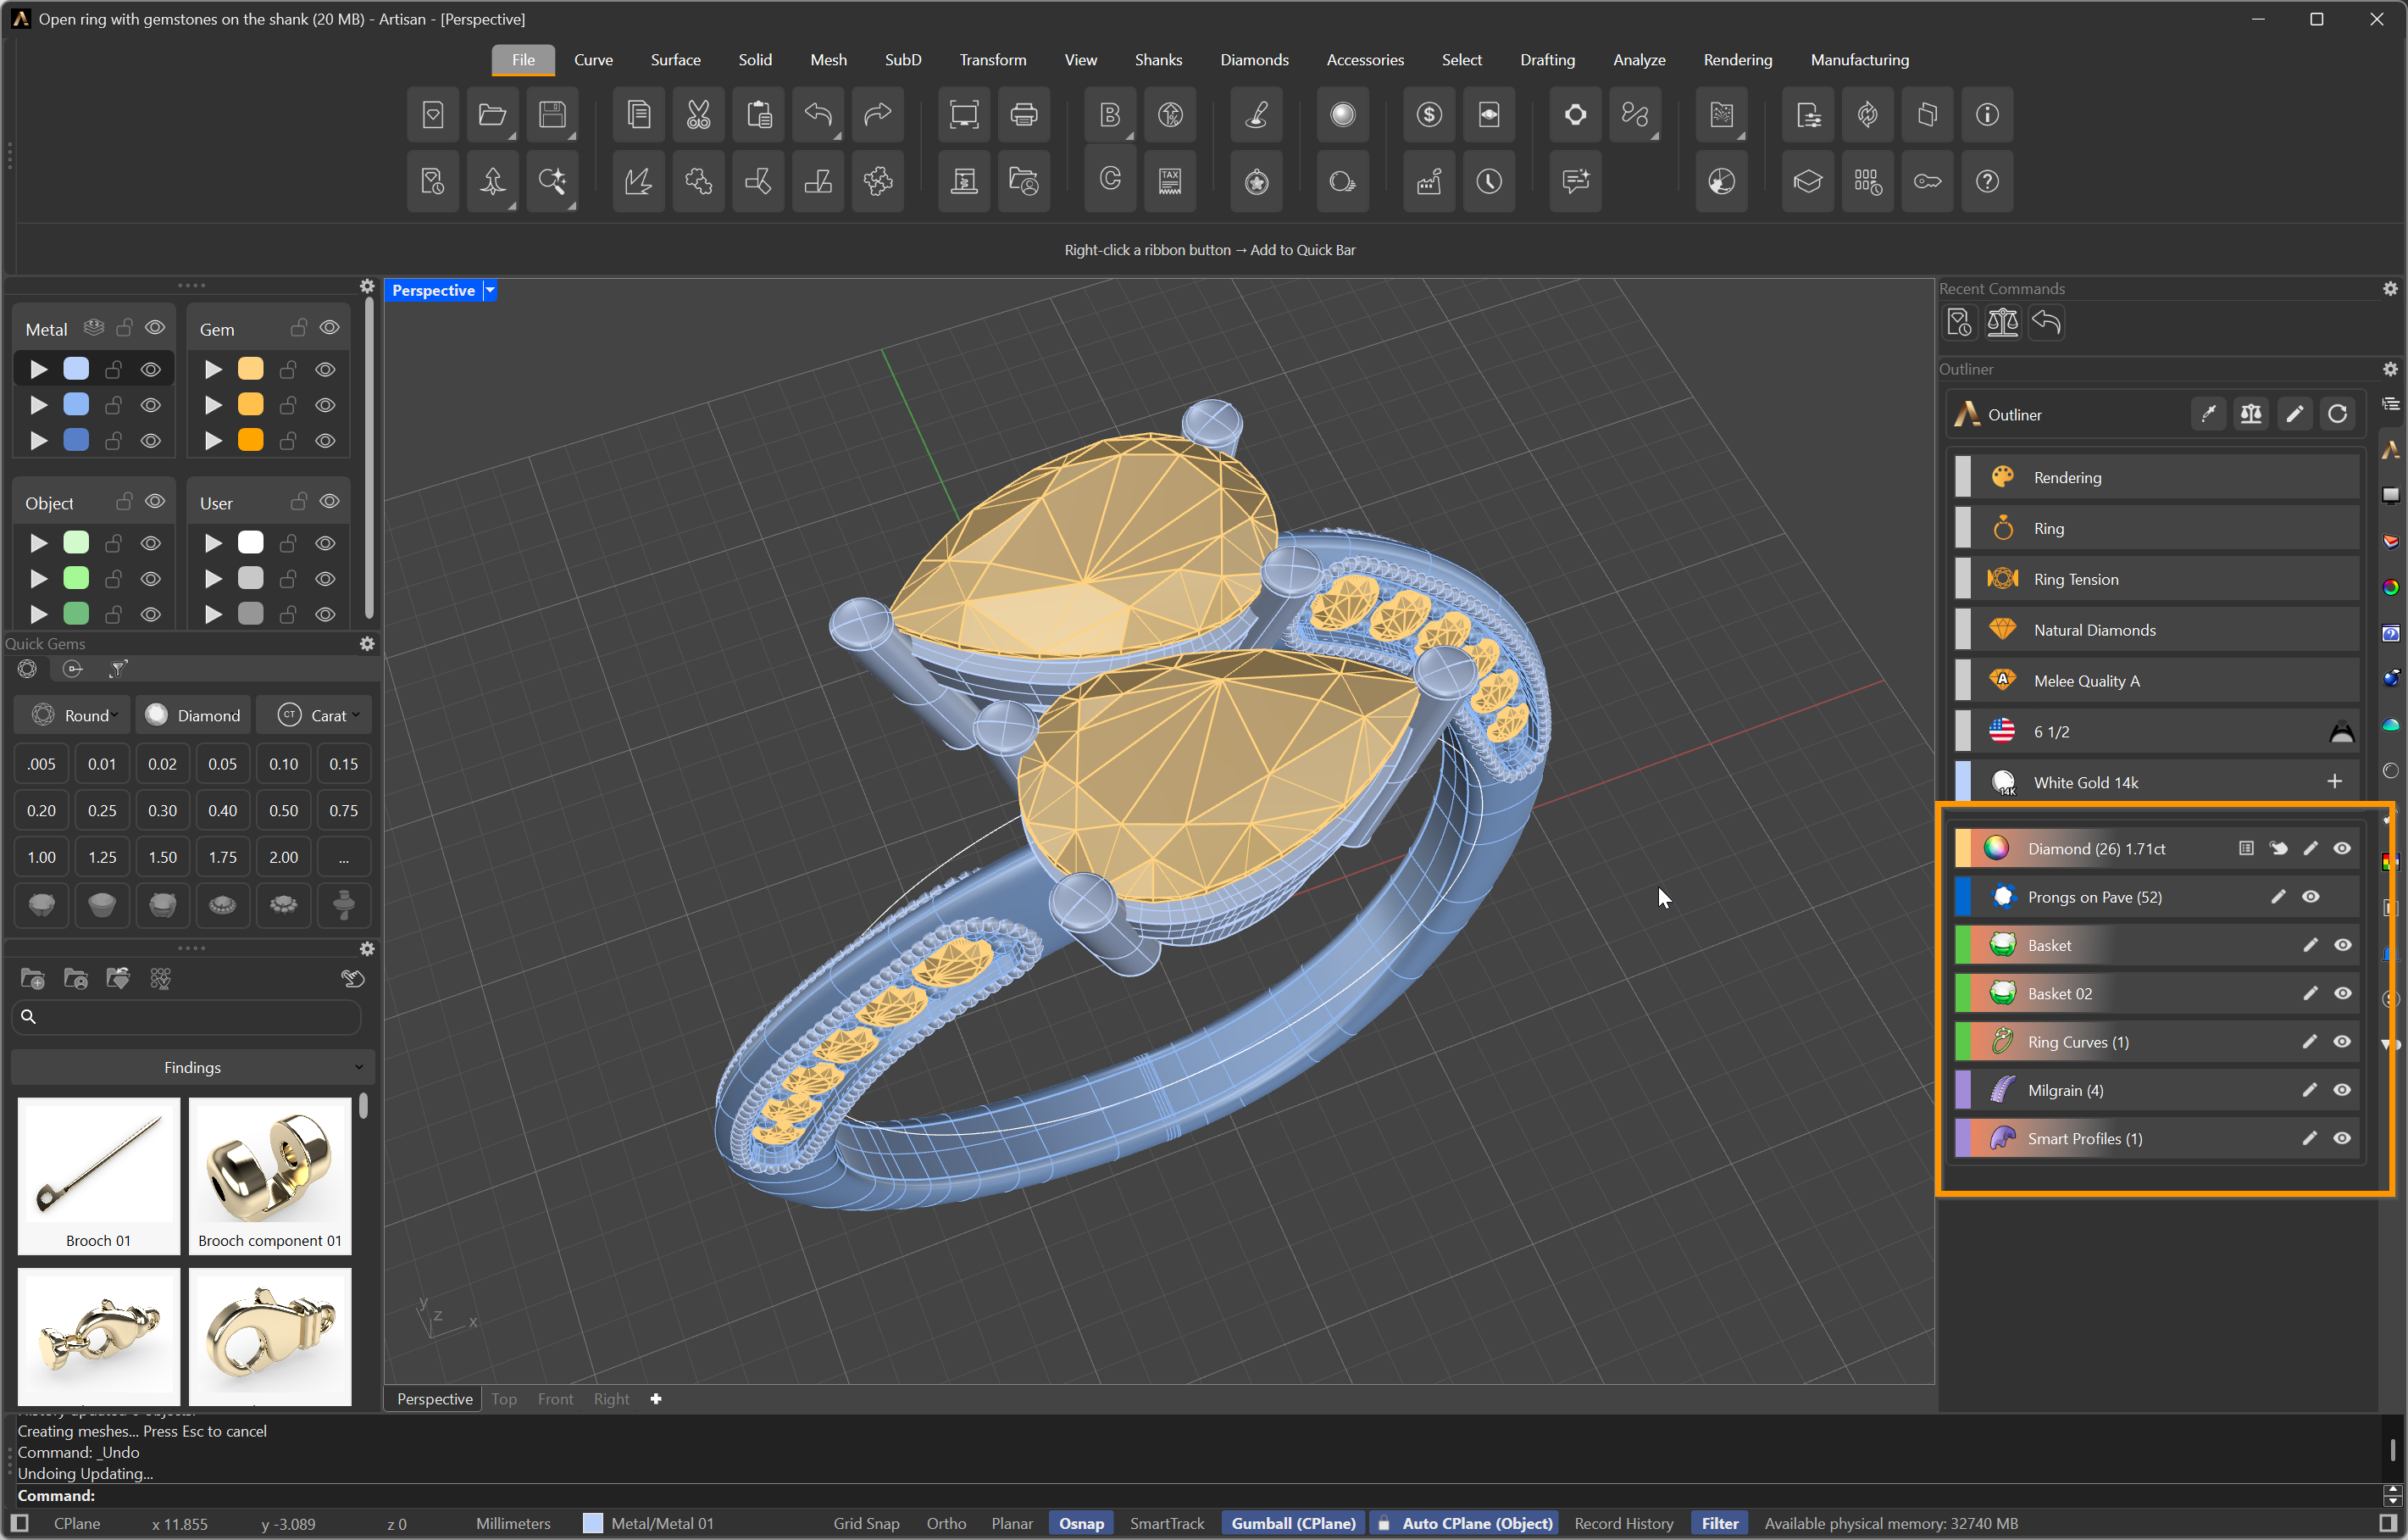
The elements of the design, listed below the global parameters
Reading a row from left to right:
- Coloured line — click it to open the element’s parameters, when it has them.
- Icon — the type of element.
- Name — click it to rename the element, so you can keep the list organised exactly the way you want.
- Count — how many of that element the design contains, in parentheses.
- Pencil — edit the element’s parameters.
- Eye — hide or show the element in your viewports.
Gems get two extras on their row:
- The total carat weight of that group of gems.
- A button that expands a detailed gem report. Inside it, each gem has an icon to select it individually, and the button in the lower-right corner places the report on your viewport — click where you want it, or right-click to cancel.
Orange gradient: element pending refresh
When a row shows an orange gradient, a parameter that element depends on has changed, and the element needs to be regenerated. It happens, for example, when you change a gem and another element is built on it — a basket, say.
When you’re ready, click Refresh Design in the header and everything updates.
.png) Apply Style
Apply Style
One of the standout features of the software is the Apply Style command. This tool allows you to copy the parameters from one element—such as a basket—and apply them to other gemstones within your design, regardless of their size or shape. This greatly streamlines the design process when working with multiple gemstones, as you can create a single element, copy its settings, and efficiently paste those parameters to other stones, ensuring consistency and saving time.
This tool goes beyond a simple copy-and-paste function—let’s explore an example to showcase its full potential. Imagine you’re designing a fashion ring featuring six gemstones, each varying in size and shape. Instead of manually adjusting each setting, you can streamline the process with Apply Style.
.png)
Start by arranging the six stones on a cylinder and creating a basket around one of the gems. Once you’re satisfied with the look of the basket, use the Apply Style command to replicate the same design across all the other gemstones. After refreshing the Outliner, you’ll have perfectly matched baskets for each gem, regardless of their shape or size!
Next, reposition the gems to ensure the baskets don’t overlap.
.png)
Now, to create the shank, draw a curve from the lower rail of the baskets down to the bottom of the ring from each of the baskets.
.png)
Use RhinoArtisan’s Profile command on one of the curves and adjust the sections until you achieve your desired shape and proportions. Once you’re happy with the result, use Apply Style again to transfer the profile to the other curves.
.png)
In just a few clicks, you’ve created a single basket and a single shank profile, then applied them to six unique gemstones and curves, allowing you to design a complex ring quickly and efficiently.
.png)